Click for more info and reviews of this CURT Trailer Hitch:
https://www.etrailer.com/Trailer-Hitc...
https://www.etrailer.com
Don’t forget to subscribe!
/ etrailertv
Full transcript: https://www.etrailer.com/tv-install-c...
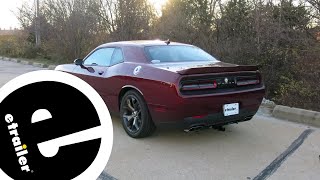
Hello, everybody. Clayton here at etrailer.com. Here at etrailer.com, we install, test fit, and review a lot of different products to help you as the customer make a more educated decision. And today I have a 2020 Chevrolet Traverse. We'll be taking a look at and I'll show you how to install the CURT class three trailer hitch receiver. You might be wanting to add a hitch to your Traverse to carry a bike rack, cargo carrier, or to tow a trailer.
And with this being a two inch by two inch receiver tube, it's going to give us a lot of different options for that use. One of my favorite features of this hitch is that it can actually be completely hidden with our bumper cover here. All we got to do a snap it back in and engage our locks at the bottom. It's not even going to look like we have a hitch on the back of our car. So it's not going to stick out like some other hitches on the market do, it's going to look really nice.
Personally, it's my favorite.With that being said, it is going to be a steel construction so it's going to be really strong for a long time. It also has a nice black powder coat finish, which is going to help resist rust and corrosion over time as well. Our hitch does have a standard five eighth inch hitch pin hole. You can see it fits through there nicely. Now, a pin and clip aren't included with this kit, but you can find one here at etrailer.com.
We are going to have rolled style safety chain loops. I like the way these look. Again, we're not going to see them every day because we have the option to cover it up. But when we are towing, it's going to allow us to use a bunch of different styles of safety chains.Now we can go ahead and get some measurements for you. The measurement from the ground to the upper most part of our receiver tube is about 20 and a half inches.
You just want to keep this in mind for anything that could be low to the ground, just for that ground clearance. Another important measurement is the measurement from our hitch pin hole to the outermost part of our fascia. And in this case, we're looking right at three inches. You just want to keep this in mind for any folding accessories. That way they don't make contact with the rear of our car. As far as our weight capacities are concerned, we are going to have a 5,000 pound trailer weight rating. You want to keep in mind, that's the weight of the trailer and the load included. It's also going to offer us a 750 pound tongue weight rating. That's the weight pushing straight down on the inner most part of our receiver tube.Now, it is a good idea to check your owner's manual and make sure that your vehicle is capable of towing or hauling at these capacities. You want to go with the lowest number between the two. And in terms of installation, getting the hitch receiver installed on the Traverse really isn't that bad. The hardest part is going to be taking off the rear fascia. Now speaking of installation, I'll show you how to get the hitch installed on your Traverse now.To start our installation, there's going to be two plastic caps right here. We're just going to take a small flat blade screwdriver and carefully pull these tabs out. It doesn't take much force at all. You want to be careful not to scratch your paint. So let's pull those out and let them hang there. With these two caps out, we'll repeat that same process over on the passenger side. Behind our plastic caps, we're going to have seven millimeter bolts. Go ahead and take those out now. You want to make sure to repeat the same process on the passenger side.We're now going to move down and take out this bolt here. We're going to use a T 20 Torx bit. There's going to be one more on the other side. We can now move down to our wheel well liner. Our instruction say that there's going to be eight screws, but there's actually only five. We're going to have one here, one here, one here, one here, and then one right back here behind our wheel. This is going to use a T 15 Torx bit. There, screw removed. We'll set it off to the side and repeat that same process for our remaining hardware. With the bolts removed out of our wheel well liner, we now want to pull this trim piece off. This part can be kind of tough. Just pull very carefully because we don't want to break any of those clips. Now move our way up. We now want to come back and take off the seven millimeter bolt. You do want to be careful pulling out on this trim because we don't want to break any of our clips. It was kind of hard to see. It's just a very tight space to work.And then we take this out, the rest by hand and we'll be repeating the same process over on the pa


Информация по комментариям в разработке