Click for more info and reviews of this etrailer Trailer Tongue Lock:
https://www.etrailer.com/Trailer-Tong...
Check out some similar Trailer Tongue Lock options:
https://www.etrailer.com/dept-pg-Trai...
https://www.etrailer.com
Don’t forget to subscribe!
/ etrailertv
Full transcript: https://www.etrailer.com/tv-review-et...
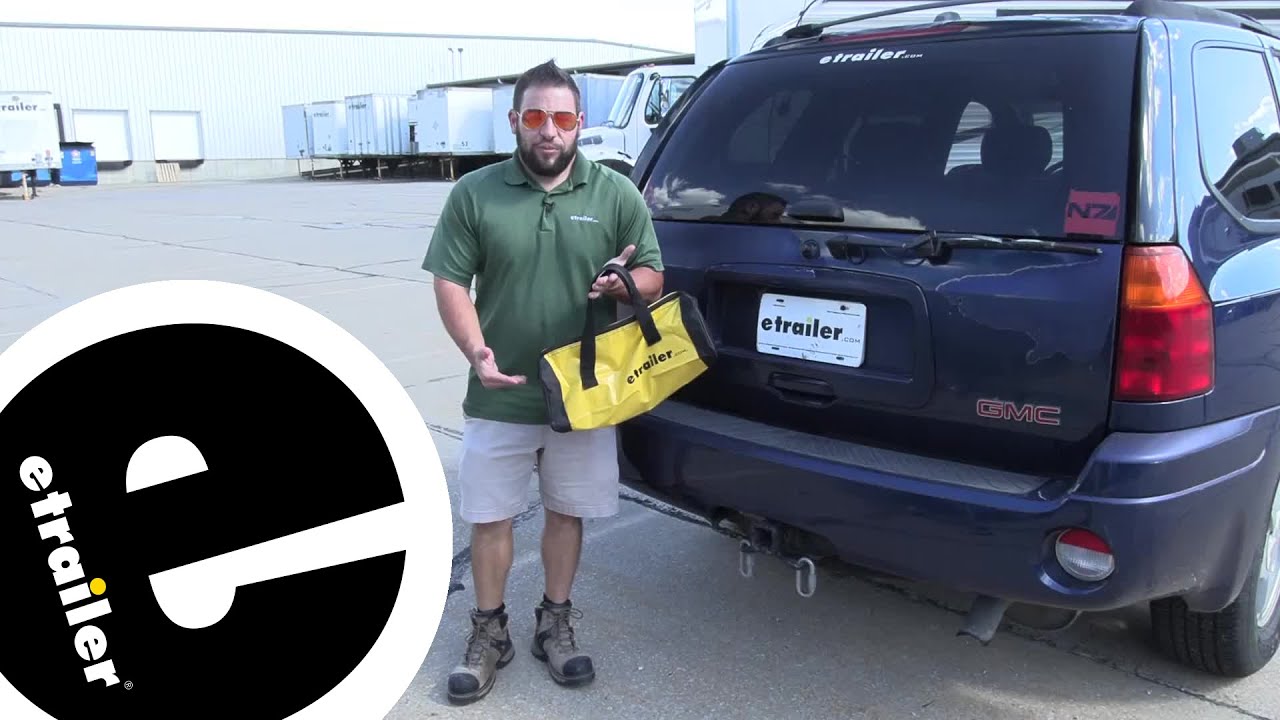
What's up, everybody It's AJ, with etrailer.com. Today we're gonna be checking out the etrailer coupler lock and hitch receiver kit. So you're gonna get this bag that comes with it, great for storing all those items and what comes in the kit, let me unzip it. Plenty of room to add more stuff in here if you want more ratchet straps or anything else you have in the back of your vehicle that you might need for towing reasons. But we have the lock for your hitch receiver, and we have the lock for your latch on your coupler, so you can lock both of those up. And then also, the etrailer hitch alignment tool, so this is gonna be good for your ball mount, you'll put that on there, tighten it up, that way you're gonna line up that hitch pin hole on the first try every single time.
All these arms are really gonna help keep everything locked up, and help you not worry about anybody messing with it when you're not around, let's check it out. First part of the kit we're gonna look at is the hitch alignment tool. So this is gonna go onto the shank of your ball mount, I've already loosened it, you just do it by hand with these knobs. You slide that on there, get that into place, then we'll put our ball mount in our hitch. And what you wanna do is line up your hitch pin hole right there.
That seems to be lined up, and how we're gonna double-check that, I'm gonna take the pin and slide it through. So you see how now that's lined up, I did have to look to do that, well this is going to eliminate that, so we're gonna slide our collar up, tie it down on both ends. I just do a little bit on each side that way, one side is not all the way done before the other, I'm gonna do it evenly. Now that's in place, I can pull that pin, remove the ball mount, so now when I go to set it up, let's say just pull it right out of the bag, set this up, line up, I didn't have to look. You see the hitch alignment hit the front of the hitch, and then without even looking at the side this then goes right through.
So that's what it does, it's lines that up on the first and it's gonna make set up far easier. Something that I wanted to point out is this is coming with your ball mount kit and works really well. We use it around here all the time but it's not just limited to ball mounts, so if you have like a bike rack or a cargo carrier, I highly suggest getting one of these separate, the hitch alignment tool, and put it on those because it's gonna apply the same way as it does this ball mount. You won't ever have to look to the side and make sure that's lined up again, to get the pin through there, 'cause you know, cargo carriers stick out quite a bit more so you're gonna have to kind of lean over, or a bit in between and check. Bike racks can be in the same way, kinda cumbersome, you have to kind of look around them.
So much easier to having this on there, just let it hit that hitch, you know that's it's lined up, you can just pop the pin in. Next thing we're gonna take a look at in the kit is our locking hitch pin. It's got a barrel cylinder lock on this side that actually threads in. So, just to show you how that works is you don't just push it on there and it locks into place. When you push it in there, make sure it finds its seating, and then you started turning the key. And as you turn the key, you'll see how it threads on there, you're actually threading the lock. So now it's on there real nice and tight, and it's gonna be hard to mess with that, You're not gonna be, it's not gonna be easy to try and pick that lock, so this is like one of the better locks you can get out there for that, for theft deterrent. So we'll see how it actually works on here, slide through the hole. Same thing with the barrel lock, and again, it's good to kind of rotate that just to make sure it sits in there so that when you start turning the key, it's gonna start threading. And I can already feel it threading now, so, just keep turning that key and you can see how the barrel comes closer here because it's threading on, and then the key is gonna stop and you know you're done. So then I can just bring it back a little bit, remove that key, put dust cap on there, that way it's not exposed to the elements either. So that's on there nice and tight, there's not a lot of room in between there, but it's just gonna keep anybody from messing with us. They'll take a look at it and see the lock, and just go to the next one that doesn't have a lock. Something else I wanna to point out about o

Информация по комментариям в разработке