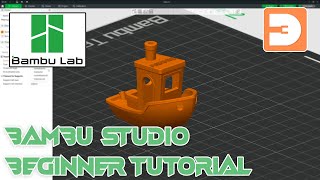
Welcome to BamBam Print! This video is a comprehensive beginner's guide to using Bambu Studio slicer software. Whether you're new to 3D printing or have some experience, this tutorial will help you get the most out of Bambu Studio. Please visit our website to get more information: https://bambamprint.com/
Bambu Studio 101 Menus and Options Settings:
The main menu in Bambu Studio includes file options for starting new projects, opening existing ones, and saving or importing models and settings. The view menu offers standard 3D modeling views, and the show labels feature helps identify multiple models. The show overhangs feature highlights areas needing support, which Bambu Studio automatically adds.
Preference Settings:
In the preferences menu, you can adjust general settings such as language, location, and measurement units. The plate preferences section lets you choose different build plates. Flushing volume options and presets are best left at default settings. You can also adjust the maximum number of recent projects and enable auto backup for safety.
Prepare Mode:
You'll spend most of your time editing your models in the Prepare window. You can move, scale, rotate, cut, paint, and slice your models. The left-hand settings menu has three sections: Printer, Filament, and Process. Each section allows you to manage different aspects of your print settings.
Controls:
In the Prepare window, the view pane controls include the middle mouse and right-click to pan, left-click to rotate and orbit, and the mouse roller to zoom in and out.
Bambu Lab Studio Guide Toolbar Features:
The toolbar in the Bambu Studio tutorial contains icons for importing models, adding build plates, and organizing multiple objects on a plate. The auto-arrange button quickly organizes multiple objects, and the measure tool provides basic measurement capabilities.
Add Models and Build Plates:
You can import models directly into your project using the import icon. You can add additional build plates, up to a maximum of 36 plates, which is useful for staging prints ahead of time.
Controls: Move, Rotate, Scale:
The Move, Rotate, and Scale buttons allow you to adjust your models' positions, orientations, and sizes. The move button lets you position your model using the X, Y, and Z axes. The rotate button lets you rotate the model along these axes, and the scale button allows you to resize the model uniformly or non-uniformly.
Complete Slicing and G-code Education:
Slicing in Bambu Studio divides your 3D model into thin horizontal layers, guiding your 3D printer layer by layer. The slicer generates paths for the printer's nozzle, sets the print speed, and adjusts the nozzle and bed temperatures.
The preview tab shows an overview of your sliced model, including filament usage, cost, preparation time, and model printing time. You can navigate through layers, add pauses, custom G-code, or jump to specific layers.
Printer, Filament, Process Sections:
The left-hand settings menu has three sections: Printer, Filament, and Process. Each section allows you to manage different aspects of your print settings. The Printer section includes options for adding and managing 3D printers and selecting nozzle sizes.
Process Tabs: Quality, Strength, Support, Others:
The Process menu includes settings for the entire project or individual models. The Quality tab covers layer height and seam position, while the Strength tab deals with wall loops and internal solid infill patterns. The Support tab allows you to enable supports and choose between normal and tree supports.
Slicing Plate and Printing Plate:
The slicing plate button lets you slice the current active plate or all plates in your project. After slicing, you can print the plate, send it to your printer's SD card, or export the sliced file to your computer.
Multi-Device Print:
The multi-device print feature in the Bambu Lab Studio tutorial lets you simultaneously manage and send print jobs to multiple printers. You can select the printers, configure print options, and stagger the start times to prevent overloading your power system.
Device Mode:
The device mode in Bambu Studio provides an overview of all connected printers and their statuses. You can monitor print progress, manage print jobs, and access printer settings from this mode.
📚 Chapters:
00:00 Introduction
01:50 Menus and option settings
11:51 Controls
12:34 Toolbar Features
22:37 Slicing & Gcode Education
31:17 Printer Filament Process Menus
01:03:26 Slice and Print Buttons
01:06:24 Device Tab
This video is about How To Use Bambu Studio: Complete Beginner Tutorial For 3D Printing. But It also covers the following topics:
Features Explained
Beginner's Guide
Configuration Guide
How to us Bambu Studio
Bambu Studio 101
Bambu Studio Guide
How To Use Bambu Studio: Complete Beginner Tutorial For 3D Printing | BamBamPrint.com
#3dprinting #bambustudio #tutorial #beginnerguide #3dprintingtips #bambulab


Информация по комментариям в разработке