Purchase DCS: F-16C Viper at:
https://www.digitalcombatsimulator.co...
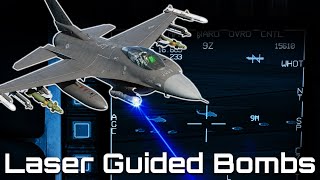
In this DCS: F-16C Viper video, we’ll talk about the use of the GBU-24A/B Paveway III laser-guided bomb with the Viper. Like the GBU-10, the GBU-24 also uses a 2,000 lbs. class warhead, but it has a much more advanced autopilot and larger control surfaces that allow a greater standoff range of greater than 11 miles when dropped high and fast. Lower and slower will result in a reduction in range of course. It also uses the BLU-109/B penetrator warhead that is effective against hardened targets.
The bomb can be carried on stations 3, 4, 6, and 7.
Once dropped, the GBU-24A/B can pitch up, termed a bump up, to climb and increase range.
Like all laser-guided bombs, it will require laser designation of the target from your own targeting pod or a remote laser-designation source.
We will first select Air-to-Ground mode from the ICP. On the Stores Management System, or SMS page, we can see that we have two GBU-24s selected at OSB 6. Also, on the right side of the page, we can cycle between four different release profiles at OSB 7. At OSB 8 we can release the GBU-24 as a single or in pairs. At OSB 10 is the Ripple Release Internal. We’d only use this when releasing more than one GBU-24 at a time, and it would be used to set the release time between drops from 50 to 500 milliseconds.
On the left side, RBS at OSB 20 and Mode at OSB 21 are not functional due to lack of public information. From OSB 18, you can cycle the fuze between Nose, Tail, and Nose Tail. Below that at OSB 17 you can select the Arming Delay with successive pressing of the OSB to cycle through the pre-set options in the center of the page.
Along the top at OSB 2, you select between Pre-Planned (PRE), in which the delivery is based on the current Sensor Point of Interest that could be a Steerpoint, Offset Point, A-G FCR designation, TGP designation, etc., or Visual (VIS) mode in which you can slew the designation box on the HUD and press TMS Forward to set the designation point.
As a laser-guided bomb, we’ll need to make sure that the bomb seeker is looking for the same frequency as the designating laser. Press the K on the keyboard to view the bomb seeker code. In this case, 1688. To check in reference to the targeting pod, press LIST on the ICP, then M-SEL, and then 5 for Laser. We can see that the TGP will be designating at 1688. If you wish to self-designate, these must match.
More options are available on the Control page at OSB 5. Alongside OSB 6, is the estimated weapon Time of Flight, this cannot be edited. At OSB 9, we can input the range at which the Range Cue is displayed on the HUD as a small circle. Let’s set it to 8 miles. Note the indication changes on the HUD. The desired release angle can be set at OSB 10. We’ll do a level release with an angle of zero.
The SMS page is set up, let’s explore the HUD now. Because we are in PRE mode, we can see the box and dot that indicates our target SPI location and the Azimuth Steering Line, or ASL, that provides us azimuth steering information to the target. We want to fly the aircraft such that the ASL intercepts the SPI indication. Along the ASL is Release Cue that appears as a thicker horizonal bar. As we approach our maximum release point, the Release Cue will march down the ASL until it intercepts the Flight Path Marker. Prior to the two reaching each other, hold down the weapon release button and the bomb will automatically release when the two symbols coincide.
Along the right side of the HUD is the GBU-24 dynamic launch zone. It is indicated as a 20-mile scale with a bar and “20” at the top. To the left side of the DLZ is a caret that indicates current range to the target. As we close on the target, the caret will move down the DLZ.
Further down the DLZ, we have an open bracket to the right, and this the current range of the GBU-24 based on current aircraft flight conditions. The closed bracket below that is the planned range based on the inputted SMS data.
With everything set up, don’t forget to arm the laser.
At the bottom of the data block in the bottom right of the HUD, we can see the estimated Time to Release. Once the bomb is released, it counts down to estimated impact at zero.


Информация по комментариям в разработке