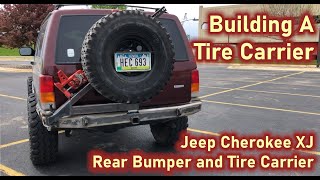
In this latest video of Project XJ Overland, I finally get around to installing the Smittybilt XRC rear bumper and tire carrier on our 1999 Jeep Cherolkee that we have been slowly transforming into a worthy overlading vehicle.
Bumper and Tire Carrier: http://amzn.to/2CT1OUB
🌐 TRAILRECON.COM 🌐
https://trailrecon.com
Check out our website if you’re looking for off-road or overland gear and equipment for your next rig and your next off-the-grid adventure. We have everything you need, including recovery gear, tents, cooking and kitchen gear, sleeping bags, TrailRecon clothes and stickers, and a lot more.
If you’re interested in reading in-depth articles about the places we go, products we use, and our personal insights about overlanding, you’ll want to check out our blog.
https://trailrecon.com/blog.asp
********************
📲 SOCIAL MEDIA LINKS 📲
Facebook: www.facebook.com/trailrecon
Instagram: www.instagram.com/trailrecon/
Bumper info:
Add a bolder look and more capability to an off-road vehicle by installing this Smittybilt XRC rear bumper w/tire carrier. This rugged rear bumper includes raised corners that allow for better clearance along back roads with heavy brush and debris. The rear bumper is designed to handle extreme weather conditions and includes solid mount D-rings for additional security.
This Smittybilt XRC rear bumper w/tire carrier is made from 3/16-inch cold roll steel and includes a one-piece welded design. Finished with a black matte powder coat, the rear bumper includes a 5 year limited warranty.
Video Transcript:
Getting access to these bumper bolts is a tight fit. So removing these rusty nuts took the use of a breaker bar and some creative leverage on my socket wrench….. I’m sure there is an easier way, this just worked for me.
There was no easy way to remove these trailer hitch bolts. No amount of bp blaster was going to break through the rust and loosen them up. I tried with a breaker bar, but even that wasn’t successful and I think I actually snapped 2 of the bolts. I ended up getting out the cutting wheel and the saw zaw which I was hoping to not have to do, but sometimes you gotta do what you gotta do
I think I made a little mess here…. Amazing how much work it took just to remove the trail hitch… I’m glad it’s off now!
You want to first slide the frame mount bracket into the body and then put the bumper mount into place and hand tighten all the bolts…. Don’t start torqueing anything down just yet.
On the passenger side, when you remove the trailer hitch, you also have to remove the fuel tank exhaust heat shield and exhaust hanger, make sure you remember to put those in place before you start screwing in the bumper mount bolts
With both bumper mounts loosely in place, take a measurement. The directions say the distance between them should be just slightly less than 34” You need to ensure there is a enough room so the brackets on the bumper will slide into place.
Once you have everything lined up, you can go ahead and tighten everything down, there is a chart in the directions that give you all the torque specs for each bolts.
You can see in the bumper mount, there is a good amount of room for adjustment, but on the bumper, the nuts are welded on, so this actually limits your wiggle room. I think lining things up would have been a bit easier if these were not welded on.
My son and I spent a good amount of time trying to line things up. I resorted to getting out the jack and a block of wood, this helped quiet a bit.
Once you get all the bumper bolts in place, you want to spend some time getting it level, and trying to match up you body lines as best as you can.
Before we put the tire carrier in place, I greesed down all the holes in the gate where contact was going to be made.
With the tire carrier in place, I greased up the main hinge pin and slid it into place. Then you place the camp wheel on top and insert the 6 ½ bolt that slides through the pin and it comes with a hut with a little handle to make holding it underneath easier, just ut don’t tighten it down just yet.
With the weigh of the tire, I made some adjustment to the cam to get the hindge to line up….. I’ll be doing this again once the weight of th tire is on
Before I can mounting the bracket, I needed to bust out the hammer and drive in tall the lug nut bolts.
And there is no instructions for where to mount your bracket, so I just took some rough measurements and made some estimates.
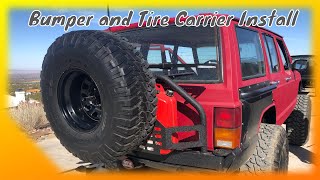
I’m pretty happy with where the tire sits and how it all lined up.
Oh and on a recommendation I received from some on who has this tire carrier, they recommend using a little blue lock tite to keep te cam bolt in place
With the plate in place, you can use it as a template for drilling your holes.


Информация по комментариям в разработке