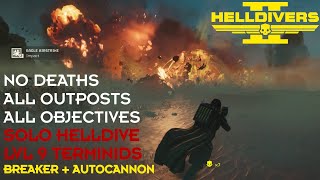
Solo Helldive, Max Difficulty Lvl 9, all objectives (Main + Optional) completed, all outposts destroyed.
Modifiers: Atmospheric Spores, Atmospheric INterference
Planet: Nivel 43
Patch version: 1.000103
Spoiler alert: probably would have been deathless if I had just waited out the extract timer, but I didn't fancy waiting in a bush for 10+ minutes - the downside of being too efficient :P.
This one's been lying in my upload pile for a while, and of course a couple of patches have to come by while I dilly dally...not much has really changed for this build since this run though, except that medium armour has since been buffed, and stun nades no longer stun Bile Titans, so you'll have to bait melee attacks instead.
Sadly no commentary this time or I'll never get through this upload backlog, though the next one will - hope you're up for some Ballistic Shield + HMG action :).
__________
Build:
Probably my favourite build so far against the bugs, this build can handle it all - the Autocannon is the Swiss Army Knife of support weapons, able to take out bug holes, tear through hordes of light to medium armour enemies, and can destroy a Charger from behind with a few well-placed shots. Its one weakness is lacking the ability to punch through heavy armour, which is where the Autocannon Turret comes in - with a long duration and relatively short cooldown, this is one of the best anti-armour stratagems you can get, able to solo Chargers and Titans or weaken them for you to finish off with your very own Autocannon. The key to it is placement - find yourself a nice long sightline or even better an elevated position that enemies will struggle to reach, and you have yourself your very own personal sniper cover.
We're not completely reliant on the turret though - if we're on the move we're still packing a 500kg for Bile Titans, and Eagle Airstrike for...well, everything else. With the AC taking care of bug holes, we can bring Stun nades to help group up any enemies for those airstrikes or keep Chargers still while we unload on their ass. The Juggernaut medium armour means we'll have an extra supply of those stun nades, while the reduced recoil helps with the Autocannon's recoil when things get a little hot. Stamina Booster helps keep us moving as we kite the bug hordes.
For my primary, the Punisher is an exceptional choice - while its firerate is a little slower, it one-shots most smaller enemies and can stunlock Stalkers and interrupt Brood Commanders and Hiveguards from calling bug breaches. Its high damage and large magazine also means you'll often clear an entire group before you even have to reload. Redeemer is reliable as ever for some quick burst damage.
________________
00:00 Intro
00:15 Insertion, Pump 1, SEAF Artillery, Nest 1
05:25 Shrieker Nest, Pump 2
10:25 Nest 2, Broadcast Tower, Radar Station,
16:40 Nest 3, Stalker Nest, Shuttle
25:10 Nest 4, Nest 5
30:30 Extraction
34:00 Mission Stats


Информация по комментариям в разработке