Part 01 - Blockboard Sandwich - • Red Special build - PT01 - Blockboard...
Part 02 - CNC Body - • Red Special build - PT02 - CNC Body Cuts
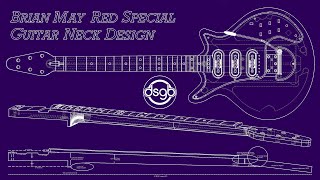
Part 03 - CNC Neck - • Red Special build - PT03 - CNC Neck
Part 04 - Body Glue Up - • Red Special Build - PT04 - Body Glue Up
Part 05 - Router Bearing Repair - • Red Special Build - PT05 Repairs - Ro...
Part 06 - Applying Veneers - • Red Special Build - PT06 - Applying V...
Part 07 - Binding and Staining - • Red Special Build - PT07 - Binding an...
Part 08 - Veneer Sand Through Repair - • Red Special Build - PT08 Repair - Ven...
Part 09 - Neck and Fingerboard - • Red Special Build - PT09 Neck and fin...
Part 10 - Neck finishing - • Red Special Build - PT10 Neck Finishing
Part 11 - Frets - • Red Special Build - PT11 Frets
Part 12 - Assembly - • Red Special Build - PT12 Assembly
Part 13 - Demo - • Red Special Build - PT13 Demo
: : : Assembly : : :
Finally, it all comes together! Almost exactly two years to the day from when I started gluing up the raw lumber to make the blockboard I've put the finishing touches on my build. There are still things to tweak, correct, modify... but it's working guitar.
This video covers the final drilling of all the holes necessary to assembly, the wiring of the switches and pickups, and the mounting of all the plastic parts. A lot of these steps were quick and relatively pain free, but there are always a few that create enormous set backs and terrible headaches.
Getting the placement/intonation of the bridge blocks absolutely correct was trickier than I would have thought, and drilling the holes for the hank rivets also proved a delicate task. I used Araldite epoxy to mount the rivets, as per the original, to reasonable success, but this was a step I could have spent more time practicing. I also might eventually edit an entire video devoted to this process, but we'll see.
I had a few issues wiring the switches correctly. Some due to user error, some do to the tolerances in my homemade switches. I had to disassemble a few of the switches throughout the process of wiring to make certain everything was making the proper connections. This was very time consuming and frustrating.
The bakelite nut was another killer for me. I broke my first one by not making a wide enough slot for my low E string, so when I went to tune it, the end just cracked off. I also spent a LOT of time looking at the original and other replicas for hints as to the string spacing. I never came up with a perfect consensus, but I ended up leaving my strings quite close to the edges of the fret board, which seemed to match the original best, to my eyes... even if it looked strange, compared to all my other guitars. Playing it takes some getting used to, but Brian's thumb-over-the-E-string technique makes more sense to me with it this way.
The rest is really just screwing things together or using the same 3M - 467 double sided tape Greg Fryer used to tape on the pickup surrounds. I put in some beauty shots at the end of the video, and will try to get some audio/video demos recorded soon.
This has been a long journey, and I hadn't made it without a lot of help. Lots of people to thank, but first and foremost Doug Short, who's weighed in on nearly every decision I've made along the way for the last two years, and provided me with a copy of his own plans and a number of the bespoke parts made to work with my specific pieces. We've hammered through every single possible decision together, sometimes disagreeing, but always arguing our case. Check out his build and lots more info here: dsgb.net Huge thanks to Mark Reynolds and Jonathan David Griffin who have also been invaluable and endlessly patient in answering unending questions, helping out with parts and also tools when needed. Help and hardware from Ron Smith, Woody Thomas and Matt Wicks. Maxime Thiery for pointing me towards the General Finishes dyes that I used, and Timothy Grocott for initiating the plans for the replica switches. Hopefully I didn't forget anyone, just want to give credit where it's due.
Music: "Drain" by Smokescreen. (My old band)


Информация по комментариям в разработке