Click for more info and reviews of this CURT Trailer Hitch:
https://www.etrailer.com/Trailer-Hitc...
https://www.etrailer.com
Don’t forget to subscribe!
/ etrailertv
Full transcript: https://www.etrailer.com/tv-install-c...
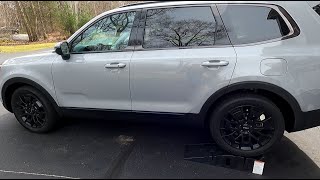
Either Kia owners, tenure 2022 Kia Telluride. And we're going to be taking a look at and showing you how to install CURT's class three, two inch trailer hitch receiver. And this is what our hitch looks like when it's installed. It's a class three, two inch by two inch receiver. So it's going to be great for all of your towing needs. Whether you're wanting to use this for accessories, such as bike racks or cargo carriers, or if you're wanting to use it to pull a trailer like a small pop-up camper, or maybe even a utility trailer to bring the zero turn around and get some work done, you should be able to do that with this hitch.
You'll secure your accessories to your hitch using a five-eighths inch hitch pin and clip. Now one doesn't come included with the hitch, but we've got plenty available here in each trailer, and you can also get locking the ones to protect your investments. On bottom, we have a loop style safety chain loops with a very large opening that should accommodate just about every shape, size and style of safety chain. Little one goes on and off with ease and our big guy here also on and off very easily. This hitch offers a 750 pound tongue weight, which is the force going down on top of the receiver.
And that's going to be enough for a four bike platform rack fully loaded up with four bikes and the largest cargo carrier that we have here at Etrailer.com. You can fully load that up to the max as well. And it have a little bit of headroom left spill on the tongue weight of this hitch. It also offers a 5,000 pound gross towing capacity, which is how much that it can pull behind it. And with 5,000 pounds, you should easily be able to pull a small camper.
Pop-up campers with ease. There's plenty of boats out there. Of a pretty decent size that you'd be able to pull as well. I, as always, I recommend that you verify in your vehicle's owner's manual and industry, you don't exceed any of its towing capacities. Now I've got some measurements for you to help you when deciding on accessories from the center of our hitch pin hole to the edge of our rear bumper, we measure right at about four inches.
This is important when determining if your accessories will contact the bumper when inserted, and if they can be placed in the upright storage position without contacting the bumper and from the ground to the top inside edge of our receiver tube, it's right at about 15 and three quarters of an inch. And that's important when determining, if you need to drop a rise or ratio to shank on your accessories. Now that we've covered some of the features of our hitch, why don't you follow along with us And we'll show you how to get it installed. This is a fairly easy hitch to get installed. We will have to drop the exhaust down a little bit just to get it into place, but I'd say this is something you can do in your driveway in less than an hour. We'll begin our installation here at the back of the vehicle. We've got our lift gate open. We'll have to lower down our spare tire. You can find your spare tire mechanism underneath your cover, here. There's a label right on the cover here. It says spare tire. You can use a screwdriver to pop that up. And there is the full head that will lower down the spare tire. We're going to use a 21 millimeter socket and just start lowering it down. We're now underneath the vehicle. We'll need to remove the under shield here on the driver's side. There is a three push pins on the bottom. We'll remove those with a flat blade screwdriver, or you could use a trim panel tool. Let's see, there's kind of like little notches on like a plus shape around. You can stick your screwdriver in one of those little notches, that'll pop the head out and we can just pull it right out of there. So we get all of these removed and then we're going to switch over to a 14 millimeter socket, just checking if that that's loose. And then we're going to remove the nut here with a 14 millimeter socket. And we're going to keep a little bit of downward pressure on it. That'll help that nut get removed. Once we get this one removed, we'll do the same thing with the other one. Now look at that panel, everybody just want to point out that this connector right here is your factory wiring connector. So if you're going to be installing wiring on your vehicle as well, I'd recommend doing that while you're here before you put that panel back up. 'Cause again, it's right there. Well, now take a strap and we're going to put this in place between the suspension here. That way it'll support our exhaust cause we are going to have to drop that down. So there we go and pull it a little bit


Информация по комментариям в разработке