So this took more time than I anticipated, but the special Mini-Z Buggy build is done, and it's glorious. In this video, I will be documenting the full build process of this Sai Lai CFV and calling out some areas that needed attentions. It was not the easiest build, but with enough time it all came together in a satisfying manner.
Let's get the build going. CFV stands for Carbon Fiber Version, and that's the name I was given when I asked Sai the creator. Its partially assembled already which mitigates the lack of any instruction manual. I think this build normally involves transplanting parts from an existing buggy, but I ordered parts instead to build a new one. The first thing to install is the center prop shaft, and go from there to the diffs. Not recorded here is a m3 0.5mm collar between the front pinion and bearing.
For this build, I opt for the top of the line Kyosho aluminum ball diffs. They are expensive but the quality is high. Like all AWD builds, shimming for a good gear mesh with the diff is key. The rear is straightforward, but I struggle with the front. The mesh at the front is too tight even after adding 0.5mm of shims on the opposite side. After some trial and errors, I discovered it was the position of the center bearing holder. I loosened the screws under this piece and reposition to the left just a tiny bit. This straightened the pinion at the front of the prop shaft ever so slightly to achieve a better mesh. This is the first pro tip for the CFV build. Took me a couple of days to debug this issue. Satisfied with the prop shaft and diffs, it's time to install the bulkhead covers.
CFV reuses MB-010's suspension setup. That's a good thing because the Mini-Z suspension design is top notch. You know the drill: make sure all joints are nice and free. The Mini-Z buggy design doesn't rely on ball joints as much. That makes the job fortunately more straightforward. Since I already have the adjustable link set (MBW021), I use that instead of the stock MB005 parts. Building turnbuckles is annoying, as usual. Please that for the steering link, the manual says 21mm but I find that 20mm is more appropriate.
To drive the wheels, I'm using the stock dogbones and axles. CVDs would've been nice though. To ensure the dogbones don't pop out of the cups at high steering angle, I cut some small foam blocks and insert them in the diff drive cups. The rear suspension is done. It's moving very freely. The front is a little bit more complicated because of the steering knuckles and c-hub design. This design common in larger scale buggies doesn't need ball joints so I'm a fan. Don't over tighten the screws to preserve movement. As usual, test all the joints for any binding issue. Installed the front shock tower. Then mounted the front shocks. I will need to refill shock oil in them later but they still feel good. Next up is the rear shock tower and the motor mount. To get a better look, I've mounted Inferno rims and tires.
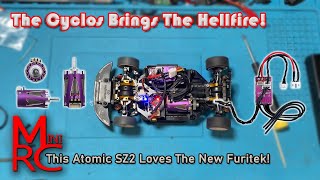
Moving onto electronics, let's start with the motor and pinion gear. The motor mount and plates require a "square" type motor with a D-shaped end. Though I'd like to use a 5500KV motor, the only suitable one I have on hand is this Surpass Rocket 3500KV. Use this chart to determine which motor plate to use with which combination of pinion and spur gear. To compensate for 3500KV, I'm using the 15T pinion and 33T spur.
CFV expects a 6g servo like the GL003-DMG or A06CLS. The AGFRC is better but I will start with the GL. One minor hiccup I encountered was the servo horn ball stud. It's not quite a hex hole so I made do with a torx tool. As I test the steering range, I notice that the servo horn I've initially used is too short. It limits the right steering lock. Easy, I just need to use a longer horn. Problem solved.
Regarding other electronics, I'm putting in the fantastic sensorless Furitek Momentum ESC. Throttle control will be much better than the Kyosho brushless ESC. The receiver is a NB4 micro receiver from DasMikro. Any GL-sized 2s lipo should fit. There is this mysterious part that came with the CFV and I don't know what it's for. Sai said it's used to hold the battery pack in the bay, like this. It's pretty basic but it works. And with that, the chassis part of the build is done... wait!
I think Sai's CFV chassis is both interesting and well designed. It evolves the Mini-Z Buggy platform in a new direction. As with any small batch production, some parts variation could exist, so be on a lookout to work out some kinks. I enjoyed the build, including the troubleshooting I needed to do. In a future video soon, I will test drive this buggy and share my thoughts on its performance.
To buy the carbon chassis, contact Sai Lai by Facebook ( / sai.lai.37625 ) or Whatsapp (+85291911193)
Music: "Newfound Land", Ikson ( • Ikson - Newfound Land (Official Full EP) )
Songs by TELL YOUR STORY music by ikson™
Link: https://ikson.com/tell-your-story

![Custom Mini-Z Buggy using buggy parts, carbon fiber chassis, and standard electronics [Part 1/2]](https://i.ytimg.com/vi/nFS4XMth1A8/mqdefault.jpg)


![Le modélisme voiture 1/28 - Coupe de France 2019 MiniZ [Modélisme #00]](https://i.ytimg.com/vi/6ZJNg6cOCKE/mqdefault.jpg)


Информация по комментариям в разработке