Click for more info and reviews of this Thule Roof Rack:
https://www.etrailer.com/Roof-Rack/Th...
https://www.etrailer.com
Don’t forget to subscribe!
/ etrailertv
Full transcript: https://www.etrailer.com/tv-install-t...
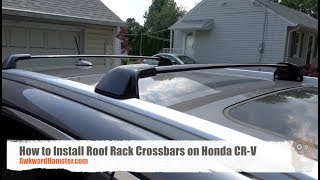
Today on our 2016 Honda CRV, we're going to be doing a test fit on the Thule WingBar Evo podium roof rack system. I've already got it set up just to give you a good idea of what it looks like, but this system is specifically designed to mount to your flush-mounted rails on your roof. It is a fixed mounted system. This is going to allow you to carry roof-mounted accessories, things like bike racks, kayak carriers, cargo boxes and more. It features 53"-long crossbars. You can see here how they span across the entire roof.
So I mentioned that it's going to allow us to carry accessories, but it's going to allow us to carry multiple accessories, so maybe two or three bike racks, or maybe even two kayaks. We're going to be able to do that with this bar length.Now they're made out of aluminum, so we don't need to worry about any rust or corrosion. They're also available in either black or silver. So I've got the black installed. If the silver is something of interest to you, then see etrailer.com.
Now you can see that they're aerodynamic. These are going to be a lot quieter than your traditional round or square bars. This is a premium option. Those others are an entry-level option. This is going to work with your standard clamp-on accessories as well as your T-slot accessories.
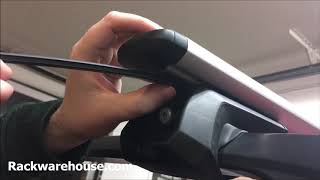
That end cap can fold to the side, and that T-bolt just slides right down to the center to your desired location. There's no need to trim or remove that rubber strip, so it's going to give you a nice clean look.Now the crossbars are held in place by four Thule podium towers. These are also what attach to the fit kit, which is then attached to a fixed location on your flush-mounted rails. Now these are going to give you that clean look on the outside, but on the inside, as we take off the cover here, it's going to protect and hide all of the access to that. That way it can't be stolen, and the elements are not going to get in contact with it.
Now if you'd like to upgrade to a metal locking core, which takes out that plastic locking core, for more security, you have that option. You could pick up a lock for each tower right here at etrailer.com.Now the fit kit is rubber coated around that podium. That way it doesn't harm or scratch those flush-mounted rails. The bracket on the inside is also coated. That way it doesn't scratch the inside. But to get a closer look, you can see it has security bolts here. It needs a special tool to get them off. This is another security feature to prevent anyone from removing it from your flush-mounted rails.Now this roof rack system has a weight capacity of 220 pounds. That's a step up compared to some of the other systems out there. This one can carry a lot more. Some of the others out there offer 165 pound weight capacity. You do, however, want to check with your CRV's owner's manual to see if the roof can support that much weight.Now I'm going to give you some measurements. This is to give you an idea of how much you've added to the roof of your CRV, and it may help you when using those accessories. I'm going to take a measurement from the top of my roof to the underside of the bar, and it's about 3". From the roof to the top of the bar is about 4 1/4".Now that we've gone over the features, I'll go and show you how to get it set up. I've already got that front crossbar in place, mounted to my flush-mounted rails on my CRV. The rear one installs the same way. I've already got that fit kit installed on this side. Let's start by doing the other side together. So we'll need the fit kit parts. We've got the pad here, the bracket, the security tool, the two spacers, and the two security bolts. So up on top of the CRV here you can see our two mounting locations, here. Now they're covered up with a rubber grommet or cover. You can use a flathead screwdriver to pop those out. Now, you're welcome to throw these away. I'm going to put mine in my glove box. That way I can put them back in if I don't want my roof rack system installed.Now our bracket is going to go on first. It lines up with this direction. That way our top portion here is going to be on top. If you put it this way, it's going to be facing out; you need it facing up. Now from here, you need to install the bracket. This is what goes on first, so it needs to be pointing up directly on top of the flush-mounted rails. It is slightly slanted inward, but that's okay. That's what we want. If you turn it this way, it's going to be pointing away from the vehicle, and that's not what you want. So turn it around this way. Before you actually put it in place, we need to install the spacer in each one of the thread holes. Then we'll


Информация по комментариям в разработке