Click for more info and reviews of this Tekonsha Trailer Brake Controller:
https://www.etrailer.com/Trailer-Brak...
https://www.etrailer.com
Don’t forget to subscribe!
/ etrailertv
Full transcript: https://www.etrailer.com/tv-install-t...
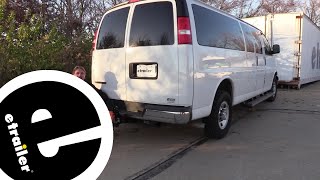
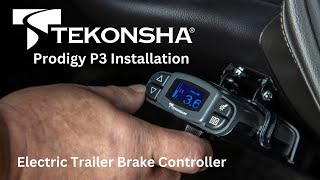
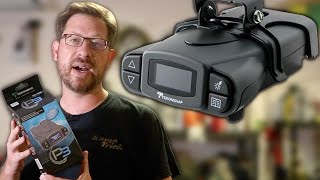
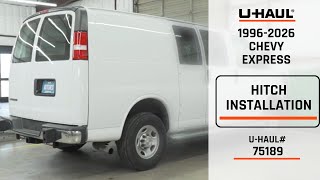
Connor: Hey guys. Connor here at etrailer.com. Today we're going to be taking a look at the Tekonsha P3 Trailer Brake Controller and the universal install kit for Trailer Brake Controllers here on our 2018 Chevrolet Express van. The Tekonsha P3 is going to be an excellent option here for any vehicle, especially our Chevrolet Express van in particular. Now, it is one of definitely the easier to read brake controllers. You can see we have this nice, clear LED display so we're going to be able to see what's going on with our trailer, what sort of settings we're selecting.
It's going to make things a lot easier to read while we're driving down the road as well.So the reason that this P3 is such a popular option because it's been on the market for a while and it is definitely a tried and true brake controller. It is one of the most reliable options you can choose. It has integrated features such as detecting shots on the trailer as well as circuit protection to stop any issues from transferring over to the vehicle. That's just another reason along with its reliability on what makes this such a great option. So if you have multiple trailers, then the P3 is definitely going to be the right choice for you.
This is going to allow us to save settings for multiple trailers. That way each time we switched trailers, we don't have to go through the lengthy setup procedure again. To start installation today, we need to find a place to mount our trailer connector here. Now, there's a couple of different options for this. However, the best one we have found is going to be to mount it right here to the hitch body.However, we don't want to drill into the hitch body, which is where this long no-drill mounting bracket is going to come into play.
Now, you're going to need to get this separately, because it doesn't come with the kit but it makes things extremely easy. We don't have to do any drilling and it's going to mount the trailer connectors right here to the hitch body in a nice convenient location. So now if you do end up using this long no-drill bracket like us, we'll go ahead and show you how to install it real quick. We're going to take this back, curved edge piece that's going to go on the backside it's a top of our hitch body. And then we're going to take our band clamp here we're going to slip it through that hole in our bracket and around the receiver to body.
Then we can take the end of the band clamp back up and insert it. Now we're going to take an eight millimeter socket, we're going to try to tighten this up.We'll leave it loose for now until we can get the top bolts on our trailer connector bracket in. So now we're going to assemble the trailer connector mounting bracket that did come in our kit to our 7-way. I'm going to take this open end here, the curved surface porting back, I'm going to slide all of our wires and trailer connectors to this opening here, and we're going to bring it up made it up like that. There's four holes we're going to need to align. This hardware comes with. We have the smaller bolts here. Place that through there like so and then on the back side, we're going to be using a flat washer, a lock washer, and then our hex nut. We're going to do that for all three holes and tighten these down now.So we went ahead and tightened up all four of our bolts, which hold our trailer connector to our trailer connector mounting bracket. Now we can go ahead and attach it to the trailer mounting bracket on our trailer hitch. Now, as I said, we want to leave this loose so we have some room to work here. And indicate you're going to get these two small bolts you see here, we're going to use these to secure the two brackets. Now let's go ahead and tighten on these brackets together using a Phillips head and a 10 millimeter socket. Now, in order to make room for our wiring harness, we went ahead and tucked it to the side here, back over the hitch body, and now we're going to tighten down our band clamp.Now that we have our mounting bracket installed, we can go ahead and begin attaching our wires. Now, the first thing we're going to do is we're going to attach the four-pole we see here to the four-pole we already have on our vehicle. Now this part of the installation could vary a little bit depending on if your 4-way is inside the vehicle or outside the vehicle. However, ours is outside the vehicle so this is going to be a much easier option. What we're going to do is we're going to take the four-pole from the vehicle side and we're going to attach it to the four-pole on the back of the co


Информация по комментариям в разработке