How to Draft Fitted Bodice Patterns for Strapless Garments hu
@FASHIONACADEMYMJ
strapless, fitted bodice pattern. You can then use it either as a top, or add a skirt and make a dress.
I prepared examples of a fitted bodice, both with and without cups. My initial idea was to fit these on a real person, but 2020 being as it is, the safest alternative ended up being my usual dressform instead.
This type of top needs boning to support the structure, as it has no straps. So I’m also going to show you a few ways to insert the boning, too. Sounds good? Let’s get drafting then.
To make these, you’ll need a basic bodice pattern. We’ll eliminate the ease, so the less ease the basic bodice pattern has to start with, the better.
In this case, all the examples end at the waistline. But if you want to make a longer bodice, it’s not that much different. Just follow the side seam and dart shapes.
Basic Princess Bodice Pattern
The first example is the easiest one. Copy the basic bodice pattern.
Write down your bust and waist circumference measurements.
In addition, take your over bust and under bust measurements, and also the distance between bust point and underbust level. These will help you to draft the pattern as perfect as possible. But don’t worry, you can always correct it after you’ve tried on the toile!
Begin by drafting the ”neckline” (it’s quite far from the neck, so what should I call it..?). The bust span is usually something like 7.5-8cm or 3 – 3 3/8in. from the bust point, which means, don’t go lower than that. Just draft an approximate shape. In this example we’re making a straight line in the front and a v-shape line in the back.
Then, with the help of the measurements cited earlier, adjust the side seams and darts so that you have the correct measurement at each level. Take in at the side seam and enlarge the darts if needed.
The front waist darts should also have a curved shape.
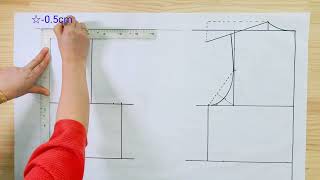
The neckline will often be gaping, so enlarge the bust dart at least towards the c-front. Start with 0.5cm or 1/4in. When you do the fitting, you can increase the amount if it seems like the neckline is still gaping.
Copy the pattern pieces. Re-draw the front pieces around the bust point, adding some extra volume as shown. Add notches. If the bodice seems too tight around the bust during the fitting, you can add more volume.
Close the back dart and re-draw the lines. Finally, check the pattern pieces and adjust the lines so that they flow smoothly between the pieces. Now you can also correct the neckline shape. These are the final pattern pieces:
Princess Bodice with Sweetheart Neckline
What if you want your fitted bodice to have a sweetheart neckline instead? Well, the pattern is quite similar as you can see. I only changed the neckline shape.
There’s also a seam at the center front, which allows us to shape the bust area some more. The previous bodice leaves a hollow area in the middle, but in this version we’ll draw a small dart from c-front to bust point to create a rounded shape.
To give you another example for the back piece, here it’s divided into 2 pieces along the dart lines.
Trace the pieces. Close the extra dart and re-draw the lines as before. Remember to add notches at the bust point level. You can correct the sweetheart neckline shape also after you’ve sewn the toile. It can be tricky to draw the curve just right without seeing it on the person.
Bra-Top Fitted Bodice with Vertical Seams
You might want your fitted bodice to have separate cups. Here’s the first version of the bra-top. Basically it’s very similar to the previous design, it’s just that in addition you draw the bra styleline.
The front piece consists of four pattern pieces. You’ll cut two of each.
The bra styleline should be located under the bust, so you’ll need the bust point – underbust distance measurement here. Draw whichever type of curve you prefer. The cups can have a gap in between, too. In that case you’d continue pattern piece number 3 all the way up and cut it on the fold, and the cups would start maybe 1cm or 3/8in. from the c.front.
Trace the pattern pieces as usual, and close the little dart. Re-draw the bra cup pieces around the bust point, and add notches.
Bra-Top Fitted Bodice with Horizontal Seams
This version of the bra-top pattern has cups with horizontal seams. The pattern is the same as the previous one, but it has an extra step, as you’ll need to absorb the darts into the horizontal style lines.
Divide the bra cup into two sections by drawing a line between the bust point and side seam.

![Чертеж блока лифа для женщин [Учебник по созданию выкройки]](https://i.ytimg.com/vi/Bn594SV1nXA/mqdefault.jpg)


Информация по комментариям в разработке