A560 comes with Byme-A flight controller. It can be controlled by different kinds of transmitters. Today I’m going to introduce how to set AT9S Pro/AT10II to Operate A560. You can also check this video for how to use AT9S Pro/AT10II together with Byme-A flight controller.
AT9S Pro and AT10II are compatible with R12DS, R12DSM, R9DS, R6DS, and R6DSM receiver. Considering the size of the body, A560 is more suitable for mini receivers. So we use R6DSM mini receiver and AT9S Pro as an example.
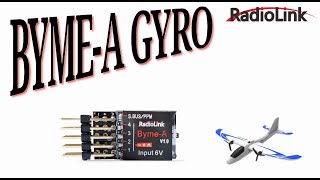
Here is Byme-A flight controller. Aileron servo is connected to channel 1, elevator servo to channel 2, Throttle, ESC to channel 3, rudder to channel 4. And SBUS/PPM channel is connected to SBUS/PPM channel of the receiver. So connect this channel to R6DSM receiver directly. Make sure the positive and negative pole cannot be reversed. Here is the right connection.
Now, bind the receiver to the transmitter. Power on AT9S Pro. (Note: Please remove the propeller when setting A560 to ensure the safety.) Connect battery to A560. Long press binding button of R6DSM to bind it to AT9S Pro. The signal tower on the screen indicates the binding is successful.
The LED of R6DSM is blue/purple, which means it is SBUS working mode now. Byme-A supports standard SBUS or PPM signal. So they can work together.
Now. Set the transmitter.
1.Enter Basic menu-MODEL TYPE. Set the TYPE to ACROBATIC. Long press PUSH button. Are you sure? Press the button once to confirm it. And wait.
2.Enter Basic menu-REVERSE. Set the direction of channel 3, throttle to REVERSE. And other channels to Normal. (Note: If CH3 THR is set to NOR, the motor may rotate when the aircraft is powered on)
When using transmitters from other brands, there is no need to follow this requirement.)
3.The flight modes of Byme-A flight controller are switched by channel 5 and channel 7 by default. We need to assign a 3 way switch for channel 5, and a 2 way switch for channel 7. Enter Basic menu-AUX-CH. The default switch is SwC, a 3 way switch here. we can use SwC to control channel 5.
And for channel 7, VrC knob is the default switch. We need to assign a 2 way switch, such as SwD for channel 7. The switch here. Channel11 is also controlled by SwD, so change it to other switch for channel 11.
Return to the home page. Enter the SERVO display. Channel 5 is controlled by a 3 way switch, SwC. And channel 7 is controlled by a 2 way switch, SwD.
After setting the transmitter, power on A560.
1.Attitude calibration. Place A560 on the ground to calibrate the attitude. It is advised to lift the head of A560 with about 20 degree angle for beginner to calibrate it.Then push the two joysticks like this for about 3 seconds. The green LED flashes once mean the calibration completed. It is also normal for the control surface to swing or the motor to rotate once at this time.
I’ll Introduce the flight modes of Byme-A.
Byme-A V2.0 has 6 flight modes. We have already assigned SwC and SwD to switch the flight modes. Refer to the picture for it. Push SwD up, it is stabilize mode when SWC up, Gyro mode when SWC central and Manual mode when SwC down. In manual mode, there is no gyro function, so the control surface won’t move when you turn the aircraft.
Push SwD down, it is Multorotor Vertical mode when SWC up, Acrobat mode when SWC central and Fixed Wing Vertical mode when SwC down.
Note: The value range of channel 5 and channel 7 corresponding to the flight mode is shown in the picture here. When using transmitters from other brands, please refer to it to switch the flight modes.
2.Test gyro phase. Switch to Stabilize mode. Hold A560 and turn it to check the movement of the control surface of aileron, elevator and rudder. If the gyro phase is reversed, please press the button on Byme-A to change gyro phase.
3.Test transmitter phase. Switch to manual mode. Push the joystick of aileron, elevator and rudder, and check the movement of the control surface. If the movement of the control surface of the corresponding channel is reversed, enter the setting page of the transmitter to adjust the transmitter phase of the corresponding channel.
For more details of A560:
https://www.radiolink.com/a560
Purchase link of A560:
https://www.radiolink.com/a560_where_...
If any question about A560, please feel free to contact us via email: [email protected]
#3DFixedWing #rcplane #rcairplane #at100 #radiolink


Информация по комментариям в разработке