A step by step tutorial on i-cord knitting for beginners
►►► VIEW THE FULL TUTORIAL HERE: https://nimble-needles.com/stitches/h...
I-cords are fun little knitted strings that are so easy even an idiot could knit it. Hence the name. You can use them as drawstrings (like for a cowl or a hoodie) or as straps for a hat.
You typically knit them on double-pointed needles (I'll show you how to knit an i-cord circular or single-pointed needles at the end of this video) Here's the transcript:
Why is it called i-cord?
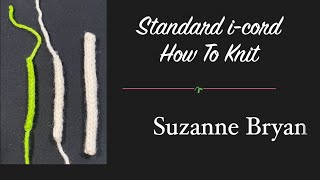
When you look closely at it, and i-cord is basically nothing but very very small tube knit in the round. Because it’s so small, you can knit it on two needles instead of four. The great Elizabeth Zimmermann rediscovered it and made it popular. She thought the technique was so simple even an idiot could knit it and hence named it i-cord.
If you ever saw one of these knitting spools or strickliesel, then you might realize that they produce the exact same cord, though the process is a bit different.
Cast on 4 stitches on double-pointed needles. There are ways to knit this on straight needles and circular needles as well. I’ll show you how to make that work at the end of this video.
You can cast on any number between 3 and 5 stitches for thicker or thinner i-cords, but for this tutorial, we’ll cast on 3.
I am using a standard longtail cast on, but you can use whatever cast on your like best. It won’t matter a lot.
From here, knit 3 stitches.
And this is where the magic starts. Instead of turning your project around, you slide the stitches to the right end of your right needle.
And then you simply knit across. Make sure to knit with high tension.
Once you knit all 4 stitches, you slide the stitches to the right end again and knit across one more time
After 4 or 5 rows, you’ll start to see the cord.
And it’s really just that simple. Knit, don’t turn, slide, and knit.
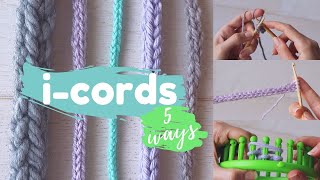
You can also knit an i-cord without double pointed needles. So, if you only have circular needles or single-pointed needles. No problem.
In this case, you need to slip the stitches back to the left needle after you knit them.
Like so. And knit across. Slip them back, then knit across.
This will take quite a lot more time, so I don’t really recommend it if you want to knit longer cords.
Now, here is where the fun starts and can get really creative
The idea behind the i-cord is simple. It’s a shortcut to knitting in the round on 3 needles. When you knit in the round, you bridge the gap here, here, and here. Because the distance between 3, 4 or 5 stitches is so small, you can sort of get away with knitting it flat and it will still look like a tube when you knit it the way I showed you. Once you understood this, you will realize that you can combine the i-cord technique with any stitch pattern you want.
For example, instead of knitting each stitch, you can purl each stitch. Then the i-cord will look like this.
The only thing you need to know is that you have to bring the working yarn all around your project and then to the front. Remember we are knitting in the round, not flat and you want to simulate knitting in an upward spiral.
As a result, purl i-cords with 4 stitches look less than ideal. You always end up with that one stitch here in the back that’s a bit too wide.
You can also create a little spiral like this one. I knit this by casting on 3 stitches and then knitting 3 and purling 1. This repeat spans more than one row and this creates the spiral.
You could create a curly cord like this. This is a three-row repeat
Row 1: Knit
Row2+3: K1, Sl1, K1
And if you repeat these three rows over and over again, you get this kind of curly i-cord.
The possibilities are really endless.
One last thing I would like to mention is that i-cord tend to look better with yarns that are a bit fuzzy. Cotton is really unforgiving and you will spot the tiniest mistake. Wool, on the other hand, will usually hide minor little mistakes that might eventually happen.
Anyway, that’s it. That’s how you knit an i-cord. I hope you enjoyed this video. Give me a thumbs up if you liked it, and of course, consider subscribing to my channel in case you don’t want to miss any new videos. Happy knitting and enjoy the rest of your day.
►Visit my blog for a free knitting school: https://nimble-needles.com/learn-to-k...
►Subscribe my newsletter for free patterns: https://nimble-needles.com/newsletter/
► View my projects on Instagram / nimbleneedlez


Информация по комментариям в разработке