The first 1,000 people to use this link will get a 1 month free trial of Skillshare: https://skl.sh/dualex02221
MY SECOND CHANNEL: 👉 https://bit.ly/30Dq39k 👈
I N S T A G R M: @dualex2x 👉 / dualex2x 👈
AMAZON PRODUCT LIST👉 https://www.amazon.com/shop/dualex 👈
HELPFUL LINKS 👉 https://www.dualexbuilds.com/product-... 👈
FREE BUILD PLANS 👉 https://www.dualexbuilds.com/ 👈
C L I C K T O S U B S C R I B E:
http://bit.ly/2fWl1tU
▬▬▬▬▬VIDEO CONTENTS▬▬▬▬▬▬
0:00 - Intro
1:19 - Cleaning the cab
8:07 - Cleaning the Cargo Area
8:40 - Skillshare
11:14 - Building the floor
15:46 - Security Cameras
17:47 - Roof Vent & Skylight
20:14 - Electrical Wiring
20:48 - Insulating & Covering the walls
22:06 - Insulating & Covering the Ceiling
26:04 - Testing the Lighting
26:33 - Ending
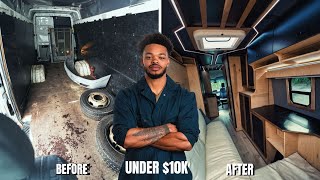
I Built a Living Space in a TINY 3,800 Cargo Van (Part 1 of 2) | Micro Camper Build
In this video, I finally reveal my secret project that I've been working on behind the scenes recently. I am building a Ford Transit Connect Cargo Van that I purchased for $3,800 from a delivery man who was also smoking inside of the vehicle. I needed to work exceptionally hard to make sure that the van would not smell like smoke. Luckily I was able to deep clean the van to the point that it smells new again.
After that, I built a floor in the van by first making a 2x2 frame and filling in the gaps in the frame with foam board insulation with a vapor barrier. I then added a sub floor on top of the frame and finally installed waterproof Laminate flooring.
I also cut holes in the roof in order to install a roof vent as well as a skylight featuring a bug screen as well as a reflective shade. I chose to use a skylight instead of adding windows to the van in order to keep the van more stealthy.
Because there are no windows, I needed another way to still be able to see outside of the van while its parked and I wanted increased visibility while driving, so I installed security cameras in discrete locations around the van. These cameras provide a 360 degree visual around the outside of the van and can also be used while driving as blind spot cameras.
Finally, I insulated the walls and ceiling and added automotive carpet to the walls as well as stained and sealed planks to the ceiling the van. This allowed me to mount my lights that are able to change temperature and be dimmed while being controlled from a small remote.
I will be posting in depth videos showing exactly how I was able to do everything that was done in this video over the next few weeks and then I will be releasing part 2 as well as a final tour of the van. Hopefully you enjoyed this video and I'll see you soon. Thanks!
Tags:
urban stealth camping,van camping,camper van,stealth camping,tiny house tour,tiny home,van life,van tour,rv renovation on a budget,camper remodel before and after,rv renovation ideas,renovated rv tour,rv life renovation,van conversion,van conversion solar,van build,diy camper van,micro camper van build,stealth van,stealth camper van,stealth camper,stealth camper van build,camper van conversion,van to camper conversion,diy van life build,dualex


Информация по комментариям в разработке