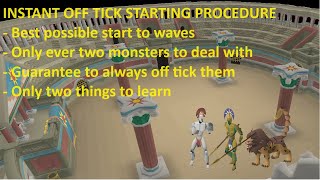
This video is intended for players that have a basic grasp of the mechanics at Alchemical Hydra (i.e. flame skip when Alchemical Hydra spits the fire attack), and who simply want a short video recapping the core mechanics of the fight. These guides are not intended for optimal play, or even efficient play, but prioritize consistency and minimizing the amount of moving parts during a given kill.
My general philosophy is that slow is smooth, and smooth is fast. I want players to not feel that they need to be hyper optimized in every second they play, and that it's acceptable to take a 70% efficient method if it means the player not experiencing burnout or distress from the method.
For additional explanations, context, and timing, turn on the Closed Captions (English) for this video.
A basic walk through of the fight is as follows:
Start on 1, and lure the hydra over the red vent.
After the vent has activated, we want to move to tile 3 during the poison attack
Move towards 6, dragging over the green vent, preparing for 2nd phase.
When the lightning special comes out, we want to be on or near tile 7, and when we see it come towards us, we want to move to tile 8
As the lightning falls off, move towards tile 10, and align the boss over the blue vent
Stand on 11 until the fire special, at which point we stand on 13, and click 14 when the attack begins
Once the final phase transitions, we want to put the opison on 15, and continue to leave 14 open for ranged and atack
For Alchemical Hydra, we want to focus on reaching enough damage to kill the boss so we aren't dealing with multiple special attacks, then prioritizing prayer bonus and sustainability. I would say the lowest you should tackle this boss at is with full crystal and bowfa for range, and a Zamorakian hasta for melee. Both styles offer separate advantages and disadvantages, but I personally prefer melee with worse gear, and range with better gear up through and including Twisted bow.
0:00 - Visual break down of boss room by how I think of them in segments
1:52 - Ranged Kill (Bowfa, Ranged potion, entry kill)
5:33 - Melee Kill (Lance, Super Combat, entry kill)
Soundtracks:
Alchemical Attack!
Ful to the Brim
The tile markers in this video are for efficient use of a Twisted bow, which I think you should use as a baseline. It makes talking about locations and methods easier, as every method follows this general layout, albeit they may walk in different ways, or end up in different corners. You can learn this entire fight without the markers, I like them for remembering where to go, but I don't follow them extremely strictly.
Tile markers:
[{"regionId":5279,"regionX":54,"regionY":7,"z":1,"color":"#FFD600E2"},{"regionId":5536,"regionX":33,"regionY":23,"z":0,"color":"#FF299645","label":"1"},{"regionId":5536,"regionX":33,"regionY":27,"z":0,"color":"#FF299645","label":"2"},{"regionId":5536,"regionX":30,"regionY":30,"z":0,"color":"#FF299645","label":"3"},{"regionId":5536,"regionX":30,"regionY":35,"z":0,"color":"#FF299645","label":"4"},{"regionId":5536,"regionX":28,"regionY":37,"z":0,"color":"#FF299645","label":"5"},{"regionId":5536,"regionX":27,"regionY":38,"z":0,"color":"#FF35C5DB","label":"6"},{"regionId":5536,"regionX":31,"regionY":38,"z":0,"color":"#FF35C5DB","label":"7"},{"regionId":5536,"regionX":14,"regionY":38,"z":0,"color":"#FF35C5DB","label":"8"},{"regionId":5536,"regionX":14,"regionY":33,"z":0,"color":"#FF35C5DB","label":"9"},{"regionId":5536,"regionX":13,"regionY":32,"z":0,"color":"#FFD01865","label":"10"},{"regionId":5536,"regionX":16,"regionY":34,"z":0,"color":"#FFD01865","label":"11"},{"regionId":5536,"regionX":19,"regionY":32,"z":0,"color":"#FFD01865","label":"12"},{"regionId":5536,"regionX":20,"regionY":31,"z":0,"color":"#FFD01865","label":"13"},{"regionId":5536,"regionX":19,"regionY":30,"z":0,"color":"#FFD01865","label":"14"},{"regionId":5536,"regionX":18,"regionY":31,"z":0,"color":"#FF000000","label":"14"},{"regionId":5536,"regionX":17,"regionY":30,"z":0,"color":"#FF000000","label":"15"}]


Информация по комментариям в разработке