Click for more info and reviews of this CURT Front Receiver Hitch:
https://www.etrailer.com/Front-Receiv...
Check out some similar Front Receiver Hitch options:
https://www.etrailer.com/fitguidefmr.htm
Search for other popular Chevrolet Silverado 3500 parts and accessories:
https://www.etrailer.com/vehicle/2024...
https://www.etrailer.com
Don’t forget to subscribe!
/ etrailertv
Full transcript: https://www.etrailer.com/tv-install-c...
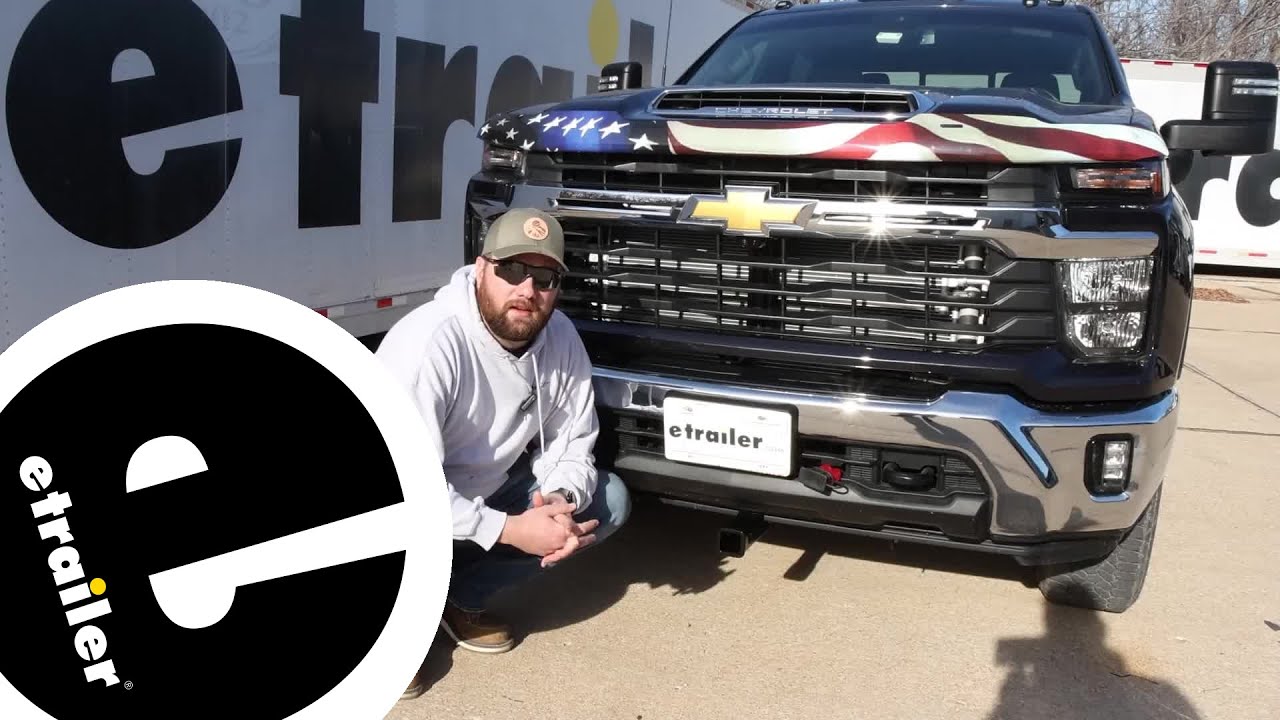
Hey guys, it's Jake here with etrailer. Today we have a 2024 Chevrolet Silverado 3500. We're gonna be taking a look at, I'm gonna show you how to install the CURT front mount trailer hitch. Adding a front mount trailer hitch to the front of your Silverado, it's going to allow you to do a couple of different things. First and foremost, a lot of people like to use this for a front-mounted winch. If you've got it on a hitch plate, you can slide it in there and use it whenever you're off-roading or stuff like that.
You can also mount bike racks up here on the front, snow plows or maybe even a cargo carrier. A measurement so you know what you're getting, from the ground to the top inside of the receiver tubes about 14". That's a good measurement to keep in mind if you have a cargo carrier, an accessory that you're wanting to use with this of how high that accessory will be off the ground. It's gonna come with a standard 5/8" hitch pin hole. It does not come with a hitch pin and clip, so you will have to pick one of those up in order to secure your accessories.
I also like how it is going to fit inside this plastic valance, so it's gonna look really good when it's on the front, but it will be behind the front of your bumper so you don't have to worry about hitting your shins on it. As far as the insulation goes, this is a very easy installation. The only trimming it involves is are any modifications to your vehicle, that is. It's going to be putting that little notch in the bottom of that plastic. But other than that, it's very, very straightforward and easy.
You can definitely do it at home. With that being said, let's go ahead and pull it in the shop and show you how we did it. To begin our installation, you're gonna need to be underneath your truck, and we're gonna have to take a few of these bolts off. It should be pretty easy for you since our truck does sit a little bit higher off the ground. So on our frame rail you're gonna have two bolts that are holding in your tow loops on the front of your truck.
The further back bolt, so the bolt that's closer to the cab of your vehicle, that's the one we're gonna be removing on both sides of our frame rail. So we'll take an 18 millimeter socket and wrench and get this bolt removed. (metal clicks) Once we get those nuts removed, just slide the bolt right out. Because we're gonna be using this hole as one of our attachment points for our hitch, we have to get the stuff out of the way. That is going to impede our hitch in order to mount up correctly. So we'll take either a flathead screwdriver, if you happen to have one of these trim panel removal tools, you just pop that tab out. We're gonna push this up so that's out of the way of our hitch being lifted up into place. Take our fish wire, run it through this lower hole in our frame rail. We'll come out the end of our frame rail, slide our big spacer block on there. You wanna use the one with the square hole in it, 'cause it'll accept our carriage bolt. And we will toss our spacer block up through into our frame and we'll pull our carriage bolt down through the spacer block. Now this can be kind of tricky, because GM has put this sticky stuff on the whole frame rail, so if it gets kind of gooey, that's just kind of the nature of the project. But you want to pull that out the center of that hole, and now we can put it other spacer block on. In order to get our outer spacer block to stay in place, you'll just wanna put a piece of tape on it, tape it up to the frame rail and you can poke a hole with it with the fish wire through it, slide it over our bolt. Now it's up in place where we need it to be. Essentially what it's designed to do is to take up the extra space that all these plates are welded to so that our hitch will sit flat up against the bottom of our frame. Now with an extra set of hands, we're going to lift our hitch up into place. We've got Aiden here to help us. It's definitely a lot easier so you can get the hardware in the correct spot. What we're gonna do here is it'll go on the inside of our frame rail. We'll lift up, we'll take our hardware, which will be the long bolts that come in your kit, conical tooth washer. We're gonna slide it through that hole in our frame where we removed our bolt from earlier. Lift it up and slide i

Информация по комментариям в разработке