http://www.ereplacementparts.com/ball...
Click here for more information on this part, installation instructions and more.
This particular crankshaft bearing is specific to Echo manufactured brands, including Echo and Shindaiwa. To find a crankshaft bearing specific to your model, visit eReplacementParts.com.
If your straight shaft trimmer is showing any of these symptoms; replacing the crankshaft bearing could solve your problem:
1) Excessive vibration
2) Smoke coming from the engine
3) Engine not turning over
4) Starter rope stuck
5) Engine not starting
6) Bearing seizure
7) Engine dies suddenly
eReplacementParts.com part number: 9403536201
Tools used for this repair/replacement:
1) Receptacle for draining fuel
2) Torx wrenches
3) Spark plug wrench or socket
4) 10mm wrench (or adjustable)
5) Long-nosed pliers
6) Rubber mallet
7) Standard screwdriver
8) Starter rope (or similar)
9) Adjustable pliers
10) Flat-blade screwdriver
11) Socket set
12) 2-cycle oil (for lubricating seals)
13) Razor blade (to scrape gasket surface)
14) Ignition gapping gauge
Get model-specific repair help from eReplacementParts.com. Learn how to troubleshoot, diagnose and repair your power tools and equipment with illustrated instructions, hundreds of step-by-step repair videos, and our DIY forum. If you have a power tool or appliance problem, we can help https://www.ereplacementparts.com/art...
[ VIDEO TRANSCRIPT ]
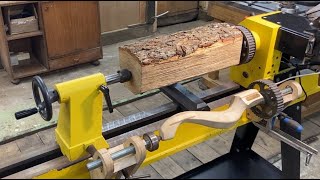
Hi, I’m Mark from eReplacementParts.com. In this video, I’m going to show you how to replace the crankshaft bearings on an Echo trimmer. The crankshaft bearing provides the bearing surface between the crankshaft and the crankcase. These bearings are typically very durable, but with extreme use, you can wear them out. More common reasons that the bearing would need to be replaced are an engine that’s been run without oil in the gas. That can cause the bearing to seize. Or an engine that’s suffered from dirt ingestion. The dirt can wear away at the bearing.
Replacing the crankshaft bearings can be a somewhat difficult repair, but if you follow our instructions, you should be able to do it yourself. Crankshaft bearings, as well as many other parts, can be found on our website. Let’s get started.
I’ll begin by removing the air filter cover and the air filter. Before we remove any of the fuel lines from either the carburetor or the fuel tank, you’ll want to make sure you drain the gas from the fuel tank. Otherwise, it will leak, as the fuel in the tank tends to be slightly pressurized. I’ve already drained the fuel, so we can go ahead and move on.
Next, I’ll remove the air filter bracket, as well as the air filter base. They’re secured with two screws. There’s the air filter base, and the air filter bracket. Now I’ll remove the throttle cable and the fuel lines from the carburetor. Pull that away from the carburetor, as well as the throttle cable. And on the underside, I’ll remove the fuel lines.
Between the carburetor and the isolator block, is the intake gasket, and that’ll just usually fall away, or you may have to pull it or scrape it away from the isolator block, or the carburetor. Now I’ll go ahead and remove the isolator block. Now I’ll remove the spark plug boot and the spark plug. Now I’ll remove the motor housing. It’s held in place with two screws. Now I can remove the insulator gasket. Now I’ll remove the starter. There’s four screws on the back, one on the side, and one between the fuel tank and the starter.
Now I’ll remove the fuel tank. It’s secured with two screws. Now I’ll remove the air duct. There’s just one more screw securing it. Now I’ll separate the clutch and shaft assembly from the engine. First, I’ll go ahead and disconnect the ignition wires. They just pull apart. And now I’ll remove the four screws that secure the clutch housing to the engine. I’ll just give the motor a couple of taps with the mallet. And it’ll slide apart. Now I’ll remove the clutch. But I can’t just simply thread it off the spindle, because, as I turn the clutch, the motor will just spin. So I need to bind up the motor. To do that, I’ll put a piece of starter rope into the cylinder through the spark plug hole. The rope will take up the space between the piston and the top of the cylinder and bind the engine....
[ DOWNLOAD THE ENTIRE TRANSCRIPT FOR THIS VIDEO HERE: https://www.ereplacementparts.com/art... ]


Информация по комментариям в разработке