Now that you've successfully configured the payments tool, you're all set to streamline your sales. With payment links at your disposal, you can effortlessly provide customers with a convenient way to finalize their purchases. Whether it's a one-time product or an ongoing subscription, payment links cater to both, ensuring a smooth buying experience.
Here are the step-by-step instructions for creating payment links in your HubSpot account:
Step 1 - Go to your HubSpot account and navigate to Sales, Payments, and Payment Links.
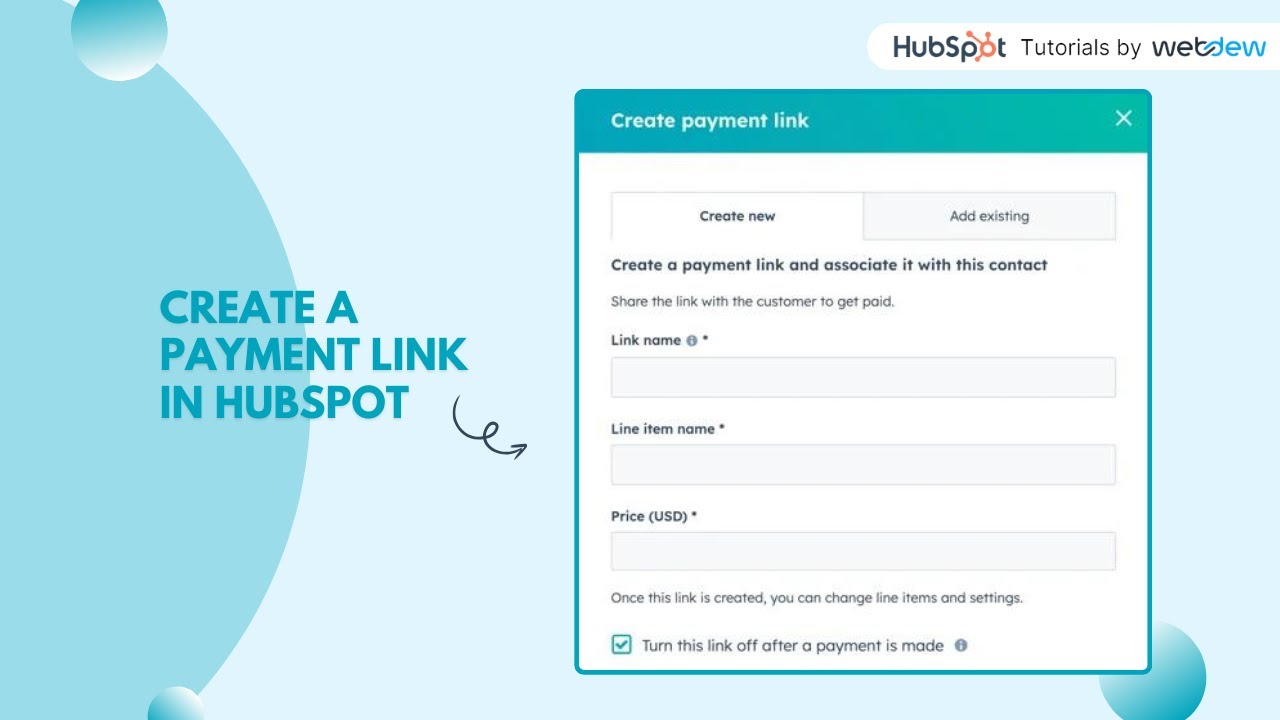
Step 2 - Click the "Create payment link" button located in the upper right corner.
Step 3 - Add line items to the payment link by following these options:
a. To add line items from the product library, click "Select from product library."
b. To create a custom line item specific to this link, click "Create custom line item."
Step 4 - If you're selecting products from the product library:
a. In the right panel, choose the checkboxes next to the products you want to include in the payment link.
b. Click "Add."
Step 5 - If you're creating a custom line item:
a. Configure the line item using the following fields in the right panel:
-Name: The name of the line item visible to the customer during purchase.
-Description: Detailed information about the line item's features, options, etc.
-Make this line item optional: Allow buyers to decide if they want this item.
Unit price: Price per item, multiplied by quantity.
-Allow customers to set their own price: Enable buyers to define their price (not with quantity edit).
-Quantity: Number of items to purchase.
-Allow customers to edit quantity: Let buyers select the quantity, set Min and maximum quantity if needed.
-Billing frequency: Set the frequency of charges for the line item (One-time, Monthly, etc.).
Step 6 - For recurring subscription payments:
a. Select the billing frequency (Monthly, Quarterly, Semi-annually, Annually).
b. By default, subscriptions renew automatically. To set a specific number of payments, use "Fixed number of payments" and specify the count.
Step 7 - To start billing in the future:
a. Check the "Delay Billing Start Date" box.
b. Choose either a "Custom Date" or delay by days/months.
Step 8 - After configuring the line item, click "Save" or "Save and add another."
Step 9 - To update line item details, click the line item name or use the columns in the line items table.
For a one-time discount:
a. In the "Totals" section, click "Add one-time discount."
b. Enter a discount name, select USD or %, and input the discount amount. c. The total amount with the discount applied will be shown.
Step 10- After setting up all line items and discounts, click the "Settings" tab at the top.
Congratulations, you're now equipped with the knowledge to revolutionize your sales strategy using HubSpot Payment Links.
-----------------------------------------------------------------------------------------------------------------------
Follow HubSpot Tutorials by webdew: / @hubspottutorials
With webdew's HubSpot account setup tutorials, you will learn about General, Security, Notifications, Website, Inbox settings, and much more. All the videos that are shared on this Youtube channel will make you run through the HubSpot tool effortlessly.
Moreover, you will learn more about the HubSpot CRM, Marketing Hub, Sales Hub, Service Hub, Reporting, and Dashboards through our videos and see how you can use these tools to leverage HubSpot to benefit your business.
To get access to Webdew’s Weekly Newsletter with tips and tricks for using HubSpot, follow the steps below: https://www.webdew.com/hubspot/newsle...
1. Go to the Webdew website and find the newsletter sign-up form.
2. Enter your email address in the designated field.
3. Click the “Subscribe” button to submit your subscription request.
4. You should receive a confirmation email shortly after, which will ask you to confirm your subscription. Follow the instructions in the email to complete the process.
Once you’ve successfully subscribed to the newsletter, you’ll receive weekly updates and tips on using HubSpot. Keep an eye on your inbox for the latest information and helpful advice.
Get Started with HubSpot with the Free CRM Sign-up:
https://www.hubspot.com/products/get-...

Информация по комментариям в разработке