This bowl is available for purchase at: https://formanwoodworking.com/product...
_____________________________________
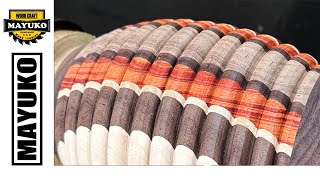
Today's video: Hello, friends! I have wanted to try my hands at making a board bowl for a very long time, and finally, I’ve got my first one under my belt! For those that don’t know, a board bowl (or sometimes called an “economy” bowl, named for the minimal material waste involved in the process) is pretty much exactly what it sounds like; it’s a bowl made from board. As far as I’m aware, the most common method used for making board bowls is to use a jig on a band saw to cut out half rings, which are then glued back together to make the full rings. Not only do I not have a band saw, but I’ve always felt this method involves an unnecessary step (that being to make the rings from halves). I thought that surely there must be a way to get fully intact rings before the final glue up. A few months ago, I came across The Papa1947 (check out his channel here: / @thepapa1947 , and he makes board bowls with the exact method I’ve been looking for (the jig you see me use in this video is largely inspired by his own; you can see the making process of it here: • Ring Cutting Jig Bowl from a Board - ... ). If you haven’t checked out ThePapa already, I highly recommend; he does some spectacular work!!
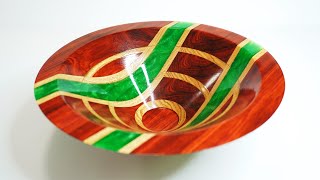
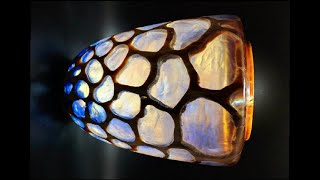
With this method, I decided to give it a go. For this bowl, I cut out wavy pieces of zebra wood, glued them down into a circular mold, and filled the gaps with epoxy resin dyed in a transparent tangerine colour. I ran into a little overheating issue during the pour (see the video for more details), which did introduce a lot of bubbles in a few key areas, but for the most part I was able to salvage things. Once cured, I needed to flatten out both sides of the blank. I wasn’t sure what the best way to do this would be, but I ended up trying to do it on the lathe. I think I did an okay job of things, but in the future, I might just try to hand plane it flat as the seams were a little larger than I’d wanted. Once relatively flat, I cut out 3 rings along with the base (using my own handmade jig) and attached them all back together into a bowl shape using epoxy resin. One thing that likely also contributed to the larger seams was that I didn’t manage to clamp the rings together as the epoxy cured (I didn’t think the set this up ahead of time), which I’ll definitely do in the future. Once cured for the second time, I flattened out the outside and inside of the bowl (this took a little more work than intended as I didn’t get the angle of my jig right given the thickness of my board), wet sanded everything up to 2000 grit, and applied the finish using Waterlox’s original varnish.
Ultimately, this was just a proof-of-concept project; the end product has quite a few imperfections, but given that I was just trying out a new technique, I’m quite pleased with how everything came out! Based on my mistakes from this project, and what I learned from them, I’m very excited to try some more complex board bowls in the near future!
_____________________________________
Want to use the same pigments shown in this video? Check out the following affiliate code for a discount on SquidPoxy products! https://squidpoxy.ca/?sacode=duo8gk&u... _____________________________________
Check out our Instagram! https://www.instagram.com/formanwoodw...
_____________________________________
Key equipment/products I used:
Rikon 70-220 VSR Midi Lathe: https://www.leevalley.com/en-ca/shop/...
Woodstock 1/2 inch bowl gouge: https://www.amazon.ca/gp/product/B005...
CA Technologies Resin Casting Pressure Pot: https://www.finishsystems.com/product...
Magic Resin 2” Deep Pour: https://www.amazon.ca/dp/B08VW5RPVK?p... Waterlox Original Varnish: https://waterlox.com/original/


Информация по комментариям в разработке