Click for more info and reviews of this Tekonsha Trailer Brake Controller:
https://www.etrailer.com/Trailer-Brak...
https://www.etrailer.com
Don’t forget to subscribe!
/ etrailertv
Full transcript: https://www.etrailer.com/tv-install-t...
Today in our 2017 Honda Ridgeline, we'll be installing the Tekonsha Prodigy P3 Trailer Brake Controller. Part number 90195. To ease our installation we'll be using the Tekonsha Plug-In Wiring Adapter for Electric Brake Controllers, part number 3070-P. Now the reason you want a brake controller is if you have a trailer that has electric trailer brakes and your vehicle doesn't have a brake controller, you won't be able to use those trailer brakes. When you have a brake controller installed you'll be able to take advantage of those trailer brakes and be able to slow down your trailer a lot more efficiently and putting less strain on your vehicle's brakes. Also, in some areas of the country, they do require functioning trailer brakes on trailers over a certain load, so that's just something to keep in mind. All right here's what our brake controller looks like installed.
As you can see it's a nice compact unit that doesn't take up much space in our vehicle at all. It's a nice convenient spot, easy to read the display while we're driving down the road and easy to reach all of our controls on it, including the manual override here on the bottom. Here's what it looks like once we've connected to our trailer. As you can see, we have a nice little indication on our screen which displays a pickup truck and a little trailer behind it, showing that we're connected. We also have our current level of amperage going to our trailer brakes.
Now when we apply our manual override here, you can see how much voltage is going to our trailer brakes. Okay now over to the left of our brake controller here we have our two adjustment buttons here to adjust how much power is being applied to our brakes. We can go all the way up to 14 or all the way down to zero which would be no assist at all. Now over to our right of the brake controller we have our boost level button right here. This will give us more power output going to our trailer brakes and also allow us to make quick adjustments in case there's change in driving circumstances where we need more braking power. We just press this button once to go up.
We have three different levels of boost settings on this brake controller. The higher you go the more assist you get. Now also you can see the size of the trailer behind the pickup truck. It's bigger. Now to the bottom right we have our settings button here. This gives you a whole bunch of options you can change.
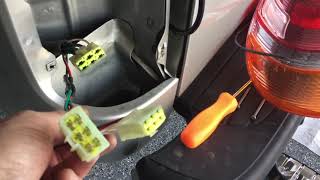
If we hit our okay button down here for the display we can change brightness, color, you also can change your contrast, so you've got three settings here for your display. Brake type, you have electric and then you have hydraulic over electric which is when you have like electric discs, you have an electric pump on the trailer to control hydraulic disc brakes. You'll find that on some of your larger trailers or heavy-duty trailers, but most trailers just use standard electric brakes, so we'll make sure we're set on that setting. Then we have our help area. You can change your language on it, trouble shooting guide, you've got contact information, their website, phone number. Now what I really like about the Tekonsha Brake Controller that we have here is that there's a lot of adjustments, a lot of customizations that you can make with it, and by having all those customizations you can make it suit your needs. You can match your display color to match your interior lighting. You can fine tune stuff and it has the built in diagnostic functions to help you diagnose any problems that you may have. Now that we've gone over some features of our Tekonsha Prodigy P3, we'll show you how to get it installed. Okay the first thing I'm going to do is find a place to mount our brake controller for installation. Typically you want to have it to the bottom right of your steering wheel, in this area. However our customer today requested something a little bit different. We go over in front of our gear shifter here, we have this pocket, we can mount it here. However, this panel here is not easily removable and there's an air conditioning control unit behind this panel. We need to make a hole for the wires to pass through, because the air conditioning control unit is in that location, I don't feel comfortable to use a drill in this area so we'll use a utility knife instead to score out an area for the wires to pass through. Okay once you have it marked out, we'll just keep going along those lines until we're all the way through. Okay, with that cut out we'll make sure our wire can actually pass through there. All right, this is the end that connects to our brake control


Информация по комментариям в разработке