Click for more info and reviews of this etrailer Gooseneck Coupler:
https://www.etrailer.com/Gooseneck-Co...
Check out some similar Gooseneck Coupler options:
https://www.etrailer.com/dept-pg-Goos...
https://www.etrailer.com
Don’t forget to subscribe!
/ etrailertv
Full transcript: https://www.etrailer.com/tv-review-et...
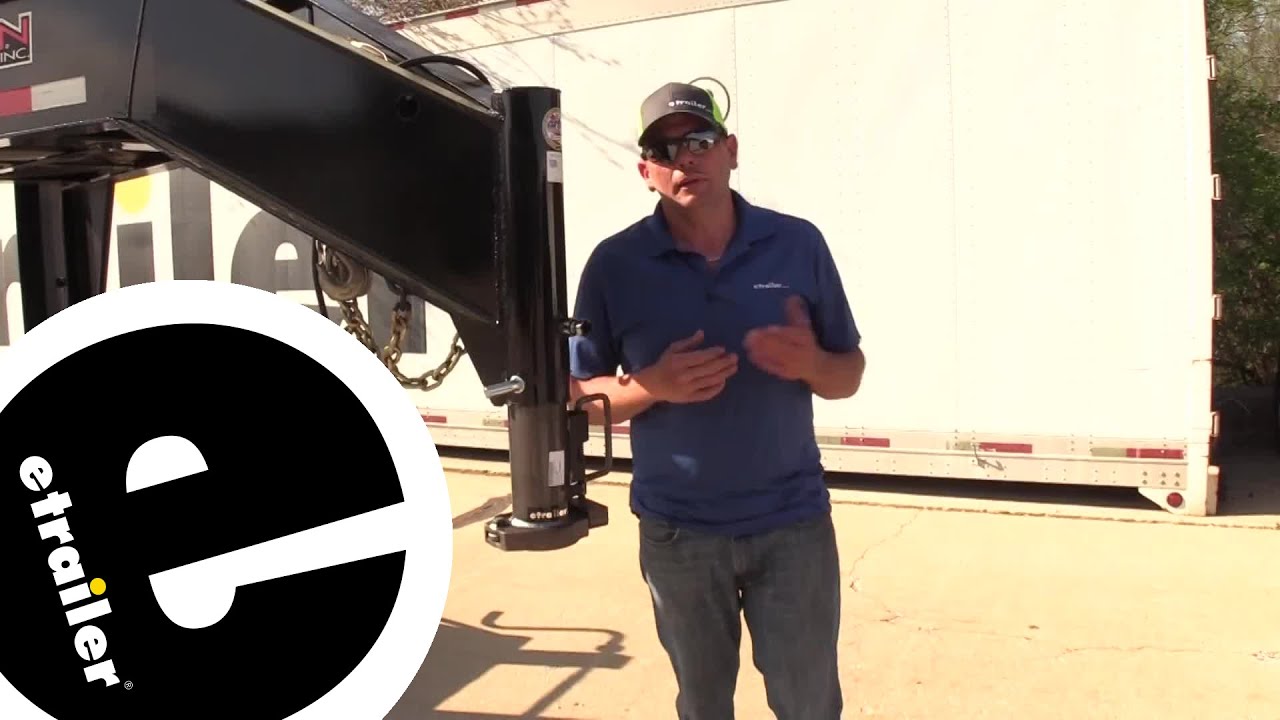
Hey guys. Randy here at etrailer.com. Today we're taking a look at our two and five sixteenths inch gooseneck coupler. Now this coupler is going to be pretty ideal for most gooseneck applications. It's a little bit heavier duty here at the bottom. Sometimes I like gives you a lot of confidence in it.
Another nice feature is that it's got the spring loaded release here at the bottom, so we pull that up and turn it and as we lower this down on our ball, it's automatically in a open. Then close behind it. At that point, all we have to do is pull our handle. You see it clicks right down in position. You can see our base plate here is going to be much thicker than what we are used to seeing with some of the smaller types.
It's going to have a nice wide bevel on it as well, so if we're not exactly centered underneath that ball, it's going to help to guide it in as we put weight on it.All in all, it's a really nice easy to use coupler. The overall construction feels really nice. You've got heavy duty welds around here and they're really clean. You'll see a little bit of welding slag here and there on it, but it is an unfinished coupler and we're going to have to paint it anyway, so most of that's going to come off as we sand blast it before it goes through that paint process. Now as we said, this coupler is going to work on just about any gooseneck application, but it does have its kind of its sweet spot.
I think that's going to be in your farm use, in your utility use or if you just don't haul your trailer very often. If you haul a gooseneck trailer regularly, you're used to some of that chucking, bucking and noise that we get. It can make your ride a little bit uncomfortable.So if you've got horses or livestock or living quarters in a trailer that you're trying to haul with you, I'd recommend something cushion, maybe the GEN-Y or the Convert-A-Ball cushion used from that mount. Basically that cushioning is going to take the rigidity out. So the Convert-A-Ball has about three quarters of an inch of movement there.
Your GEN-Y uses a torch and flex system and it can overall just give you a better experience while hauling your gooseneck trailer. The gooseneck is going to offer us about eight inches of adjustability, so we can move this down and up eight inches. So right now we're about 11 inches, 11 and a half inches to the bottom of the coupler to our pinhole. We can get that all the way out to about 19. Alright, now we can move on to the installation process and that's really going to depend on how you're set up currently.If you are rebuilding a trailer, maybe it took damage, you need to repair it or building a new trailer, then the outer tube is going to be something that you'll want to install. Now this is a weld on outer tube, just like any other gooseneck coupler. This one uses two set bolts. The set bolt can be tightened down using a 23 millimeter 12 point and it's going to have two jam nuts. Those you're going to need an inch and an eighth for. I like that it's not painted. That's going to prevent us having to kind of, grind all the paint off to get a proper weld done on it. Standard length on these, it's about 20 inches. You're going to see that just about across the board on the coupler, outer tubes. And one thing to make note of, the top is open on these and typical applications that's going to be capped off.That prevents moisture from getting down in there, causing that inner and outer tube to kind of rust together. So I highly recommend if you are going to install the outer tube that you have that plate welded on to protect your two components from the elements. Now with us not replacing the outer tube, we're going to take our inner tube, you're going to slide that up and in. You can see the four holes here. That's where we get that eight inches of adjustment. And as we bring that in, we just line up the pinhole with the hole in the outer tube and slide the provided pin through. We're going to secure it on the other side with a clip. Now to set your coupler height appropriately, you're going to want this to be either matching to or as close as you can get it to what your old coupler was or you'll want it to be about two inches lower than what your ball sits in the back of your truck compared to the ground. And once you've got it pinned in the appropriate spot, I'm using an inch and an eighth on this particular boat. Remember, if you're using the outer tube that comes with it, it's a 12 point 23 millimeter.We'll torque that down to the appropria

Информация по комментариям в разработке