Deep Burn Part 2 event is nearing its end, and I am nearing my FOURTH (4th) Relapse! I've never been so proud.
Getting back into the swing of things with a Mother Gooseberry map, recorded in only the most ultra of HDs because I FORGOT AGAIN!!!! Am I mad at myself? Yes. How mad? Over an hour's worth of upload time level mad! It's already fading though and I'm not one to hold onto rage arbitrarily, so let's move forward...
...(the next upload is also uber ultra HD because I'm a silly and only remembered I had bumped the recording quality up for the Retrowave videos I made AFTER recording TWO videos...aren't you lucky?)...
Anyhoo, the call to return here was my friend and fellow Twitch streamer and Youtube uploader Defense14 is replaying the original Outlast and it's given me an even greater appreciation for the trials. Red Barrels really stuck with their formula but tweaked it just enough to make it a fun and engaging multiplayer or solo experience. Yes, it's not exactly the same as the original, but it doesn't need to be. It's its own experience, and I am so fond of it.
This trials goes the way of so many before it, where I am on point and professional for most of it, but slip near the end because I'm a silly billy but also HOW DID I MISS? We aren't there yet, so let's focus on the positives.
Finding all of the targets to smack gets so challenging at harder difficulties because of placement naturally but also those blocked and unreliable doors make me lose my mind wondering if an area is blocked because of the trial environment or if they are blocked because of the difficulty.
There is a circuit in the second, darkened area that, if disconnected, will open the doors to the diner so you can easily access more hearts. This is necessary for harder difficulties, but also simply convenient so I don't have to go all the way back to the beginning for more throwables.
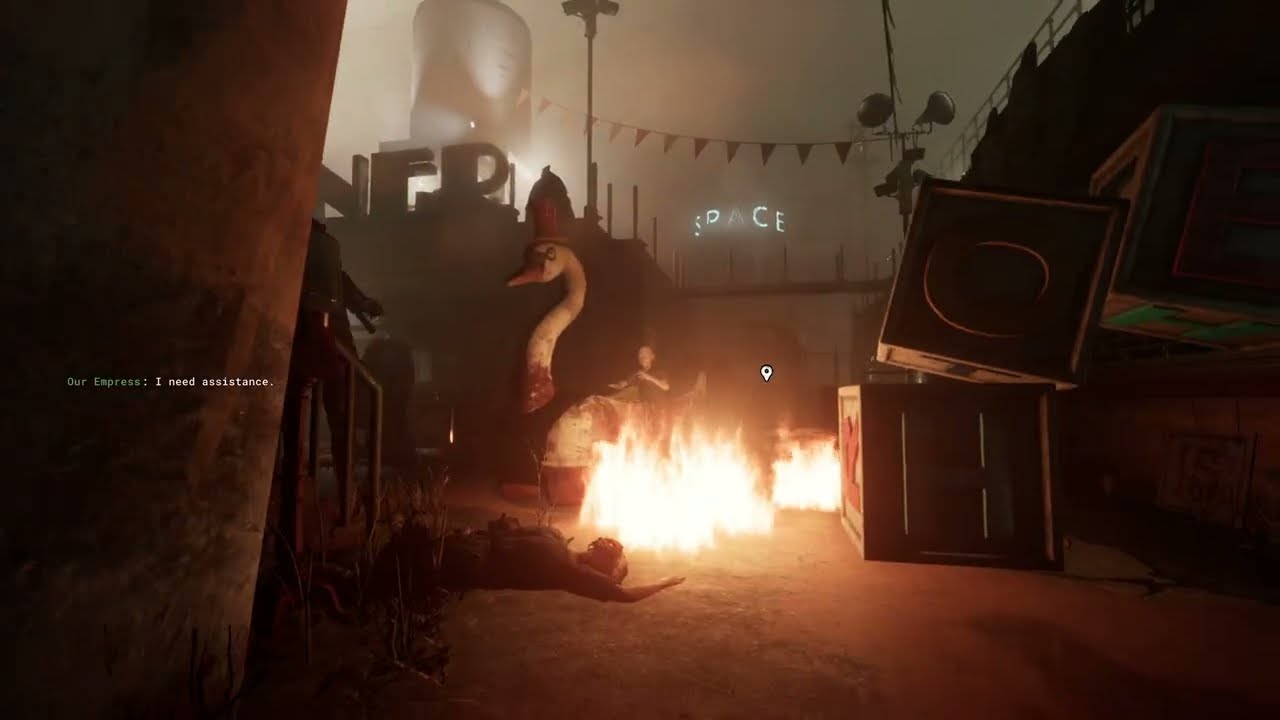
The addition of the burning barrels to this map is very nerve-wracking. I feel like there isn't enough space anywhere to comfortably quench a flame AND feel secure that an ex-pop won't bump into you accidentally.
I sure love breaking bottles near Pitcher and from that point on, she can sense me in the darkness. Could've waited a few seconds, but nooo, I wanted that target DESTROYED NOW.
I try getting that three pointer on the Root Canal target, but there's a point where ya just have to be in the light and take that risk. This is made harder by my choice to not have an aiming reticule but it's also a lot cooler so wahoo.
It's very funny to hear another target in a later section through a wall.
Sometimes, when a big grunt ex-pop puts her butt in your face, you gotta use your Jammer Rig to make her puke. I think it's funny that the bigguns don't double forward to puke, just kinda dribble it out.
I of course get turned around and go back the way I came, but it wouldn't be me in a trial after a while if I didn't get a little lost.
The final section is too well lit and winding, and I salute Easterman and the architects for creating this maze. I really do feel like a rat lookin for some cheeese.
Getting pounced upon, have no throwables to break out, then having Mother looming over you is all fun and good if you have a heart to throw at her to knock her off balance for a half second while you skedaddle away. It's hard during times like that but always remember to stay calm! Think the situation through! Go through your options. I wasn't always this calculated playing this game, but I got here from many, many painful and terrifying mistakes. The game also used to be much more painful and unforgiving, but those were the before times and we no longer speak of them. It would be nice if the old way was a game mode you could play still.
I love hearing the ex-pops call me names, it's so fun.
It's nice smashing a target and the kind lady from the Sleep Room says, "One target remaining."
I love messing up mines and other traps with my Jammer Rig. It's really my favorite rig at this point, I think. The Stun is invaluable during solo on harder difficulties, but nothing feels as good as using all those painful traps against the ex-pops. They never suspect a thing.
The first time I played this map, I got to the end with my friend and we both freaked out having another objective before we could leave. That fear haunts me still. Luckily, Standard is on my side here.
My aim for the final targets is FLAWLESS and that is ALL that matters.
My aim with Mother, on the other hand...eh. I disagree with the game, but that's okay. We can disagree and still be pals.
For the ending maze, again, don't panic.
Luckily Mother Gooseberry and Dr. Futterman caught me in time to teach me about dental hygiene. That lesson was not enough to lower my grade though!
Father is so proud of me! He knows I am approaching another Relapse.
Sleep Room: (0:00)
Shuttle: (0:33)
Therapy: (1:52)
Evaluation: (35:12)

Информация по комментариям в разработке