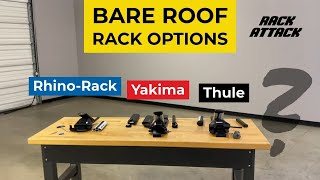
Click for more info and reviews of this Rhino Rack Roof Rack:
https://www.etrailer.com/Roof-Rack/Rh...
https://www.etrailer.com
Don’t forget to subscribe!
/ etrailertv
Full transcript: https://www.etrailer.com/tv-install-r...
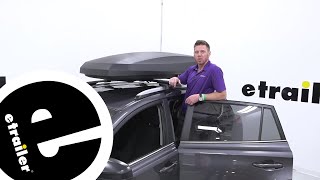
Hi everybody, Adam here with etrailer. Today we're gonna be taking a look at the Rhino-Rack Vortex Aero Roof Rack system, for your naked roof, on your 2014 Honda CRV. If you're looking for a fairly cost-effective roof rack, that has all the features that I really look for, in a roof rack system, I definitely think that the Vortex Aero Rhino-Rack Roof Rack system, is gonna be good for you. We're going to be able to put about 165 pounds worth of stuff on top, we have T-Tracks, it's made of aluminum, it's not gonna rust away, and it's just gonna allow your CRV, and the people you're driving around, to do more. Some things that you don't see with some roof racks is locks, these come with it. Even some of the higher end racks, you really have to purchase the lock separately, which is kind of silly in my opinion, but this one comes all with it, you don't have to buy anything separate.
I just don't like the idea of buying a premium roof rack and then having to buy more stuff for it. This one doesn't break the bank and it gets the job done. And we don't have to worry about anything scratching, we have some rubber pads on the bottom of our little feet here, but then also on the clamps, that clamp into our little door jambs, that is gonna be coated as well, so you don't have to worry about this thing scratching up your vehicle. It does have a pretty sleek design, so we don't have any overhang right here. So this is good if you're really just needing some bar space, but you really don't want a bulky roof rack sticking out past the foot.
I really like that, especially if you're looking for something that's going to look a little bit more OEM and low profile. From the top of our roof in the center, to the bottom of our bar, we're gonna have a little less than an inch and a half of space, and then going all the way up, it's only going to add about, two and three quarters of an inch, to the top of your roof in the middle. So if you do have a sunroof or something like that, I think we're gonna be able to clear, and then most of it's gonna be back here, so I think it'd be fine there. Hopefully that kind of gives you an idea of what you're really gonna get, when you go with the Rhino-Rack Vortex Aero Roof Rack system but, if you want to see how it installs, if you stick around, we're gonna show ya. First thing we want to do is familiarize ourself with the hardware.
We're gonna have our foot kit here, and we will get keys with the kit, so what you want to do, is just take this cap off, just like that, and then we can go ahead and take this, and insert it in. You know if you're putting it in right, you'll see a little hole here, it's gonna line up with the hole on the foot, and work it in like that. We're gonna have a screw, it's gonna go right there to secure it down, and then you can take a Phillips screwdriver and screw that all the way down. And we'll do that same exact thing on the other side. Now's a good time to put in our weatherstrip.
I've found it easiest to start on one side, make it to where it's flush right up against the edge of the bar, get that one channel fitted in on one side, and then kinda fold it in, kinda like that, you hear it kinda of snap in there. That's the easiest way I've found it to be, and you just kinda have to mess with it a little bit. We can take our excess, once everything's in, and trim it up. You can just use a little bit of scissors right here, to make a clean flush cut, and then put the rest in there. Now what we want to do, is we can take our little plastic foot, and notice the arrow, so what this is gonna do, they're going to be pointing towards each other whenever they're installed, so gonna be facing towards the inside of the bar, and then all we need to do, is take this, put it right on top like that, turn over, you can kind of start to push it into place, like that, and then with the arrow facing in, just go right here, and snap it into place. We're gonna do that same exact thing on both sides, and while we're here, you might as well remove this, because we will need that to be removed, to install the next bracket. Now you want to grab the 145. So this is going to be the front bar, so grab those, make sure they match, and what we're going to do, is take that bolt we just took out, it goes through that, and we're going to have to kind of hold this with our finger on the back end, so it doesn't pivot, and get that threaded in. We don't have to thread it all the way down, but just get it started, so it'll just sit there and hang for now. And we're going to use another 145 bracket, on the other side. Now we can go ahead and put it up on our roof.


Информация по комментариям в разработке