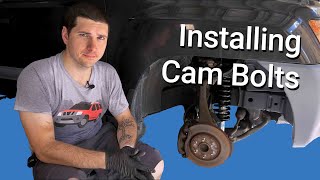
How to install caster and camber bolts in your Ford Ranger. If you remember a while back, I released tutorials on replacing the upper control arms, lower ball joints, and tie rods for this truck. I am working with a 1998 2wd model and you’ll find a similar up to 2012 and possibly on the 4wd models as well. These trucks usually have a fixed setting from factory and cannot be adjusted unless you install new bolts. While these bolts are only replaced on the upper control arms, they are able to do two adjustments which is camber and caster angles. Typically a kit in purchased, they may come for each side or in one kit for both sides. Four bolts only require the replacement. #ford #fordranger #mazdabseries
Website: http://4diyers.com
Patreon: / 4diyers
Facebook: / 4diyers
Google Plus: https://plus.google.com/+4DIYers
Twitter: / 4diyers
Instagram: / 4diyers
Tumblr: / 4diyers
Pintrest: / 4diyers
Tools/Supplies Needed:
-21mm socket and wrench
-ratchet set
-caster and camber bolt kit
-torque wrench
-jack with axle stands
-hammer
Procedure:
Now in order to replace these bolts, you’ll need safely elevate the vehicle. The wheel doesn’t necessarily need to be removed, but it does provide a little more room and I’m also able to show you how the adjustments work. There are rubber covers which I already have off, they’ll most likely need to be removed and are simply held in with plastic clips.
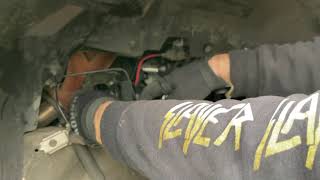
Using a mixture between a ratchet with sockets and a wrench, loosen the nuts for the bolts. If they’re excessively tight, use a johnson bar for added leverage. You’ll usually want to replace one at a time, trying to keep the adjustment fairly close. Now to give a view once that nut is removed, you can see the factory bolts are locked into place with a squared plate.
You can use a hammer to lightly tap out the old bolts, these are getting replaced so if the threads get damaged, it’s not an issue.
The new bolt needs the plate installed to the head, then a washer which goes against the frame bracket, this goes through the control arm bushing, then another washer, cam plate, and finally the nut. These are stover locking nuts which have their threads distorted to provide fraction and pressure, preventing them from loosing.
Reinstall the new bolt with plates and washers.
Then tighten, but don’t torque them just yet as the vehicle needs to be on the ground to preload the bushings. Use both a wrench and ratchet while tightening to prevent the control arm from moving, throwing off your existing adjustment too badly.
Moving onto the other side using the same process. Again do one bolt at a time, this time around I will be showing how these adjustments work. Poor alignment can result in excessive tire wear and or irregular handling.
Due to the separate movements for each of these bolts, they can adjustment both the camber and caster angles. When moving the front bolt, the cam rides against the edges of the frame brackets for the control arms and this pulls the control arm in and out. When it’s pulled in, this not only pulls the spindle closer to the frame, but also pull the upper ball joint towards the front of the. If the control arm is pushed out, this shifts the ball joint towards to rear of the truck.
Again with the rear bolt, this also has the same affect on the control arm. Pulling the control arm in, pulls the ball joint towards the rear of the truck and pushing it out angles the ball joint towards the front of the truck.
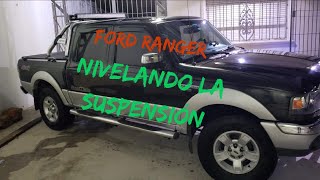
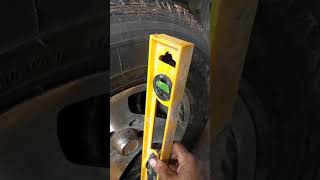
Once both sides have been replaced, ensure the truck is on a level surface. Loosen each of the bolts slightly, ensuring the bushings are relaxed, then torque. The torque specs for these bolts are 83 to 113 ft lbs. Once the bolt replacement is done, it is necessary for the truck to get an alignment.
Thank you to all those who watch my videos and support my content. Don't forget to subscribe to my channel for future tutorial videos and like my video if you found it helpful. New videos are always being uploaded every week!
© 4DIYers 2013
All Rights Reserved
No part of this video or any of its contents may be reproduced, copied, modified or adapted, without the prior written consent of the author.


Информация по комментариям в разработке