Complete Carburetor Disassembly and Cleaning | TVS Apache & Pulsar Series Carb Maintenance Tutorial
Description:
Welcome back to Mega Piston! In today’s video, we’re getting into the nitty-gritty of motorcycle maintenance with a complete disassembly and cleaning of the carburetor. This tutorial is applicable for a range of popular bikes, including the TVS Apache 160 2V, Apache 160 4V, Apache 180 2V, Apache 200 4V (2018 model), as well as the Bajaj Pulsar 200 and Pulsar NS 200. If you’ve been experiencing issues like poor fuel efficiency, rough idling, or sluggish acceleration, a dirty carburetor might be the culprit. I’ll guide you through the entire process of taking apart your carburetor, cleaning each component, and reassembling it to keep your bike running smoothly.
What’s Inside This Video?
In this in-depth tutorial, I take you step-by-step through the process of disassembling the carburetor, introducing you to each component along the way. From the float and float chamber to the pilot jet, main jet, choke needle, diaphragm, and spring, I cover every part that plays a role in the carburetor’s function. This video is perfect for both novice and experienced riders looking to maintain their bike and ensure optimal performance.
Key Topics Covered:
Why Clean the Carburetor?: I start the video by explaining why it’s essential to keep your carburetor clean. Over time, dirt, debris, and fuel deposits can clog the jets and passageways, leading to various performance issues. Regular cleaning is key to maintaining fuel efficiency, throttle response, and overall engine health.
Tools You’ll Need: Before diving into the disassembly, I go over the tools and supplies you’ll need to get the job done right. From screwdrivers to carburetor cleaner and compressed air, having the right tools on hand will make the process much easier.
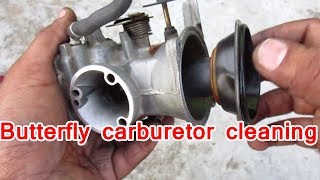
Disassembling the Carburetor: I carefully walk you through the process of disassembling the carburetor, starting with removing it from the bike. As I take apart each section, I introduce you to the key components, explaining their roles and why they need to be cleaned. Here’s a breakdown of what you’ll learn:
Float and Float Chamber: The float controls the fuel level within the carburetor. I show you how to remove it and inspect the float chamber for any signs of dirt or damage.
Pilot Jet and Main Jet: These jets regulate the flow of fuel at different throttle positions. I explain how to remove and clean them to ensure proper fuel delivery.
Choke Needle: The choke needle enriches the fuel mixture during startup. I demonstrate how to clean it and check for wear.
Diaphragm and Spring: The diaphragm and spring are crucial for regulating the carburetor’s air-fuel mixture. I show you how to handle these delicate parts and ensure they’re in good condition.
Needle Jet and Jet Needle: These components work together to control fuel flow at mid-range throttle. I explain how to clean and inspect them for any signs of wear.
Cleaning Each Component: After disassembling the carburetor, I demonstrate the proper techniques for cleaning each part. Whether it’s using carburetor cleaner, a small brush, or compressed air, I cover the best methods to remove grime and deposits without damaging any components.
Inspecting for Wear and Damage: While cleaning, it’s important to inspect each part for signs of wear or damage. I point out what to look for, such as worn jets or a damaged diaphragm, and discuss when it might be necessary to replace certain components.
Reassembling the Carburetor: Once everything is clean and inspected, I guide you through the reassembly process. I show you how to carefully put each part back in its place, ensuring that everything is properly aligned and secured.
Testing the Carburetor: After reassembly, I explain how to test the carburetor to make sure it’s functioning correctly before reinstalling it on the bike. I also discuss any adjustments that might be necessary to fine-tune the carburetor’s performance.
Why You Should Watch This Video:
Detailed Step-by-Step Guide: Whether you’re new to carburetor maintenance or looking to refresh your skills, this video offers a thorough, easy-to-follow guide to disassembling, cleaning, and reassembling your carburetor.
Applicable to Multiple Models: This tutorial is relevant for riders of the TVS Apache 160 2V, Apache 160 4V, Apache 180 2V, Apache 200 4V, Bajaj Pulsar 200, and Pulsar NS 200, making it a versatile resource for many enthusiasts.
Additional Resources:
Links to Tools and Parts: Check the description for links to the tools and carburetor cleaner used in this video.
Related Tutorials: Interested in more motorcycle maintenance videos? Be sure to explore my other content on Mega Piston.


![Apache Carburettor Cleaning : 160/160 4v/180 [Detailed Guide]](https://i.ytimg.com/vi/Rinig2ld5aM/mqdefault.jpg)


Информация по комментариям в разработке