Bert explains some of his best leak search tips. We use his tips for leak detection at Kalos, and although leak detection can be intimidating for beginners, it absolutely MUST be done right.
Before you start any type of leak detection, you must confirm that the system is low on refrigerant. When you confirm that a system has a low refrigerant charge, you then need to estimate how low the charge is so that you can get an idea of the leak's size. Then, you can find the leak.
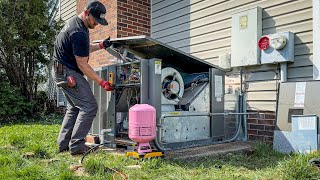
The visual inspection comes first. You will want to look at common problem areas often touched by humans, such as joints. In many cases, the refrigerant or oil will leave spots or a trail where it has leaked; shiny pipes may look dull or wet. Check for discoloration of oil on top of the water in the drain pan as well. Leaks may be larger and faster on the high side of the system, so try to pinpoint the exact area when you have leaks at the outdoor unit. You'll also want to check the capillary tubes, look for oil lines, and watch out for rust on the accumulator.
After you find a spot visually, you can bring out your electronic leak detector (heated diode, infrared, or ultrasonic). Know your electronic leak detector's limitations; otherwise, you might unknowingly pick up false positives. Move the leak detector from top to bottom; if you start from the bottom and go up, you might get a false point because the refrigerant is heavier than air and sinks. Once you get a hit, do a bit more leak detection before going back and confirming that you still have the hit. Then, you can use a liquid leak reactant on the possible leak area; bubbles will constantly form over the leak. (However, it's harder to use bubbles to confirm leaks between fins; in those cases, make sure you confirm it with your detector by going back several times.)
Evaluate the leak to see if you have a leaky joint, if you can potentially repair the leak, or if you can take another course of action. Sometimes, you may need to get access to the chase to assess the line set for leaks. Schrader leaks are possible, but they are often not the main culprit of major leaks, so keep going through the entire system after you find one leak (or get a hit on the Schrader ports). Confirm Schrader core leaks with bubbles, too. Leaky refrigerant caps hold oil, so check those if you get a hit on the refrigerant caps.
After you find and evaluate the leak, gather all the information you need from the system and the customer to determine the next course of action. Check for warranty information and see if labor and parts are covered. If you do a replacement, you need to think about replacing the filter-drier and recovering the refrigerant from the system.
If you still can't find the leak after following all of these steps, talk to the customer about your options, including quoting and performing a line isolation test.
Read all the tech tips, take the quizzes, and find our handy calculators at https://www.hvacrschool.com/.


Информация по комментариям в разработке