Admin How To Create A Stamp Template
"Hello everyone, my name is Sinuhe, and in this video, we'll show you how an admin can create stamp templates. It's a very simple process. The first thing we need to do is locate 'Stamp Templates' on the left-hand side of the screen. Here it is, and we are going to click on it—perfect.
We are adding a new stamp template, so I'm going to select the button at the very top of the screen, 'Add a Stamp Template.' I'm going to click on it—perfect. Here is where we are going to create our stamp. The first thing we need to figure out is if we are creating this stamp for our company or on behalf of another company. In this scenario, I'm not creating the stamp for my company; I'm creating this stamp for one of our clients, MBL Permian LLC. This specific client is coding and signing invoices through the platform for the first time, so we need to create their first stamp. After they have an authenticated approver, they can create stamps on their own. However, the first time has to be created through us, the provider. So, I'm going to recreate this stamp template that they usually use.
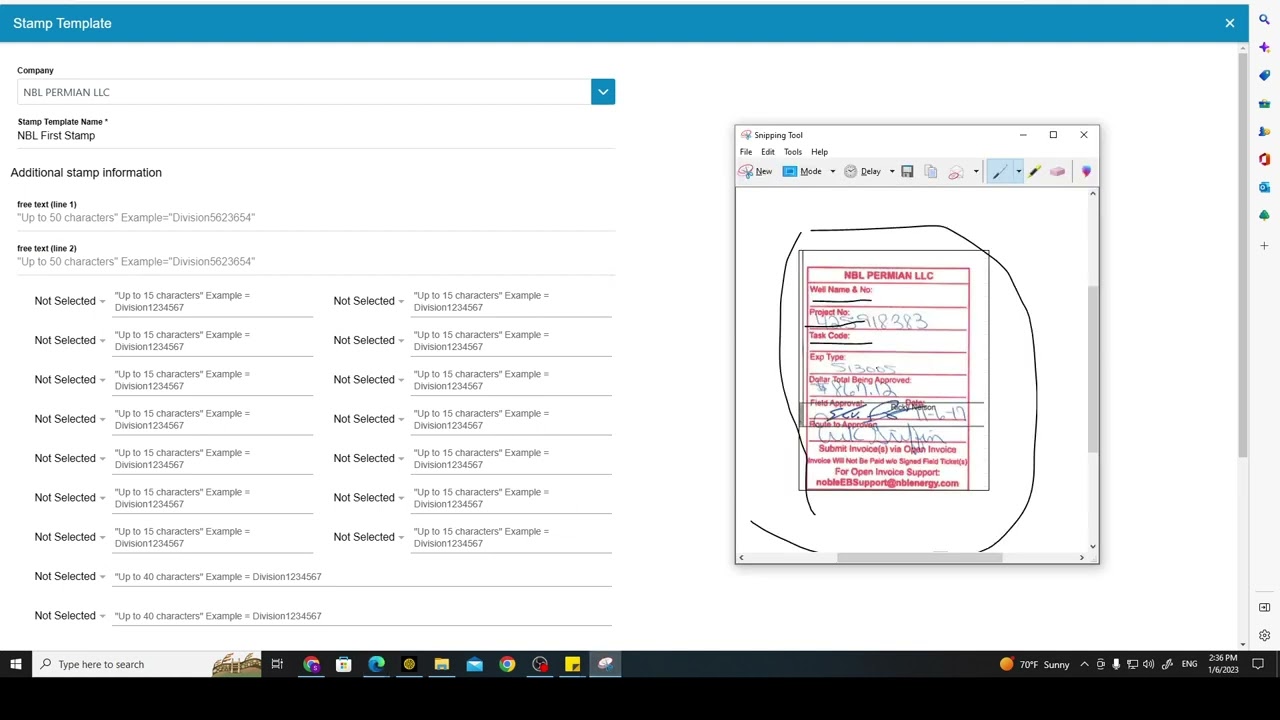
Alright, the first thing we need to do is name the stamp template. I'm going to name this one 'MBL First Stamp'—perfect. In addition to stamping information, in line number one and line number two, you can enter freeform messages. Here you have up to 50 characters. This specific client does not have any message at the top of the stamp; they do have one at the bottom. For that message, I'm going to use our note section. But first, I'm going to add all the labels on my stamp. So, the first one is 'Well Name' and 'Well Number.' I'm going to select 'Well Name' here and 'Well Number' over here—perfect. Now, I'm going to select 'Project Number' and 'Passcode.' Project number, I'm sorry, 'Project Number' and 'Passcode,' here it is. Alright, 'Expense Type' and 'Dollar Total Being Approved.' 'Expense Type,' here it is, and 'Dollar Approved'—perfect.
Now, I'm going to enter this message that they use at the bottom of their stamp, and I'm going to add that message here in our note section—perfect. This is a stamp template preview. This is how the stamp is going to look. As you can see, we have the name of the company at the very top, all the labels, and the note, the message that they usually have at the bottom of their stamp, is right here. So, if everything looks good, the only thing that you have to do now is simply click on 'Submit Stamp Template,' and here's your stamp template. It's always going to be at the very top of the list. You can click on 'Preview' to see how that stamp looks. If something needs to be updated from this stamp, you can always go back, click 'Edit,' and change any labels or add any message. You can always do so and click 'Submit Stamp Template' to update it—perfect.
So, this is how an admin can create a stamp template on behalf of another company. It works the same when you create stamp templates for your own company. A very simple process. Thank you very much for watching."
Certainly! Here's the information organized into steps:
1: Accessing Stamp Templates
Locate 'Stamp Templates' on the left-hand side of the screen and click on it.
2: Initiating Stamp Template Creation
Click on 'Add a Stamp Template,' the button at the top of the screen.
3: Determining Company
Decide whether the stamp is for your company or on behalf of another company. In this scenario, it's for a client (MBL Permian LLC).
4: Naming the Stamp Template
Name the stamp template. Example: 'MBL First Stamp.'
5: Adding Freeform Messages
In line one and line two, enter freeform messages (up to 50 characters each). In this case, no message at the top.
6: Selecting Labels
Add labels to the stamp, such as 'Well Name' and 'Well Number,' 'Project Number,' 'Passcode,' 'Expense Type,' and 'Dollar Total Being Approved.'
7: Entering Bottom Message
If applicable, enter the message usually placed at the bottom of the stamp in the note section.
8: Previewing Stamp Template
Review the stamp template preview to ensure it looks correct.
9: Submitting Stamp Template
Click on 'Submit Stamp Template' to finalize and save the stamp template. It will appear at the top of the list.
10: Editing or Updating
If changes are needed, go back, click 'Edit,' and make necessary adjustments. Then, click 'Submit Stamp Template' again to update it.
11: Conclusion
That's how an admin can create a stamp template on behalf of another company. The process is similar when creating stamp templates for your own company. A straightforward process.
Reach out to us at
1-800-375-0967 or visit our website at https://www.entermyinvoice.com/
Linkedin https://www.linkedin.com/company/ente...
Check out our app
https://play.google.com/store/apps/de...
https://apps.apple.com/ca/app/o-g-e-s...

Информация по комментариям в разработке