Learn How to Wrap Your Vespa Scooter with this Justin Pate tutorial https://www.rvinyl.com/Vinyl-Wrap-Res.... Completely change the look and feel of your Vespa or Aprilia scooter with a premium quality wrap from Rwraps, 3M, Avery Dennison or ORAFOL.
In this How-To video for our Rvinyl, you're going to get great tips and tricks on how to wrap a Vespa scooter with color change film Vespa scooters can be a challenge to wrap.
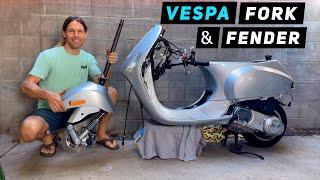
Because of all the raised objects and tight gaps on the Vespa scooter, it's highly recommended to take all the pieces off and document where all the screws and bolts go for an easy reinstall.
Place the parts in a nice, safe area so they don't get lost or damaged during the install.
And for a great install, make sure you get the right tools from Rvinyl that includes cleaners, knives, squeegee with buffers, tucking tools and application glove.
Always unbox the material from Rvinyl safely and they'll come in packages that look like this.
Inside each package is an easy instruction guide for how to wrap a scooter as well as other promotional materials.
It's very important to take extra time and clean the Vespa scooter. The reason why is a lot of dirt and oil can build up on here, so spray the microfiber towel and then clean the main area. Once the main area is super clean, then you really want to make sure you focus on key areas like on the underside, where particularly a lot of oil and dirt can build up.
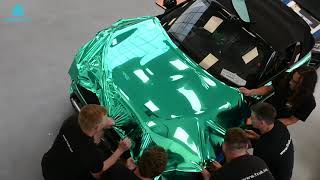
Now we're ready for install. And in this video, you can see a wide variety of tips and tricks for different shapes as the installer skills need to change and adapt for each one.
So here on this giant curvy section on the main area, it's tacked to the front. The material is rolled up, so it's easy to hold and material lightly warmed.
Now, the film is anchored on the body line. And once this is set now, the larger piece is installed on the main area.
Heat is again applied in the materials stretched. Be sure to stretch it right in the middle because if you stretch correctly when you got heat on the upper areas, the material literally shrinking a place.
That's because the color change material from our Rvinyl has PVC. This means the material has memory, which means it can shrink when it's heated. So once it shrinks, it makes the wrapping process much, much easier, and it holds better for the long term.
For recessed areas like the one in the front, the material can often be taken to the body without having to use heat because premium cast film is being used in this case. And here the film is being formed into this recessed area, then taken to the outside edge.
Here the blade can run along the edge because there's nothing behind it.
Once the blade runs from one side to the other, the excess film is removed and then heat is added to make sure all the edges are sealed. Always go round all the edges, 100 percent to activate the adhesive and then once done, go over the main area.
Here are the materials heated and relaxed towards the top point evenly. Always working in sections is key to avoid overstretching the film. Once the material is on this upper edge now here, the bottom access film is cut away. Notice that the entire underside of the scooter doesn't have to be wrapped. That's because it's out of view, and this will help save the installer lots of time and avoid overstretching here for the front recessed area, this area can be installed in one piece.
We now move on to this very interesting shape, which is the floorboard area for the best scooter.
So by wrapping it in three pieces, the material holds the surface much better and when making types of overlaps like this, it's always a good idea to use 3m knife or tape. This can be purchased at Rvinyl.
So here you can see the excess film removed from the piece in the middle, which covers the pieces on the site. There's no cutting directly on the surface, which is safe for the pain, or is that heat to the overlaps to make sure they stick nice and strong. And when done properly, it looks like one piece, but it holds up really well because there's no tension with the three piece install. And speaking of three pieces, it's highly recommended to wrap the front section in three pieces as well. This is a giant compound curve.
Now the material will hold the surface for the long term, and it won't fail.For this section here, because a part is going on top. There's no need to wrap fully behind it. This will help save the installer type, so know what is covered and not covered.
And as you can see, the pieces that were wrapped in multiple pieces look absolutely like one piece. That's because the overlaps completely disappear on the body lines that requires professional skills. But after watching this video and getting some practice, you can definitely master these techniques. And if you can wrap a Vespa scooter like this, you can pretty much wrap anything.
#Rvinyl #Rwraps #ScooterWraps


Информация по комментариям в разработке