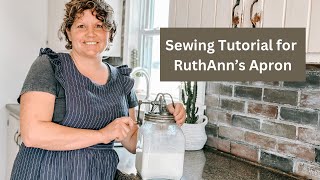
I recently took a sewing class and learned how to make this Japanese style, linen cross back apron. With just a few supplies and this simple step by step sewing tutorial, you can also learn how easy it is to make this apron.
Linen Fabric Apron found at Target: Please visit the blog for the direct link
I love linen fabric and often use it in my home. Everything from linen towels, bedding, and clothing. The first cross back linen apron I made, I purchased 100% linen fabric by the yard. However, that can be really costly. So, when I discovered this tablecloth that is 100% linen for under $25.00, I knew I had found a good deal.
Linen Pinafore Apron Supply List
For making my apron I used
1 Linen Tablecloth or use 2 yards of fabricCutting MatCutting RulerScissorsThreadIron
DIY Linen Apron Cut List
Measure just above your bust line and add 8” or 10” depending on how loose you want your apron to fit. Mine was 40” plus 10”.
Then, decide how long you want your apron to be. Measure from the top of your bust line to the bottom of where you want the apron to be. Add 3” inches to that original measurement. So, mine was 33” plus 3”.
Your main apron piece will be the above-figured measurements so, I started with a rectangle piece of fabric that measured 50 x 36.
2 shoulder straps that measure 22” x 5”.
2 pockets that measure 10” x 9”.
Linen Cross Back Pinafore Apron Sewing Instructions
Cut a rectangle piece of fabric into the dimensions that you figured above. Again, for me, my rectangle was 50” x 36”
Then, cut the straps for the apron. They will need to be cut to 22” x 5”.
Cut two rectangles for the pockets that measure 10” x 9”. If you choose to have smaller or larger pockets, then cut them to your size preference.
Take the large rectangle apron piece, and on the sides of the apron that will be the back edges (for me this was the 36” section), press 1/2 inch with the iron, then fold over another 1/2 inch to hide the raw seam and press again.
Sew down the two sides using a 1/2 seam.
Press the top edge of the rectangle down by 1” and then fold over and press down another 1” to hide the raw edge. Don’t sew this area, just yet because you still need to place your straps.
Linen Apron Straps
Fold the straps in half long ways. For the linen fabric, there really isn’t a right side or wrong side. However, if you are using a printed fabric, then you will want the right sides together.
Sew 1/2” seam all the way down the side of the strap, back stitch on both ends.
Turn the straps inside out and place the seam on the center back of the strap. Press flat.
Linen Apron Strap Placement
Find the middle of your apron by folding it in half. Just lightly press the center so that you know where it is or mark it with a straight pin.
Unfold the pressed edge so that you are working with the upper raw edge of your apron.
Place the measuring tape in the center of the apron that you have marked, and then measure 3” over to the left and pin one of the straps in place. The seam side of the strap should be facing up towards you. Then measure over 3” to the right and pin the other strap in place.
Then take the unpinned end of the right strap and pin it to the left back side of the upper edge. Then, take the unpinned end of the left strap and pin it to the right back side of the upper edge. I know that this can be confusing, so please watch the video to understand this step a little bit better.
Sew a straight line down the raw edge of the top of the apron to hold the straps in place.
Then, lay your apron back out with the wrong side up. You will want to fold the raw edge of the apron back down, but the straps will now be facing up. Pin them in place. Again, the video shows and explains this in a much easier way.
Then, you will sew two straight lines down the top of the apron where the straps are. You will sew along the bo
Set apron aside to work on the pockets.
Linen Apron Pocket Placement
Fold the top part of the apron pocket down 1” and press, then turn down another 1” and press again. Sew a 1/2” seam.
Fold the other 3 sides of the pocket edges in 1/2” and press.
Try the apron and decide where you want your pockets. Pin them in place.
Then take the apron back off and measure the distance between the edge of the pocket, and the distance between the bottom edge and the bottom of the pocket. You will want to be sure that both pockets are the same on each side. Again, please see video for full tutorial on how to do this.
Sew the pockets in place.
Linen Apron Hem
Try the apron back on and determine how long you want the apron to be, trim if needed.
Then, turn up 1/2” and press, turn up another 1/2” and press.
Sew hem.
Visit the blog: https://rockyhedgefarm.com/blog/how-t...


Информация по комментариям в разработке