Click for more info and reviews of this etrailer Trailer Hitch:
https://www.etrailer.com/Trailer-Hitc...
https://www.etrailer.com
Don’t forget to subscribe!
/ etrailertv
Full transcript: https://www.etrailer.com/tv-install-e...
How's it going Ryan here at etrailer.com. Today on our 2017 Chrysler Pacifica, we're going to be taking a look at and showing you how to install the etrailer.com Class III trailer hitch receiver. Now right away, this hitch is going to be visible, but since it does sit further back and because of its finish, it's not really going to be all that noticeable especially when the band is sitting down on the ground. And that finish is going to be one of the things that really sets us apart from some of the others. It's going to be a matte black carbide finish, so it's going to be really scratch resistant and really hold up well to elements and stay looking good for a really long time.Now this is a Class III hitch, so we're going to have that two inch by two inch receiver tube opening and a reinforced collar for extra strength. Now this is going to have these standard five, eight size pinhole.
I'll keep in mind a pin and clip does not come included, but if you need one, you can find it here at etrailer.com. Our safety chain openings are a plate style. They're not huge, but they're going to sit a little bit further back past our pin, so it should give us more than enough room to use just about any size hook that you might have.Since Chrysler Pacific cars are very versatile vans and many of their owners are very active and family oriented, they're going to use that vehicle to do a little bit of everything. Well, since our hitch has that two inch by two inch opening, it's more or less going to give us an endless supply of different types of hitch mounted accessories we can use, whether it comes to cargo carriers to haul some extra stuff on the back of our van or even some bike racks so we can hit the trails together with our family. Now, as far as the hitch's weight capacities go, we're going to have a 400 pound maximum gross tongue weight rating.
So, that's going to be the amount of weight pushing down on the hitch. So it's going to work for one to four bike racks and many heavy duty cargo carriers.As far as the hitch's maximum gross trailer weight rating goes, it's going to be 4,000 pounds. So that's going to be the amount of weight pulling on the hitch. So that's the weight of your trailer plus anything that you might have on it. Also, can be used with the weight distribution system, which is a separate component, but if you are using one of those, weight capacities do increase.
The maximum gross tongue weight rating goes up to 500 pounds and the maximum gross trailer weight rating goes up to 5,000 pounds. However, I do want to point out, it's always a good idea to double check with your owner's manual to make sure your Pacifica can pull on how much weight. So overall, really good looking versatile hitch that's going to allow us to bring your boat to the Lake or even throw some luggage on a cargo carrier when you and the family are headed on vacation.Now I'm going to give you a couple of measurements and you're going to use these to help figure out which hitch mounted accessories to get. From the ground to the top inside the edge of the receiver tube opening, it's going to be about 13 inches. So if you plan on doing some towing, chances are pretty good, you're going to need to get a ball Mount with a rise.
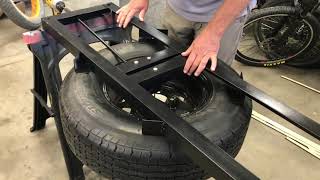
From the center of the hitch pin hole, to the edge of our rear bumper, it's going to be about five inches and you're going to use that measurement to help figure out if any folding accessories you might have, can be sorted in the upright position, without contacting the bumper. Now, when it comes to the installation, there is a handful of different fasteners that we're going to have to take off to make room to put our hitch into place, but nothing's really that difficult to get to, and it's relatively straight forward. Speaking of which let's go ahead and put the hitch on together now.To begin our installation, we're going to be working underneath the back of our Pacifica. We're going to need to remove this underbody panel. So to start, we're going to have a series of eight millimeter screws along this edge that we're going to need to remove. So, ones that we're going to need to take out, look like this, and if you kind of push up on the underbody panel, we're going to want to take the ones out that are connecting the plastic to our underbody body panel. If you keep following that panel to our driver's side wheel well, we're also going to have one more eight millimeter right here. We'll use our wrench and socket to take that out. It's going to be a little tricky to see, but we're going to have two more of those same fasteners along this edge here. So you'


Информация по комментариям в разработке