In this week’s episode of Embroidery Hub, Willy shows you how easy it is to make embroidered mesh caps. These custom mesh caps are very popular right now, so taking advantage of this hot trend will raise your profits and bring in customers looking for custom embroidered caps.
Watch this video to learn more about topping: • 4 Best Water Soluble Stabilizers and ...
Learn how to embroider on three sides of a cap here: • Front and Side CAP EMBROIDERY - 3 DES...
Check out videos related to cap embroidery:
• RICHARDSON CAPS 3D Puff Embroidery Ch...
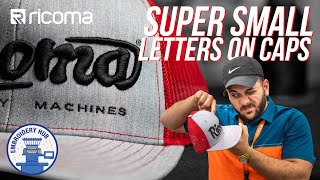
• Embroidering Small Letters On Caps | ...
• Видео
• WE BROKE A NEW RECORD! | RICHARDSON C...
Learn more about the MT-1501 here: https://ricoma.com/US/machine/mt-1501
Join our Facebook Embroidery & Custom Apparel Mastery Group: / embroiderymastery
Join the Ricoma newsletter for educational blogs, videos, and live webinars: https://info.ricoma.com/newsletter
To learn more, schedule a virtual demo today: https://ricoma.com/US/virtual-demo
Get our latest Ricoma embroidery YouTube videos sent straight to your Facebook Messenger: https://manychat.com/l2/RiCOMA.us
To learn more about our embroidery machines, visit our website: https://ricoma.com/US
For this project, we used:
MT-1501
Cap hoop
Richardson 112 cap
75 by 11 Sharp Point needles
40 weight thread
3 sheets of tearaway stabilizer
Topping
Clips
Pins
Let’s discuss profit potential:
The Richardson 112 cap cost $3.50 at wholesale. The stabilizer and topping cost $0.50. That means the overall cost of this cap is $4. You can sell front embroidered caps online for $25, but you can add $5 to your sale price because you are also embroidering the sides. So, you can sell each cap for $25 to $30, giving you a profit of $21 to $26.
To start making embroidered mesh caps, insert the hoop into your hoop station, place the stabilizer on top, and put the cap on the hoop. Before locking the cap in place, move the stabilizer to the mesh side you will be embroidering on. Then you can lock the cap in place and insert the hoop into the machine.
Now go to the panel, press File, choose your design, and press OK. Go to the Design Settings and select the cap hoop option. After that, select the colors you want to use and its sequence. Make sure to set a frameout option before the machine embroiders the mesh side, so that you can pin the topping to the side. You can do this by pressing the F button. Once you’ve set your colors and frameout, press OK, and set the speed to 800 stitches per minute. Then move the design to the far right so the machine turns the cap and gives you access to its side. That way, you can stretch out the mesh, flatten it, and hold it in place with the clips. Move the design back to the center and use the arrow keys and needle number one to make sure you are centered on the cap. Lock the machine, press the trace button, then press Start. When the machine finishes the center design, it will frame out. When it frames out, pin the topping to the side of the cap, and press Start so the machine can embroider the mesh side. After the embroidery is done, take the cap off the hoop and rip off the topping and stabilizer.
And there you have it! You now know how to make embroidered mesh caps, which opens up a new product line for your business. Custom mesh embroidery is an easy and unique application method that will give you a competitive edge against other businesses.


Информация по комментариям в разработке