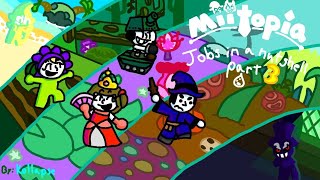
In this video, I solo the infamous Tower of Despair, the ULTIMATE solo challenge in Miitopia. Can I beat the Red Fiend, Boss Snurp, Light Sage, and more, with only a single Mii? (As well as a cleric traveler) Watch the video (And subscribe of course) to find out!
------------------------------------------
►Tips:
Below are some tips for soloing the Tower of Despair!
-- Personality --
The best personality for this challenge is definitely cool. Cool has a chance of ignoring status effects, allowing you to easily beat the Elite Goblins, and have a chance to bypass the Boss Snurp's status effects. It also gives a chance to dodge attacks, which saved my run multiple times during the Boss Snurp fight.
-- Job --
The best job for this challenge is the Elf. It has a ton of useful qualities, such as a barrier via Forest Aegis, high attack, magic, and defense stats, a healing move, an MP restoration move, powerful offensive moves such as Hail of Arrows, and more.
-- Traveler --
Travelers are temporary clients that accompany you on quests. They can be any job, but the best job for this challenge is likely Cleric. They can heal you a lot, and have a great damaging skill, Aura. This challenge likely isn't possible without a Cleric traveler. Not only that, but ALSO, they can one-shot the Red Fiend via their powerful OHKO (One Hit Knockout) move, Righteous Anger. (Keep in mind that the Cleric traveler can't heal twice in a row, and should heal every other turn.)
-- In Battle Strategy --
This goes over the strategy for all of the floors in the Tower of Despair. Keep in mind you should always use Forest Aegis on your first turn, unless specified otherwise. Also, if your MP drops below 50, use Forest's Blessing. (The MP restoring move) Additionally, the Cleric traveler can't heal twice in a row, and should heal every other turn.
Elite Goblins (1F/GF):
Generally pretty easy. Spam Hail of Arrows, the Cleric will heal you.
Heavy Golem (2F):
Generally pretty easy. Spam Enchanted Arrows or Hail of Arrows, the Cleric will heal you. (Enchanted is better for MP conservation.)
Neon Pharaohs (3F)
The curse is annoying, but you still have a move every 4 turns, although that is a painfully slow number. Just spam Hail of Arrows, and your Cleric should always heal you. Never use Healing Melody on this floor.
Colossal Serpent (4F)
Generally pretty easy. Spam Enchanted Arrows or Hail of Arrows, and the Cleric will heal you.
Gourmet Burgers (5F)
Ridiculoudly easy. Spam Enchanted Arrows or Hail of Arrows, and the Cleric will heal you.
Blue Goddesses and Red Fiend (6F)
This one requires the most luck out of all of the floors. Do not use Forest Aegis on your first turn. Instead, use Dancing Arrow on the Red Fiend. Since it's classified as a normal enemy, it is affected by Dancing Arrow. Repeatedly use Dancing Arrow, and use it until Cleric activates the most luck-based thing in this run, Righteous Anger. Additionally, if you are locked out of using Dancing Arrow due to the Blue Goddesses' status spite status effect, you must use a shield sprinkle to survive the Red Fiend's scythe attack. If you use more than 100HP sprinkles during this floor, or more than one shield sprinkle on this floor, you should probably close out of the game and restart your run, as you need a ton of HP and shield sprinkles for the next two floors. When the Red Fiend is defeated by Righteous Anger, you can safely use Forest Aegis. Use Hail of Arrows and Healing Melody to whittle down the Blue Goddesses' HP from there.
Light Lord and Light Sage (7F)
This is an hard floor, and also slightly luck-based as well. If you use more than 200HP sprinkles, you must restart. Use Horse Whispering twice on the Light Lord, and spam Hail of Arrows to remove the last bit of its HP. From there, use Hail of Arrows and Healing Melody to whittle down the Light Sage's HP.
Boss Snurp's First Phase (Apex)
Pretty easy, as it only uses regular attacks. Use Hail of Arrows and Healing Melody to whittle it down to its second phase.
Boss Snurp's Second Phase (Apex)
Do not use Forest Aegis again when your barrier is destroyed. It'll just be destroyed again in an endless loop. (This goes for the third phase as well.)
Cleric will heal you every other turn. When it doesn't heal you, use HP sprinkles and Healing Melody wisely to survive. (Note: The Boss Snurp's regular attacks deal 85 damage tops, and the Juvenile Snurp's regular attacks, which usually only activate on solo runs, deal 45 damage tops, and only one Juvenile Snurp will use it every turn.) On turns when the Cleric heals you, use Hail of Arrows, Snort, Mounted Attack, or Horse Whispering.
Boss Snurp's Third Phase (Apex)
Same as the second phase strategy, except that the Cleric's heal won't be enough, as the Boss Snurp has 3 moves now rather than 2. Use sprinkles dilligently, and you'll come out on top. (You also have to get lucky with the statuses.)
------------------------------------------
🌟Thanks for Watching!🌟


Информация по комментариям в разработке