Click for more info and reviews of this CURT Trailer Hitch:
https://www.etrailer.com/Trailer-Hitc...
https://www.etrailer.com
Don’t forget to subscribe!
/ etrailertv
Full transcript: https://www.etrailer.com/tv-install-c...
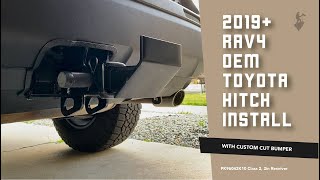
Ryan: Hey everybody, Ryan here at etrailer. Today on our 2016 Toyota RAV4, we're going to be taking a look at and showing you how to install the Curt Class 3 Two-Inch Trailer Hitch Receiver.There's a couple of things I really like about this hitch, and the main one being, the way it's going to look on the back of the RAV4. For the most part, it's going to be completely hidden. Really, the only thing you're going to be able to see is the receiver tube opening. And so, it really just helps maintain that factory appearance. And it's going to be able to do that without sacrificing any clearance.So what I mean by that, the hitch is going to sit up nice and tight against the bottom of the car, giving us some good ground clearance.
And it's also going to give us really good bumper clearance.The end of the receiver tube, it's going to be just about flush with our back bumper. And that should work out really well with those folding accessories. And that seems to be really popular, especially with the RAV4 owners. They like to use those fold up bike racks and cargo carriers.With the hitch sitting in this position, you shouldn't have any issues at all. When we go to fold those accessories out, we're not going to have to worry about them contacting the back of our Toyota.Since this is a Class 3 hitch, it's going to give us that two-inch by two-inch receiver tube opening.
That's a very common size, and a ton of different types of accessories will work out well with it. It's going to have the standard five-eighths pin hole. Now keep in mind, a pin and clip does not come included, but if you need one, you can pick it up here at etrailer.We're going to have loop style safety chain openings, which are nice and thick. And they're going to give us enough room to use just about any size hook that we might have. As far as the hitch's weight capacities go, it's going to have a 350-pound maximum gross tongue weight rating.
So that's going to be the amount of weight that's pushing down on the hitch. That'll work out real well for those one- to four-bike racks, for example.As far as the maximum gross trailer weight rating goes, it's going to be 3,500 pounds, and that's going to be the amount of weight that's pulling on the hitch. So that is a weight of your trailer, plus anything that you might have on it. I do always like to recommend, never a bad idea to check with your RAV4's owner's manual, to make sure your Toyota can pull that much weight.Now, if you do plan on doing some towing, I would suggest getting some trailer wiring. That way the lights on your trailer will sync up with the lights on the back of your RAV4.
And you'll be safe and legal.Now, something I do want to mention, for those of you that have the automatic liftgate assist, where you put your foot under the bumper, and the hatch will open up. Since we do have to relocate the sensor, that feature is no longer going to be available.However, if it's something that's really important to you, since the sensor is right here in this area, what you could do is leave one of those small panels off. And chances are really good it would then work, because that sensor would be exposed, and be able to pick up the motion from your foot.Now, I'm going to give you a couple of measurements. And you're going to use these to help figure out which hitch mounted accessories to get.From the ground to the top inside edge of the receiver tube opening. It's going to be about 14 1/2 inches. So if you do plan on doing some towing, chances are pretty good you're going to need to get a ball mount with a rise.From the center of the hitch pin hole, to the edge of the rear bumper, that's going to be about 2 1/2 inches, and you're going to use that measurement to help figure out that if any folding accessories you might have can be stored in that upright position without contacting the bumper. So at the end of the day, a hitch you really can't go wrong with. It's going to be really versatile, and look great on the back of your rack RAV4.Now, as far as the installation goes, it's really not too difficult. Everything's pretty easy to get to. However, there is a lot of small steps that we need to do to get the hitch in place. But you shouldn't have any issues getting it done at home, in your garage, or maybe even the driveway.To begin our installation, we're going to be underneath the bottom of our RAV4. We're going to start out on the driver's side. And what we're going to first do is remove this underbody panel.On this edge, we're going to have two plastic push pin style fasteners. Just take a Flathead screwdriver, and pry unde


Информация по комментариям в разработке