Click for more info and reviews of this MORryde RV Steps:
https://www.etrailer.com/Accessories-...
Check out some similar RV Steps options:
https://www.etrailer.com/dept-pg-Acce...
Search for other popular Jayco Eagle Fifth Wheel parts and accessories:
https://www.etrailer.com/vehicle/2017...
https://www.etrailer.com
Don’t forget to subscribe!
/ etrailertv
Full transcript: https://www.etrailer.com/tv-install-m...
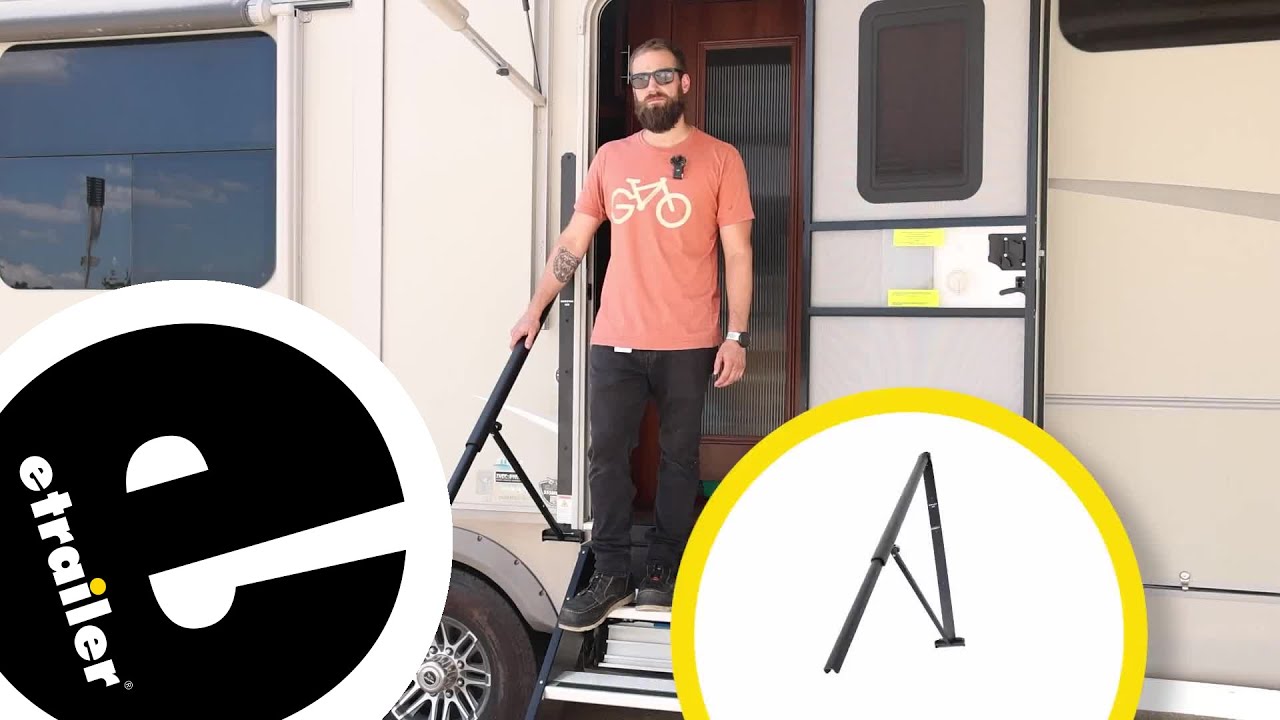
Hey there, neighbor's. Kevin here with etrailer. And today, we're gonna be taking a look at and showing you how to install the MORryde Safe-T-Rail here on our 2017 Jayco Eagle fifth wheel trailer. So the whole reason behind this install video today is safety. This last weekend, me and my family we inchesre out at Carlyle Lake enjoying ourselves. And my mom wanted to step out of the camper and go out and clean the table after we finished dinner, and missed the last step here on our pullout steps, tripped and fell, and when she hit the ground, she ended up breaking her ankle.
And now, the rest of our camping trips for the rest of the year are gonna have to be postponed because she's not gonna be able to make it up and out of the camper while she's in a wheelchair. Now this could have been easily avoided with a much more stable set of stairs and a handrail that would go the entire length of the stairs. And that's exactly what we did today. I've swapped over to some fold out steps, so we have an nice stable base to start with. And for the handrail, I've removed the old wobbly, generic, old handle that was on every single trailer from the dawn of time here.
And this just honestly doesn't really cut it in most circumstances. Especially if you have children that are coming up and down your camper steps, with this being a fifth wheel, it's sitting a lot higher up than your typical travel trailer, so it's just a real safety hazard for those little kids and anyone who's a little bit older. Now, when we pop this out, we don't have, you know, maybe the first step of this is gonna have coverage with our old handle. With our new one, we can easily pop this out and we now have 54 inches of handrail here, which brings us all the way safely to the ground. So even if we are still using our pullout steps and we didn't have the fold bound steps, we would have the ability to keep our hand on a rail the entire way in and also out of our trailer.
The handrail alone is a major upgrade, but the big thing here is also these StepAbove steps for MORryde to pair it with. And these are gonna give us a nice, stable base because it's no longer just relying on the mounting brackets up on our trailer. Now it has feet that are gonna be touching the ground and giving us that nice, stable step so that way each step we take, whether it's in or out of our camper, is gonna be nice and strong. Now to make sure that this is gonna be a compatible option with your trailer, there's a few measurements you're gonna take first. Now the first one being our width here from our door threshold over to any objects that we might have mounted up on our wall or any slide outs.
So you can see our slide out right here. We have our flange that's gonna stick out past our slide out. We wanna make sure that that's at least four and a quarter inches away from our door entry. And then we also wanna make sure that any awnings or any other kind of attachments, sometimes you might have a light or some other windows. Anything that they wanted to mount to the side of the trailer, all right here. You might also find you have like that little dog leash holder. So if that's the case, you might have to move some of that stuff over. In our case, the awning was more than two and a half inches away, so we did have enough space for the bracket to actually sit here. Now the next thing is making sure that everything is nice and flush. We can't set this where it's gonna be kind of sticking out. So if you do have any kind of trim or maybe like a gasket going over that separates the body of the trailer and then that bottom trim piece that they have, you might have to cut it just like we did and just kind of pry that out a little bit so that you have a nice flush surface for this amount up to. Now down at the bottom here, we wanna make sure that we have enough clearance from the corner of our door threshold down. So that's gonna be 1 and 7/8 that you're gonna need. A lot of times there will also place a light right here so that way when you're stepping in or out of your trailer in the dark, you have some visibility. If that's the case, that is something you would want to have to move to get it out of the way so you can get your bracket mounted up. Now this is gonna

Информация по комментариям в разработке