Click for more info and reviews of this Lippert RV Steps:
https://www.etrailer.com/Accessories-...
Check out some similar RV Steps options:
https://www.etrailer.com/dept-pg-Acce...
https://www.etrailer.com
Don’t forget to subscribe!
/ etrailertv
Full transcript: https://www.etrailer.com/tv-Demo-Lipp...
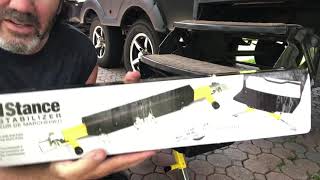
Hello, everybody. This is Jeff at etrailer.com. Today, we're gonna take a look at this Lippert Solid Stance RV step support kit. Now, this step stabilizer eliminate the bounce and instability of your RV steps by adding ground contact to the bottom step. This will help brace your steps to reduce any wear and sagging. Just want to zoom in so you get a closer look at this.
This will get rid of that wobbly feeling when you're using your RV steps. This step stabilizer permanently mounts to your bottom step and it'll extend to the ground. Basically, these legs will adjust individually to work with steps from five inches to 14 inches off the ground. And you can see they can be set at one of four angles by pulling these pins right here. So, if you pull this pin out, you can see that the leg will extend out.
And there's actually four different settings. You can see one, two, three, four. Actually, you could drop it down into the first setting, which would be right there, and that would be your smallest one. If you pull your pin out and then drop it down to the next setting, it would be right there. And you can see that's a little bit longer.
And then the next long is you would drop it down until you get this pole to line up. And then put your pin right through there. And you can see that it's getting you a little bit longer. And then your last setting would be all the way over here. Once you get that hole to line up, put your pin through and just like that.
And then what you'll do is go to the other side. Pull your pin. And again, just line it up with the same hole as on the other side. Put your pin through there. And that would be your highest setting. So, in other words, you have four different holes to put this pin through then they give you four different angles. And then the other nice feature is if you look on the back, it has these two knobs here. If you pull the knob, that'll release the legs out. Whatever height you need. And then they'll lock into place to get you that extra amount of area to bridge the gap. So, this is perfect for uneven terrain at the campground. In other words, if it's a little uneven, you can slide it down that way to make it level up your steps. And then the nice part is when you're all done, just go ahead and retract your step all the way. Do the same over here. And then again, pull your pins. Retract it all the way down and put it in the bottom one to hold it up. And do the same over here. Pull your pin. Retract it all the way down so you can slide your pin underneath. And then that'll hold it out of the way, so it's perfect for storage when it's not being used. Now, this is an easy, permanent installation. Comes with the included hardware right here. Drilling is required. The stabilizer will fold up as you can see against the bottom of the step for storage. You can see here is the four holes that you would need to drill to install the hardware. Specs again, this is for steel RV steps with at least five inches of ground clearance. Give you a few overall dimensions on it. When it's in the stored position like this, if we measure from this end to this end, we're gonna be right at about 22 3/4 inches wide. The height of this, it's gonna be right at 2 5/8 inches tall. And the total depth, in other words, you have your pin here, for the knob in the back here is gonna be right at about 4 1/2 inches deep. Now, the mounting face, in other words, just this portion here, you can see width on that is right at about 13 inches wide. And the depth on that area is about 1 1/4 inch deep. Total weight on this stabilizer is about 6 1/2 pounds. Now, one note I do wanna mention, this should not be used on quad steps or steps that stow into a tight compartment. And the reason is this Solid Stance is 2 5/8 inches tall, so it's gonna add depth to your bottom step. So, you do wanna check to see if any added depth to your bottom step will interfere with stowing. But again, just to show you, if we demonstrate this, we pull this out. Let's drop it to this one. And then we'll do the same over here. We'll line up the hole right there. And then you can see you have that height. And then if, again, you need to take up any extra, just pull the pin and it'll come out to how far you need it. Make sure it's locked into place. Do the same over here. Once you get it locked into place, you do wanna make sure it's level unless you're on uneven terrain, then you'll just level it by adjusting the leg as needed. But again, this pin will lock the legs in place. And the


Информация по комментариям в разработке