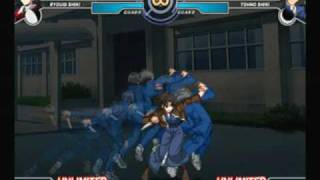
Featuring Windows 10 frame drops.
Notes:
On most characters, wherever there is a 2C in a combo, you can cut the combo
short by doing 5[B] 4C 63214A and still get a midscreen mixup. I decided not to list variants with this ender separately from the normal combos, but it’s
worth keeping in mind as some might find it easier than doing the full combo.
623B is generally followed up with an OTG string into command grab. However,
the OTG string varies depending on character and distance, and is sometimes not
even possible due to a number of factors. On top of that, you have other options
besides command grab in the first place. There’s too many variables for me to
list everything, but I will provide some examples below.
2C 2A(w) 5C 4C and 2C delay 5C 4C can be interchanged a lot of the time depending on preference. This can also help with height adjustment.
2Ax4 starter routes are possible, but they require dash momentum or a counter hit to reduce pushback.
After 2A(w), you want to press 2A as low and as late as possible. You can get away with doing it a bit higher on some characters, but it's pretty necessary for consistency on those with smaller hurtboxes.
The placement of 623B can be adjusted by changing the timing and height of 5C 4C. For 236[A] routes, or combos with only one 5BB, you want the last hit of 623B to connect with the back of the hitbox so that you land close enough to go for an OTG. In longer routes this is less relevant as 623B is done closer to the corner in the first place.
Although it isn't always necessary, 236[A] can be delayed in all combos, and there are a lot of benefits to doing so. Aside from it making the 2C link possible at lower hitcounts, it makes combos much more consistent on problem hurtboxes like Satsuki's, and allows you to still link 2C if you fail to delay 5BB in a crouching confirm. It also gives you one less timing to remember.
For j.236B timing in AT routes, you usually want it as low as possible, so the time it takes for you to land afterwards is as short as possible and your opponent is hit right before they touch the ground. There are still some weird exceptions, but keep in mind that what you want is to create a large enough window to link 2C.
As far as OTG pickups, it's hard to list or even really test every single scenario due to hitcount and distance affecting your options. However, the ones I find myself using the most are:
5B, which is very consistent
5C, which move you forward and can work midscreen
2C, which works on lolis, Ryougi, and Roa
2A, which is consistent on almost everyone but requires you to be closer than others
Other buttons can be added after any of these in order to move you forward or increase the height of the opponent. For example, I use 5B 5A a lot on this video because it works on a large number of characters and is easy.
As far as the combos in this video are concerned, one of these will almost always work provided you are within range. However, characters with smaller hurtboxes will always be difficult to get an OTG command grab on at these hitcounts, so you may want to consider going for the midscreen command grab ender.
If you have questions about the combos in this video, you can contact me on Discord (@Tallgeese#8471).
I'm also planning on making one or two more videos covering corner combo variations and other pickups when I have the time, so stay tuned for those.


![[Touhou Vocal] [C-CLAYS] To the Limit (spanish & english subtitles)](https://i.ytimg.com/vi/M5KygLkSN50/mqdefault.jpg)

![[MBAACC] gaku's Crescent Ciel Combo Video](https://i.ytimg.com/vi/FlmTN2GdF4Q/mqdefault.jpg)


Информация по комментариям в разработке