Full Playlist: • How to Scrapbook
-
-
Must Have Products for every Scrapbooking Project:
Pioneer Jumbo Scrapbook Storage Box: http://amzn.to/1LViPP0
IRIS Large Photo and Craft Keeper: http://amzn.to/1Oa2KlL
me & my BIG ideas 12-Inch by 12-Inch Scrapbooking Box Kit: http://amzn.to/1iiHZKE
Sticko Letters/Numbers Sticker Value Pack: http://amzn.to/1EBV5gv
Stabilo 88 30-Color Pen Set: http://amzn.to/1hzAluJ
Watch more How to Scrapbook videos: http://www.howcast.com/videos/514905-...
Distressing paper for your scrapbooking and other paper crafts is a lot of fun, and some people actually find it to be a little bit of a stress relief. But mostly it's fun. So I'm going to show you a few different techniques on this one piece of paper, and they're actually all illustrated on this scrapbook page. So let me just give you an overview of the techniques first of all.
The edges of the paper are torn, which gives it kind of a ragged appearance to begin with. And then on top of some of these torn edges, we have inking, adding a layer of ink which adds a little extra depth and also adds kind of an antiqued or distressed look to the paper. And then in addition to that, there is actually some stamping and spraying going on in the background. It's kind of subtle, but it's really interesting to see. So let's take a look at some of these techniques. OK.
First of all, tearing, and we have a whole other video on tearing paper, but just briefly you want to hold the paper in your left hand, then tear towards you with your right hand. And the side that's in your left hand is going to be the side that shows this ragged edge, which is really what we are trying to achieve with tearing paper. Technique number two, sandpaper. I have here a sanding block, and I also have two different grits of sandpaper. Any of these will work for this particular technique. I keep the sandpaper in my toolkit just because it's so flat and disposable and easy to use.
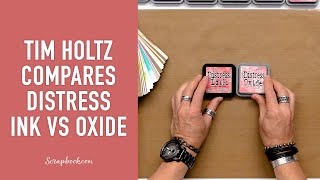
So I just kind of fold the paper around my finger and have at it on the paper. So as you sand, and especially along the edges, you start to take away some of the top layer of that paper. And as you do so, you'll see it starts to turn white, and that is because this paper has a white core. And you can see now how aged that already looks, just with a little bit of sanding. You could continue that or just stop wherever you reach the point that you're happy with your paper. Third technique is distressing with a distressing tool, and there are many different types of distressing tools. This is one I happen to have, and it has a little razor blade right in the middle there, but it's that notch that really helps you get right up against the edge of the paper, and you kind of pull it towards you. And see how it's just turning that end of the paper into really kind of a ragged edge. You actually get a few little crumbs of paper falling off your project here. So those are three different things you can do. Number four, we're going to introduce some color into the picture. So I have some different inks here. I have a chalk ink, and I have some distress inks.
And again, any of these work. They just give you slightly different looks, particularly depending on how you use them. So a chalk ink is just that. It's an ink that is a chalk. So it goes on very dry and very smooth. It's very soft, because they effect is soft and the pad itself is also soft. So just by applying the pad of the ink to the edge of the paper and gently stroking it, you get that aged or antiqued effect. Now let's see what happens with a distress ink pad. And these come in many different colors, as do the chalk inks. So each color is going to give you a slightly different effect. So this one, because of the shape and the size of the pad, you get a different application on your paper surface.
And here I've hit just the edge of the paper with this ink pad. But if you wanted to, you could go in a little bit heavier, and it's almost easier to do that if you lay your paper down, or if you bend your paper. You could experiment with different ways of manipulating this, and it's a good idea to practice before doing this on any project of yours for the first time. And that, again, is of course true of any of these techniques. Try it out first before you use your last precious piece of paper on your beloved project. So those are four ways that you can distress your paper, but you can actually combine some of those techniques together. So on an edge of the paper where I have gone over it with the sandpaper, I can now go back again with the chalk ink and add another layer of distress to it. So I've got a faded layer, and then on top of that I'm adding this brown ink for more of an older look around the edges.
And I did use this distressing to


Информация по комментариям в разработке