How to build the garage diorama ガレージジオラマの作り方
#garage #miniature #diorama
*Index
0:01 Prologue
0:34 Tamiya Bimota TESI 1D
9:50 Wooden floor Diorama
11:28 Lift table Diorama
19:22 Work desk and shelf Diorama
25:00 Make the small items Diorama
32:39 Assemble Diorama
38:36 Complete Photo
オートバイ ガレージの作り方
作ったオートバイ模型を展示するガレージを作りました。
ベースの大きさは幅がプラ板のB4サイズ以内、奥行きは棚の標準サイズが30センチ程度なので30センチ以内です。
壁を作ると高くなり、置く場所が限定されるので作りません。
その代わり棚と机で囲います。
用意するもの
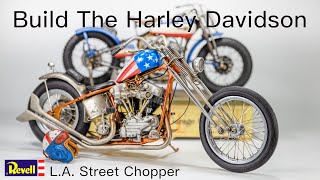
1/12オートバイであれば何でもいいです。
今回は積みプラだったタミヤのビモータ。
古い海外産の模型ばかり作っていたのでタミヤクォリティーにカルチャーショックを受けました。
作るもの
リフトテーブル、作業テーブル、棚、床、
木箱、パーツケース、引き出し、万力、オイル缶、バッテリー、卓上ライト、コーヒーメーカー、電子レンジ、オーディオ、Mac mini、ゴミ入れ、テーブルタップ、レストア中のオートバイ、段ボール箱、図面、看板、雑誌等
アフターパーツ
さすがに工具類をプラ板で作るのは途方もない作業になります。
1/35や1/24スケールですと工具のキットやガレージの備品が豊富ですが、1/12ですと工具類のキットがなくて、ドールハウス的なものとなります。
工具に関しては3Dプリンタの出番かなと思うのですが、今回は手持ちの余ったペーパークラフトを使いました。
コツと完成イメージ
整理整頓されているかもしれないゴチャゴチャな感じにします。
それと、実際のオートバイは意外に小さいです。
オートバイのスケール通りにガレージを作ると主役のオートバイが小さくなって、背景に埋もれてしまいます。
模型的にはガレージは1/15程度で作るとオートバイが引き立ちます。
紙類の工作は紙を薄く割いて作るとリアルになります。
デカールは全てレーザープリンタ用です。
ホワイトベースは厚みがあるので、マークソフターで柔らかくしています。
紙の工作物やデカールは良いアクセントになります。
オートバイ1台が精一杯の小さなプライベートガレージで、定年後の趣味のガレージライフを満喫できる空間が再現できれば成功です。
日本や海外の優れたモデラーさん達が持つプラ板の工作技術を身につけたいので、3Dプリンタは使わずに、ミニジオラマを作り続けたいです。
ありがとうございます。
How to build the motorcycle garage diorama
#garage #miniature #diorama
*Index
0:01 Prologue
0:34 Tamiya Bimota TESI 1D
9:50 Wooden floor Diorama
11:28 Lift table Diorama
19:22 Work desk and shelf Diorama
25:00 Make the small items Diorama
32:39 Assemble Diorama
38:36 Complete Photo
Material
・WAVE bolt set
New R rivet OP531
O bolt 1 OP341
Ovolt 2 OP342
aluminum pipe
brass tube
nickel silver wire
stainless spring wire
brass wire
Plastic rods (round, square, hexagonal, L-shaped, pipe)
plastic plate
copper plate
insect pin (silk pin)
O-ring
Vinyl tube
How to make the motorcycle garage
I made a garage to display the motorcycle models I made.
The width of the base is within B4 size, and the standard size of the shelf board is about 30 cm, so the depth should be within 30 cm.
If you make a wall, it will be high and the place to put it will be limited, so I will not make it.
Instead of walls, I surrounded the motorcycle with shelves and desks.
Make items
lift table, work table, shelf, floor,
Wooden boxes, parts cases, drawers, vise, oil cans, batteries, table lamps, coffee makers, microwave ovens, audio equipment, Mac mini, trash cans, table taps, motorcycles under restoration, cardboard boxes, drawings, signboards, magazines, etc.
I couldn't find a 1/12 scale tool, so I cut out paper parts and used them.
Since it is thin, I applied glue to the edge to make it thicker.
And I used dollhouse parts.
It is difficult to make a large number of tools with a plastic board.
Production hints and production images
Arrange them in a slightly cluttered way.
Also, the actual motorcycle is surprisingly small.
If you build a garage for the size of your motorcycle, your motorcycle will be too small and will be hidden in the background.
In terms of model, if you make it about 1/15 scale garage, the motorcycle will be the main role.
If you split the paper thinly, it becomes a realistic paper craft.
All decals are for laser printers.
The decal on the white base is thick, so I used a mark softer to soften it. This will make the decal look thinner.
Paper crafts and decals are also good accents.
It would be a success if we could recreate a space where you can enjoy your hobby garage life after retirement in a small dedicated garage that can only park one motorcycle.
I would like to continue to learn plastic board production techniques from excellent modelers in Japan and overseas, and continue to make mini dioramas without using the 3D printer.
Thank you all of you!!


Информация по комментариям в разработке