Click for more info and reviews of this etrailer Tonneau Cover:
https://www.etrailer.com/Tonneau-Cove...
Check out some similar Tonneau Cover options:
https://www.etrailer.com/fitguidetonn...
Search for other popular Chevrolet Colorado parts and accessories:
https://www.etrailer.com/vehicle/2024...
https://www.etrailer.com
Don’t forget to subscribe!
/ etrailertv
Full transcript: https://www.etrailer.com/tv-install-e...
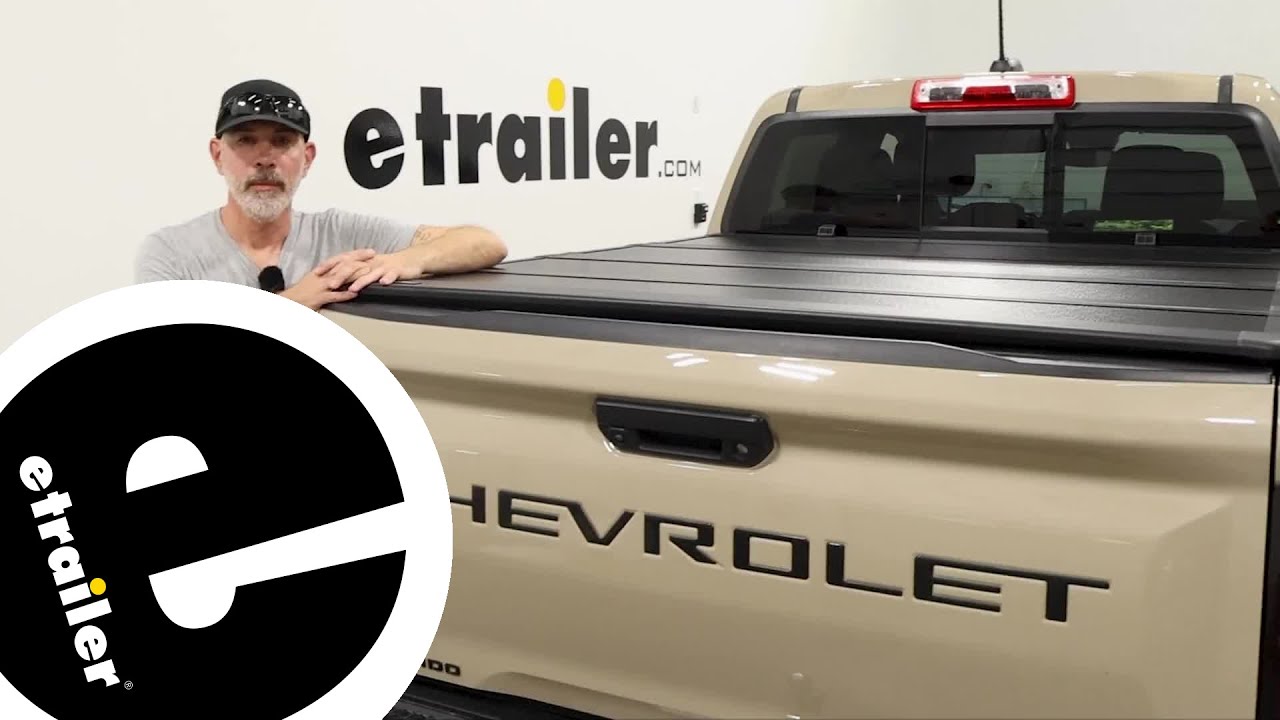
Hello neighbor, this is Curt with etrailer, and today we're taking a look at the etrailer hard fold-up tonneau cover, and we're gonna see how it fits on our 2024 Chevy Colorado. Now, a tonneau cover is an excellent way to protect any of your cargo in your truck bed, either from the elements or from theft itself. And a hard tonneau cover, especially in the anti-theft department, is gonna do a much better job than a soft roll-up tonneau cover that somebody could just come over and slash open with a knife. It has a really nice weather seal all around it, a good bulb seal here at the tailgate, and a nice seal all around the edges. In fact, this is pretty sealed up, I think. Now, no tonneau cover out there is 100% waterproof, but judging by the way that this is closed up all around the edges, I'd say this would do a pretty good job of keeping any water or any road dust or anything like that off of your cargo.
So construction is a fiberglass-reinforced plastic, which is gonna give you a lot of great protection. It gives you a distributed weight limit up here of about 200 pounds. Now that doesn't mean put 200 pounds all in one spot, but generally speaking, if there's some items you need to place up here, it's gonna do a good job of holding them up. Okay, so just to show you a bit of the function, we'll go ahead and open our tailgate here. Now, it does have a pinch mechanism here that's gonna allow you to open both ends, and we'll have that on every panel.
So we'll just pinch, fold up, pinch and fold up all the way until we get to the front where we've got these two retention straps that we can clip into place and keep it in this open position. Now installation just involves a couple of clamps. There's no drilling into your truck bed. We do have to use the stake pockets though for our rear clamps, so this tonneau cover is not going to be ladder rack compatible. However, if you do need one that is similar to this that is ladder rack compatible, I suggest you check out the Bakflip G2.
That could do an excellent job if you need something to go with your ladder rack. Now, I had mentioned how simple this installation is, so follow along and I'll show you exactly how we got this in the bed of our Colorado. So to start our assembly, it's always a good idea to kind of lay out the parts that are gonna be needed. So what we've got is we've got a trim tool. We're only gonna use this once to pull one of the plugs here in the bed.
If you don't have a trim tool, a flathead screwdriver would be fine. We've got two of our clamp assemblies with the knobs. We've got three of our bolts to go with our five millimeter Allen wrench. Our mounting block, and our GM assembly block right there. The other thing we've got is going to be our rail. Now to identify the rails, they do put a sticker on it that would say left for driver, right for passenger. But in case those fall off in transit or anything like that, they're really easy to identify. This rubber stripping right here, this weather strip, should be going on the outside up on top of the rail. And this metal tab is gonna be all up at the front facing the cab. So if you don't have that yellow sticker on there to identify it, that is an easy way to figure out which rail you have in your hands. So the first thing I wanna do is take my clamp assembly. Now in the instructions, it tells you to put it in and kind of get it closer up here to the front. But the way that the bed on our Colorado is, it doesn't really allow anything up here as far as the clamp to move in front of this position. So we're gonna be inserting our clamp right here, as close to this spot, without actually going over it. So I'm gonna just go ahead and insert this into the T-slot. The bracket should fit, by the way, so that the back one with the teeth is resting on top of the front one. So we'll slide that right in there, lift that up into place, and we're just gonna try to kind of work it in back there. And when it's all said and done, it should look something like this. Now what I'll need to do is take one of my bolts. We're gonna insert it through the front and through that hole right there. I'm not gonna tighten it down. I'm gonna leave it fairly loose for now. So I'm just gonna hand-thread it in a little bit and let it grab. So I've got the bolt set in there, and I'v

Информация по комментариям в разработке