Click for more info and reviews of this Air Lift Vehicle Suspension:
https://www.etrailer.com/Vehicle-Susp...
https://www.etrailer.com
Don’t forget to subscribe!
/ etrailertv
Full transcript: https://www.etrailer.com/tv-install-a...
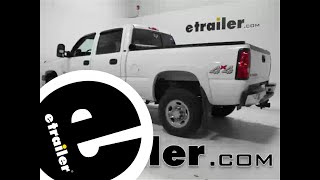
Today on our 2005 Chevy Silverado, well be installing the Air Lift LoadLifter 5000 Air Helper Springs, part number AL57275. First, well go ahead and show you the performance of the Air Lift Air Helper Springs. Now to begin our install, well first remove the manufacturers bump stops. The bump stops are secured to the frame with two bolts. Well go and remove the bolts and then the bump stop. Next, well start assembling the air spring.
Well take the airbag and the two roll plates, one for the top and one for the bottom, and set them on the airbag. Next, well take the elbow fitting, and screw it in to the top of the airbag.First, well install it finger-tight, then we use a wrench, and tighten it down an additional one and a half turns being careful not to over tighten it. Note that the elbow fitting already has a preinstalled sealer on it, so no additional sealer is necessary. Next, well install the upper bracket. The upper bracket has two sets of slots for securing to the top of the air spring.
As per the instructions, one set will be identified as slots A, and the second set will be slots B. Slots A will be for the driver side, and the second set of slots indicated by B will be for the passenger side.For assembling the driver side airbag, well be using the slots A, and secure it with the 3/8 bolt split-lock washer and flat washer. Well install the hardware finger-tight at this time. Now, well go ahead and start assembling the lower bracket. For the driver side, well install a 3/8 bolt and nylon locknut in to the open hole of the lower bracket, then well also install two 3/8 carriage bolts, a 5/16 bolt parking brake cable bracket, flat washer, and a nylon locknut.
We could take our bracket, turn it over, and install it on the bottom of the airbag, securing it with the 3/8 flathead screws.Next, were ready to install the airbag in to the truck. Well install the bottom bracket over the rear axle at the bump stop seat, and the upper bracket will line up with the attachment points for the manufacturers bump stop. Well make sure the J-hooks of the lower bracket go around the bump stop seat being careful not to pinch or damage the manufacturers brake lines as we set our air spring in to position. Now with the air spring in position, well use a 3/8 bolt, split-lock washer, and flat washer going down through the frame, then through the upper bracket, secured with the 3/8 locknut.Next, well install the lower bracket axle strap securing with the flat washer and locknut. Next, well make any adjustments necessary to make sure that the upper roll plate and lower roll plate are as perpendicular to each other as possible.
Now with all our hardware emplaced, well go ahead and start tightening it down. Well start with the upper bracket to frame attachment point. Once we made our adjustments, well go ahead and tighten down the air spring to the upper bracket, then well secure the axle strap, then well secure the parking brake cable bracket.Now with the air spring secured, well install the parking brake cable clamp securing with the 5/16 bolt, flat washer, and nut. Once we have the hardware installed finger-tight, well go ahead and tighten it down. This will ensure that the parking brake cable does not come in contact with the air spring. Now with the driver side installed and secured, well move over to the passenger side. Well repeat the same process. Now with the passenger side installed and secured, well go ahead and start routing our airlines. To begin routing the airlines, well first make two attachment points for our inflation valves.Here at the back of the vehicle, well go ahead and drill two holes next to the manufacturers 7-way connector as mounting points for our inflation valve. Well start with a smaller pilot bit, and open up to the 7/16 bit which will be large enough for the inflation valve. Now with both holes drilled out, well go ahead and find the center of our airline, and cut it in half. Well take one of the inflation valves, install a nut and serrated washer feeding it from underneath the vehicle outside through the 7-way bracket. Well install the rubber washer, flat washer, and nut to secure it, and we can tighten it down. Well go ahead and repeat the same process for the passenger side.Now, we can go ahead and start routing our airlines. Keep in mind were routing your airlines to stay away from any moving components thats steering your suspension or excessive heat such as the exhaust. Well go ahead and route the driver side following the manufacturers wiring, and then along the frame, and ultimately to the airbag. We


Информация по комментариям в разработке