Design a custom silicone wristband at Wristband.com.
First, go to https://www.wristband.com/
Hover over ‘Wristbands and click on ‘Silicone’ under ‘Custom-Printed Wristbands’
Second, select the type of customization you want. There are descriptions and images of the customization listed below.
Third, click on the band size. Wristband.com offers band sizes from ¼ inch to 2 inches. The default selected is ½ inch which is the most popular.
Fourth, select your band colors. Wristband.com offers hundreds of options including solid, segmented, swirl, and glow colors.
Next type in the number of wristbands you would like of each color. You have the option of choosing adult and youth sizes.
Fifth, start adding personalized text to your wristband.
Depending on the type of customization you selected, you may have the option to choose an imprint color. Debossed, which feature engraved letters, and embossed which have raised letters are molded instead of printed so imprint color selection isn’t needed.
When selecting an ink color for printed bands, we’ve deselected colors that aren’t recommended due to readability based on the color wristband selected. For example, blue ink on a blue band. The deselected colors are noted by a yellow triangle.
Next, you need to decide if you want a message on the front and back of the band or a wrap-around message on your wristband.
Here’s a pro tip: A front and back message allows you to add two shorter messages with a gap in the middle. Wrap-around is used for a longer, continuous message.
After you selected the message style, then start entering your personalized text. You can adjust your font and text size. You also have the option of adding an inside message to your wristband.
The text you enter is added to your digital proof of your wristband.
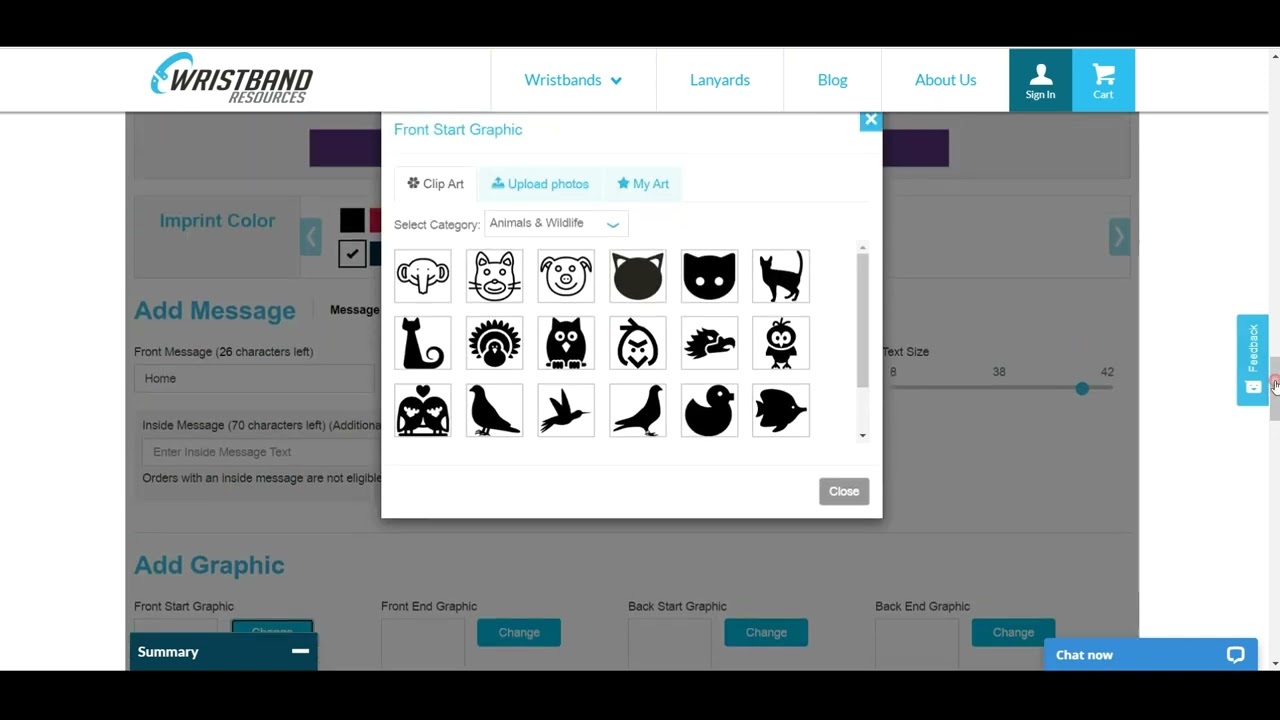
If you wish, you can add a simple graphic to your wristbands to make it even more personalized.
To add an image, click on change. From there, you can choose clip art from a variety of categories OR you can upload your own line art image providing it fits on the band. Photos cannot be uploaded.
To add a clip art image, simply click on the image and it will be added to the digital proof of your wristband.
To remove the image, click on remove and press OK. The image is then removed from your digital proof.
To add your own graphics, click on change and then upload photos. You can upload an image from your computer, Facebook, Instagram, or Dropbox. Select the icon of the platform you want to use.
If you choose to upload an image from your computer, click on browse. Select the image you want to add. It will then be added to the digital proof of your wristband.
Before you finish your order, you have the option to turn your silicone bracelets into keychains or have your wristbands be individually bagged. If you would like either of these options, click select so that the checkmark appears over the option.
Next, choose your shipping country, address type, and estimated delivery date.
Then, approve the design of your digital proof.
Prior to checking the box, review your digital proof and verify that spelling is correct and that you are satisfied with the layout. Orders are printed as they are submitted.
Finally, add your wristbands to the cart and complete the transaction.
Thanks for watching. If you have any questions, please contact Wristband Resource’s customer service department.

Информация по комментариям в разработке