Click for more info and reviews of this CURT Custom Fit Vehicle Wiring:
https://www.etrailer.com/Custom-Fit-V...
https://www.etrailer.com
Don’t forget to subscribe!
/ etrailertv
Full transcript: https://www.etrailer.com/tv-install-c...
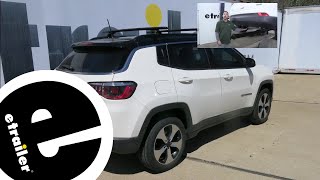
Hi there BMW owners. Today, in your 2017 BMW X3, we're gonna be taking a look at and showing you how to install Curt's 4-Pole trailer vehicle wiring harness. And this is what our wiring looks like when it's installed. That's right, you can't see it at all because this wiring is designed to stay inside of our vehicle. And I personally like the ones that stay inside better, even though it might seem like it's slightly more inconvenient. But it's protected from the elements, and these are gonna last way longer than any outside mounted connector.
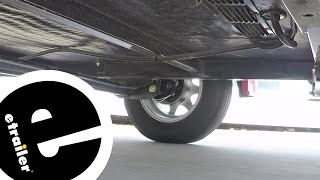
It's located in the storage compartment on the left side. And when you're ready to use it, you just pull it out, drape it out the back. You can re-install the storage compartment if you want, or you could just leave the storage compartment off, it's really up to you, just on how you wanted to do it. We're just gonna run it over towards the center here and we'll hit our button, and we're gonna drape it down the back. You do just wanna avoid the striker in the middle, as the weatherstripping will pinch our wiring.
And it's not gonna cause any damage to the wiring, it's actually gonna hold it right into place, which is what we're looking for. Can then have the length that you need for your particular trailer down here. Plug up and you're ready to go. This is gonna be a standard 4-pole flat trailer connector. So it's gonna give you all of your necessary lighting signals.
That includes your left turn signal, right turn signal, tail lamps and brake lamps, which will keep you DOT compliant in all states. There's an included dust cap. So if you did wanna keep out any dirt and debris, maybe you're hooking up a few trailers, moving some stuff around and it's not gonna be connected the entire time. You can also use it as a mount on your hitch here, by looping it around the safety chain loop. And that way it'll hold it up off the road.
So it's ready for you here at the back when you're ready to plug up to that next trailer. Now that we've covered some of the features of our wiring, why don't you follow along with me and I'll show you how to get it installed. With the battery in the back on your BMW, it makes it actually pretty quick and easy. We'll begin our installation at the back of the vehicle. With our lift gate open, we'll need to remove some panels so we can access our wiring to install it and get it routed. We're gonna start by pulling up the one here in the middle, this one just pulls out, and we can just set it aside, get it out of the way. And then there's gonna be some panels on the sides that we're gonna pull off next. And there's handles for these, just grab the handle and just give them a tug outward, will pop right off of there. We're gonna pop the other one off on the other side also. And then in the center, you'll have two little pins right here, they've got a slot in the center. Turn those counter-clockwise to release them. And then we can lift this up, and that's gonna reveal our battery tray below it. Now we've got our components removed, we can start routing our wiring. We're gonna start on the driver's side over here by getting some of the wires that are short on our module, connected up. The longer wires, we're gonna route it across to the other side. First, you need to find your wires. Here's the grommet where your taillight wires poke through to go outside, to go to the taillight, so if you just follow that down. I did peel off a little bit of the sheathing here. There's some, just a little piece wrapped around it and that'll get you to a point where there's some exposed wires here so we can make our connections. There's gonna be three wires here. You're gonna have a brown wire, a yellow wire with a black stripe and a blue wire with a green stripe. We're concerned with the yellow and the blue wires. The yellow wire is our tail light and stop circuit signal. So we're gonna start with our connection there. Since our tail and stop are on the same circuit, that means we're gonna be using the red wire to connect to that circuit. So we're gonna take the quick splices that come in our kit, and they look just like this here. I usually find it's a little easier if you take the quick splice and just kind of spread it open a little bit. Just makes it easier to get the wire in there. We're gonna slide it over the factory wire. And we want the yellow one, since that's our tail and stop, so we're gonna slide it just over that one. And we wanna make sure it's all the way on there. This wire needs to be in its little groove. So okay, we got that, in its little groove. And then the other hole, the other groove here, is where we'


Информация по комментариям в разработке