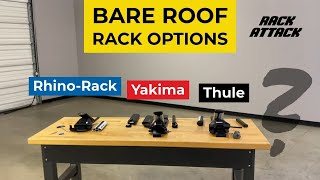
Click for more info and reviews of this Rhino Rack Roof Rack:
https://www.etrailer.com/Roof-Rack/Rh...
https://www.etrailer.com
Don’t forget to subscribe!
/ etrailertv
Full transcript: https://www.etrailer.com/tv-install-r...
John: Hey guys, John, here from etrailer.com. Today we have our 2017, Nissan Titan we're test fitting the Rhino-Rhack's Vortex Aero roof rack system. This is designed to help add extra cargo carrying capacity to our vehicle. So maybe we have our bed completely full, or we're wanting to transport a kayak, which won't fit in the bed of our truck. We can toss it up here or add a cargo basket to get extra cargo carrying capacity, as well as use our hitch and maybe our truck bed.The Vortex Aero Crossbars come in black, as we have installed on our Titan today, as well as silver. Both of these options are available here at etrailer.com.
They have an aluminum construction, so they're lightweight and durable. Plus we don't have to worry about them rusting over time. Even though they are lightweight, our roof rack does have a weight capacity of 165 pounds.However, I do recommend checking out your owner's manual just to make sure we're not going over any weight ratings that the manufacturer has. Our Vortex Crossbars have an aerodynamic design. This is an upgrade from the traditional round or square crossbars, and this is going to help reduce wind noise and drag compared to those other styles.Our Vortex Aero system does come with lot cores here for our legs.
And then we also have a plastic lock core that can be upgraded, but it's out here on our cap for our crossbar. If we unlock it, we can remove it. And now we gain access to the T-slot area on the crossbar. This is used to mount different accessories that'll have the T-slot bolt with it. Normally or older accessories will just have a clamp, but some newer ones, we can utilize this for just more of a clean fit.
We'll just slide the T-slot in there, then trim the top rubber, a rubber strip here to make it look natural. And this rubber strip is used to help cut down on wind noise and drag. There'll be a whistling sound without this rubber strip installed. So it's a really nice feature that Rhino-Rack includes with the crossbar.Rhino-Rack did think of our vehicles' protection when it comes to their roof racks. This bottom part of the fit kit here, this is rubber, and so it won't damage our paint as well as this clamp.
It actually has a thin piece of rubber here so we don't have metal touching our vehicle. Let's get some measurements here to see how this interacts with the roof of our vehicle. From the roof to the bottom of the crossbar, is about three and a half inches. You shouldn't really have any problems mounting any accessories on here. There's plenty of room for any clamps that we'll use.And then from the roof to the top of the crossbar sits, about four and three quarter or five inches. That's a good measurement to keep in mind for if you want to keep this installed on top of our vehicle when we pull into a garage or something like that, or if we have an accessory that we want to mount on here. We can take the height of the accessory and then add five inches so we know how high that's going to sit on our vehicle.Rhino-Racks clamp system here, sits nice and secure in our vehicle. I can actually grab the Crossbars over the legs and our entire vehicle moves when I shake it. That just gives us some peace of mind of how secure this is fitting to our vehicle. Now that we've gone over some of the features of this crossbar system, let's go ahead and install it together.We'll start off by removing the cover on our leg. Use the included keys and it will swing out to the left. And then we will move over to our fit kit here, which has three pieces, the plastic piece, rubber piece, and then our clamp. Won't mess with our clamp till we get the crossbar up on the roof. But the plastic piece has an arrow, as well as the rubber pieces. It has an arrow. If we refer to our instructions, it tells us how these need to be oriented according to how we mount the crossbar to our roof rack.So we will put the rubber piece in place. You just got to kind of move the lips around and make sure it sits on there, nice and tight. And then our instructions say it had this arrow pointing outwards. So you just press the clips to secure on our foot. Next we'll grab our crossbar and then we will take the measurement tabs that go underneath. There are the measurement strips that go underneath the crossbar. They're stored on the crossbar so when we open up the package, make sure you get them out. And then these have measurements on them and we'll refer to our instructions for exactly where we need to cut these. So that gives us an exact measurement for where our legs will be mounted on the undersid


Информация по комментариям в разработке