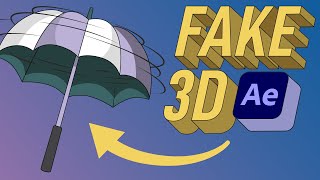
🎁 DOWNLOAD THIS PROJECT FILE & ASSETS FOR FREE!🎁 https://som.bz/35iC6IW
Is your workspace cluttered with Alpha Mattes and messy precomps? We’ll show you how to build single-layer shape “precomps” utilizing groups, merge paths, and simple path expressions so you can kiss those redundant matte layers goodbye...forever.
In this tutorial, After Effects guru Alex Deaton is going to show you a few simple techniques that lead to advanced methods for motion design. Don't forget to grab the free project files above so you can follow along!
(New) Alex Deaton addresses incorrect information from the "Drawbacks" section!
• Merge Paths School of Motion Tutorial...
Animade Lernz Tutorial | https://vimeo.com/36765418
~ - ~ - ~ - ~ - ~ - ~ -
🎓INTERACTIVE ONLINE CLASSES 🎓
Advanced Motion Methods | https://som.bz/amm
All Courses | http://som.bz/2wKsBDu
🧭FREE 10-DAY INTRO COURSE 🧭
The Path to MoGraph | https://som.bz/2VNHb7D
🚴♀️FOLLOW US FOR MORE LEARNZ 🚴🏾♂️
Website | https://som.bz/2VMjr3N
Podcast | https://som.bz/3czNeCP
Facebook | https://som.bz/3cF3SBh
Twitter | https://som.bz/2PQfSWF
Instagram | https://som.bz/2POOJU7
---------------------------------------------------------------------
Auto-Generated Transcript Below 👇
Alex Deaton (00:00): Are you tired of cluttering up your workspace with alpha mattes and messy pre comps, the break, as soon as you infinitely rasterize them or make them 3d fret no more.
Alex Deaton (00:17): Hi, my name is Alex Deaton and I've been a motion designer for almost 10 years along the way. I've picked up some after effects work arounds that saved me from daily Adobe induced frustration migraines. One of these techniques is a shape layer workflow. I utilize in almost every project to avoid layer clutter and over complicated matting and pre-computer issues. And this tutorial I'll show you how to build single layer shaped pre comps, utilizing groups, merge paths, and simple path expressions. So you can kiss those redundant matte layers, goodbye forever to make things easier. You can download the project files I'm using in this video to follow along or to practice this technique. After you're done, watching details are in the description.
Alex Deaton (01:04): Alpha mats and pre comps can be useful tools for combining several visual elements in a complicated design, but they make your timeline messy and introduce frustrating glitches and comp failures. When infinitely rests, rising pre comps or making layers 3d let's work around this by taking advantage of after effects, shape layer tools. We're going to start with a pair of eyes because this is a really, really simple way to use this trick. I use it all the time and it'll get you sort of, uh, oriented with the methods here so that you know what you're doing before you move into something a little more complicated like that vase. So let's jump into an empty empty comp here. So the first thing we're going to do is just go up here and grab an ellipse and, uh, real quick, we're going to twirl that down and change the size to a 500 by 500 seems about right, get rid of this stroke.
Alex Deaton (01:53): I'm going to duplicate it. And then I'm just going to name this bottom layer here. I am going to go ahead and call it I'm main. So I know that that's, that's my main eye layer. Then up here, I'm going to name this pupil. Cool. So first I'm going to take this, I layer and change the color to white. Then I'm going to go to this pupil layer and I'm going to shrink it to a, let's say 300 by 300. Great. So now we have our eye and our pupil. So first what I want to do since I'm going to make this eye blink. And I don't want to just, uh, you know, use the dimensions here because that would look a little awkward. I want it to have like a more realistic looking blink. I'm going to change the path here to a Bezier path.
Alex Deaton (02:37): So all you have to do is right click on the ellipse path and click convert to Bezier path. And that way I can animate the handles of the actual, uh, ellipse itself, like, like, so, so then once I have that finished, uh, I'm going to duplicate the eye main layer, rename it eye mask, and then simply pick whip the path of the mask to the, the main layer there. Like, so, and then I'm going to take this, drag it up here, highlight both the iron mask and the pupil and click command G to group those two together. I'm going to rename this whole group pupil. So now that we've got our pupil inside of this group here with our iron mask, all we need to do is make it so that the pupil itself can mask through the eye. This is where all the magic happens.
For the full transcript visit: https://som.bz/35iC6IW


Информация по комментариям в разработке