In this video, you're going to see how to transform a drum kit into any color and finish of wrap film that you want using tools and color change film from Rvinyl that you can get here: https://www.rvinyl.com/Drum-Wrap
The first step is to disassemble the drum kit. Always make sure you pull off each drum separately, then dismantle each drum in terms of taking off all the hardware. This does require a bit of time, but it will make the wrapping process much, much easier. And a very good tip is to lay all the pieces out in a very clear order or take a video of the process so the reassembly will be easy and straightforward. And note that many pieces are held on by bolts and screws. So use a cordless drill will help speed up the disassembly process.
Next, take time to clean the drum, and it's best to use Rapid Prep. Spray Rapid Prep directly on a microfiber towel. Avoid spraying it directly on the drum kit because often they're wood and they could absorb the moisture, and it'll take a long time to dry, which can affect how the material holds. The final step of cleaning is to wipe down the workspace table through any specks of dust so it doesn't get underneath the film.
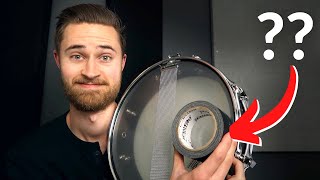
Turning now to the install, you'll note that most drum kits have a built in seam that comes from the manufacturer. This is the starting point. So take the color change film from Rvinyl and match the edge of the film to the edge on the drum. Always try to make sure there's enough material on the top and bottom, so when it's wrapped around, there's enough film that covers the edge. Pull the material away from the liner roughly three to four inches, then tuck the liner underneath the film, crease it so it lays flat, then carefully pick the film up and line the edge of the wrap film up to the edge on the drum. Once this is aligned perfectly straight, it means that the panel will go straight across the drum during the install as well. Walk it in with a nice squeegee stroke top to bottom. Now it's very important to follow these steps for the liner roughly three to four inches and with the freehand pulled down the middle so the material has no wrinkles. This is what's called creating glass. Work in increments and avoid pulling off the entire liner, as this can make wrapping the drum kit very difficult. Rotate the drum pulled down with the liner on squeegee back and forth. Repeat this process until you get to the other side. Rotate the drum on the table to make this process easy and straightforward. And as you can see, once you get the rhythm rapping, the drum will be very easy and straightforward. Remove the excess liner and then tuck the film into the edge where you started out with a very sharp knife with a blade slightly angled towards the edge, cut off the excess film.
Once one side is removed, carefully remove the excess film, then take a few seconds to rotate the drum. So it's in a comfortable cutting position and always double and triple check the edge to make sure it's 100 percent set up and uniform, then start the cutting process. If the edge is not 100 percent set up, the cut might be crooked with the excess film just like the other side.
Next, it's time to cut out the holes for the hardware. Make sure that the blade angle slightly angles out and do a 360 loop around the edge of the blade should stay parallel to the edge around the hole. A good tip is to always press down first, so the film is nice and secure to the edge and then simply just repeat the process. Always making sure the excess film was immediately on a finger or in the trash, so the workspace stays clean. And note, for the smaller holes, these don't need to be cut out ahead of time as the hardware will poke through it easily and with one drum done now as time to tackle all the others and the wrapping process is exactly the same and note for the smaller drums, the screeching processes anyways easier as a width of the squeegee is the width of the drum.
Then cut off the excess film on top and bottom in the same way, as well as cut out all the holes. And so with all the drums wrapped, it's now time to put the hardware back on and make it a drum kit. Always be extra careful when reinstalling the hardware to make sure you don't damage the wrap. Also, make sure you don't tighten the bolts and screws over the heart, as this can maybe twist the vinyl underneath, so be super focused during this process. Once all the hardware is back on, simply just reassemble each drum and then wipe everything down to remove any handprints to make it all shiny and new.
#Rvinyl #DrumWraps #HowToWrap


Информация по комментариям в разработке