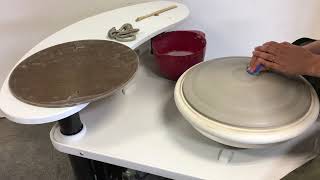
This video demonstrates the first process in making some plaster slump molds. In this, I throw three bowls of graduated sizes in which I will place plaster (in the next video) and make three lovely plaster hump molds. These bowls are thrown with a thin bottom, as I have no intention of keeping them to trim them. The pieces of clay will be waste clay, as when I have used them with plaster, I don’t want to risk the chance of recycling clay with plaster scraps. Plaster bits would cause pop outs during firing, and would ruin a piece. (Much better, in my opinion to discard!)
I begin with my clay nicely wedged. If you need any review on this process, I demonstrate and explain it in this video. • A Guide to Wedging Clay: Tips, Skills...
I begin by centering my smallest piece of clay. I throw the form with a wide flatter bottom and scooped sides. I am wanting a hump mold which will allow for some shallow bowl forms eventually. So, the forms are wider than taller. I throw the sides and base of wall on the thick side, to withstand the pressure of the poured plaster. The bottom, since it will not be trimmed, is very thin, After throwing the form, I rib the surface smooth, then cut the form from the bat, but leave it on the bat to dry some and stiffen. I complete the process for the second larger piece in the same way.
The third piece is the largest piece, and I demonstrate how it can be thrown from three separately wedged balls of clay placed one on top of another. Begin by centering the first ball. Then I round it into a domed top. Then I rib off all moisture. I round out the bottom of the second ball- making sure there are no divots or dents. Make sure there is NO slip on either piece. Slam together, then pound to blend with hands. Be careful not to trap air! Once second piece is roughly centered, I continue centering with water and hands and sponge. Once that one is centered, I dome and rib that piece, and then also round then put the last ball in place on top in the same manner. Continue to pound center, then center with water. I open this larger piece of clay with the heel of my hand rather than my fingers for more leverage and stability. I always cut my forms from the bat so as they dry and shrink they can move freely. I often do this multiple times during the first few days, as it may restick itself.
The next video in this series shows the process of mixing and pouring the plaster, and can be found here: • Making Plaster Hump Molds for Drape M...
Check out my Amazon Influencer Store where I have recommendations for some of my favorite tools and products many of which I use in my videos- which are available on Amazon. https://www.amazon.com/shop/karanspot...
For the great tools I used in the video (including the mudtools long green platter rib and the yellow rib) check out this link to a live Googledoc I continually update with lots of my favorite tools on Amazon using my associate links! (also some non-amazon suggestions on here!)
https://docs.google.com/document/d/1X...
In this video, I am using standard 153, a nice midrange firing stoneware in my classroom.
I am a public high school ceramics teacher at William Mason High School in Mason, Ohio. (Mason is currently the largest high school in Ohio!) As a potter, I have been working in clay for over 30 years, and I have been teaching for over 28 years, the past 20 have been specifically teaching high school ceramics. I love what I do! I have my own studio in my home basement, where I work on my personal pottery for my Etsy site; https://www.etsy.com/shop/KaransPotsA...
I started my Youtube channel to make videos to help my students if they are absent and miss a demo, or if they would like to explore more advanced techniques independently. I have been amazed to reach such a wider audience than my own students!
Please subscribe to my channel if you would like to receive channel updates, or would like to learn more about clay and studio processes!


Информация по комментариям в разработке