Click for more info and reviews of this etrailer Trailer Hitch:
https://www.etrailer.com/Trailer-Hitc...
Check out some similar Trailer Hitch options:
https://www.etrailer.com/fitguide.htm
Search for other popular Volkswagen Tiguan parts and accessories:
https://www.etrailer.com/vehicle/2024...
https://www.etrailer.com
Don’t forget to subscribe!
/ etrailertv
Full transcript: https://www.etrailer.com/tv-install-e...
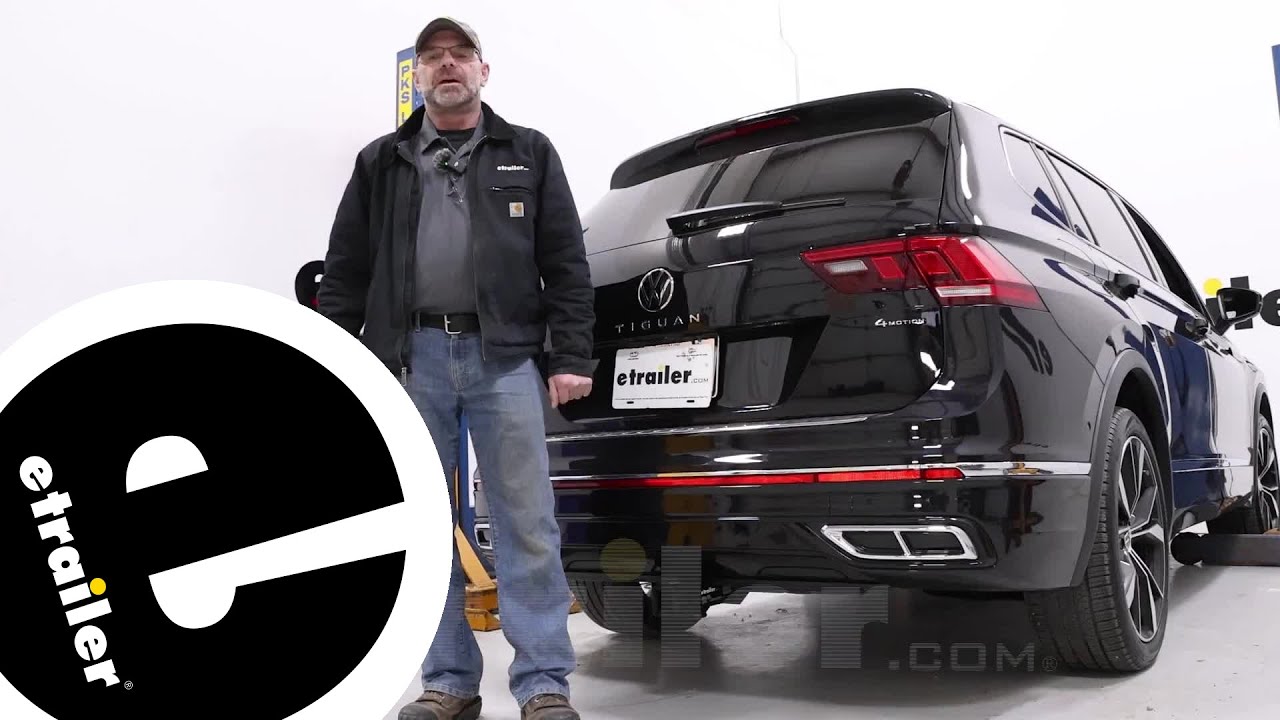
Hi, this is Scott with Etrailer. Today, we'll be taking a look at and installing our Etrailer Class 3 hitch for our 2024 Volkswagen Tiguan. The Etrailer hitch is a really nice looking hitch. It's flat black, it's gonna have a hidden cross tube design on this one. The only thing you're really gonna see hanging down is this portion of your hitch. Another nice thing about it, it's gonna be good if you want to get set up for hauling bike racks, cargo carriers.
You can also couple it with a ball mount and hook up with some wiring, and you'll be able to pull small trailers really easily with this hitch setup. This hitch is gonna have a 5/8 pinhole, and that's gonna take your standard pin, or you can also get one of the optional locking pins, and that's gonna lock on any of your accessories to keep those secure. This hitch will not come with a pin and clip, so you may want to pick them up with Etrailer, but a lot of your accessories will have those with those. Your safety chain loops are gonna be able to accommodate your normal style hook, or you can have the S-style safety hooks. Those are gonna keep your trailer on the back of your vehicle for you.
As far as measurements go, from the center of your pinhole to the edge of the bumper, you're looking at right around four inches. With that measurement, you'll be able to find out if any of your accessories are gonna make contact with the back of your vehicle when they're stowed up. From the ground to the top of our receiver tube, we're looking at 12 inches. And with that, we'll help you decide if you need to have any rise in the shank of any of your accessories, like your bike carriers or cargo carriers. As far as our weight capacities go, we're gonna have a tongue weight rating of 525 pounds, and that's the weight pushing down on this portion of the tongue.
And that will be for the combination of all your bikes and your bike rack or your cargo carrier and everything you have on that. As far as towing capacity, we're looking at a gross trailer weight rating of 3,500 pounds, and that is the weight of your trailer and everything that you have on your trailer. As far as installation goes, it's kind of a straightforward installation. If it's something you don't feel like tackling yourself or you don't have time, you can always take a look at our dealer locator and get it installed locally for you. If it's something you feel like doing yourself, you can always stick around and watch our video.
And once you do get it installed, we'd love to see some of your pictures and maybe let us know how you're using it. Other than that, let's go ahead and get it installed. To start our installation, we are working on the R model today, so we're gonna have this plastic panel underneath that we're gonna have to remove. So we have two 10 millimeter nuts up underneath here. We're gonna get backed out. Now we're gonna have five T-25 star bits across the back. We'll get those removed, and we can get this plastic panel out of the way. With all of our screws removed, we can remove our panel. One thing to note when we get ready to install our hitch is there is gonna be a sealant, almost like a really thick gluey undercoating under here on the side of your frame. Now towards the back, where it kind of meets up with your bumper mount, you're gonna want to get a lot of that off of there, clear up into the corner. Sometimes what happens with these is you'll try and push your hitch up into place, and that sealant will get in the way and it won't allow your holes to line up. So it's a good idea to try and use a scraper, or what I'm gonna use is a multi-tool today and get some of that out of the way. Once we have it all scraped back, we just shoot it with a little black paint to make sure we don't get any rust or corrosion. For the next step, we are gonna need to get our exhaust drop down. So what I'm gonna do is take a cam buckle strap, and go forward more on our exhaust, and find a good spot to put our hook. And what that's gonna do is support our exhaust when we break it loose so it doesn't drop down too far. We're gonna have two 13 millimeter bolts for our exhaust. Just want to support it a little bit. And get those out on both sides. With our bolts out, we'll just hold up our exhaust and slowly let off on our cam buckle strap, and we'll jus

Информация по комментариям в разработке