PART 1: • Part 1: Replacing Control Arms in a B...
PART 2: • Part 2: Replacing Control Arms in a B...
BLOG ARTICLE: http://blog.bavauto.com/go/control-arm
"Like" us on Facebook - / bavarianautosport
"Follow" us on Twitter - / bavauto
"Subscribe" to us on YouTube - / bavarianauto
Visit our online store - http://www.bavauto.com/
All of the items shown in these videos are available in our online store at http://www.bavauto.com/. Need additional tech help? Please visit our tech blog for thousands of Tech and DIY BMW and MINI articles at: http://blog.bavauto.com/
---
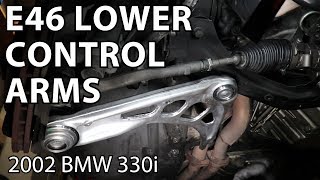
In this two part video series Otto will show you how to replace front control arms and control arm bushings on a typical BMW 3-series 84-05 and MINI. Note that while these procedures are shown on an E30 3-series (84-91) BMW, they can also be applied to the E36 3-Series (92-98), E46 3-series (99-05) and MINI models. Of the 3-series and MINI models listed, some will look slightly different or have slightly different hardware but, the basic points and procedures are the same.
---
Part one - Control arm and bushing removal steps
In this video we will remove the front control arm and control arm bushing on a BMW 3-series (and MINI). Part-2 covers the installation.
For a list of the parts and tools used, see the accompanying BLOG post at: http://blog.bavauto.com/go/control-arm
1) Lift and properly support the front of the vehicle, so that the front wheels are off the ground.
2) Remove the wheel/tire assembly.
3) If the swaybar end link is connected to the control arm (as on this E30 and most E36 3-series), remove the nut from the underside of the control arm, that secures the end link bracket to the control arm.
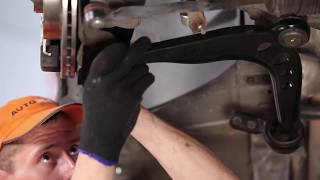
4) Release the outer control arm ball joint as follows; Loosen the nut on the top of the ball joint's tapered pin, but do not fully remove it. Using a 2 lb to 3 lb short handled sledgehammer (properly called, a drilling hammer), give the knuckle area a series of sharp-forceful blows. If the ball joint's tapered pin does not release from the knuckle, try using a pry-bar to provide downward pressure on the end of the control arm .... while hitting the knuckle with the hammer. This can take a good series of multiple HARD blows with the hammer. If the tapered pin is still not releasing, you will have to resort to a "pickle-fork". Insert the pickle-fork between the ball joint and the knuckle and use the hammer to force the pickle-fork between the two parts. If you get the pickle fork as far as it will go and the joint is still not separating, try repeating the blows to the knuckle (as in the first sequence), with the pickle-fork in place.
NOTE: Never use a pickle-fork to separate the ball joints if you intend to reuse the control arm (and ball joints), as the fork will typically tear the ball joint's rubber boot.
5) Release the inner ball joint in a similar fashion to the outer ball joint, with the exception that you will be hitting the cast area of the control arm, where the ball-joint mounts into the arm. Note that it may be necessary to resort to the pickle-fork due to a lack of area to use the hammer, as a first course of action.
6) Remove the rear control arm bushing mount bracket by removing the two bolts securing the bracket to the vehicle. Note the position and overall relationship of the bracket and how it is mounted to the uni-body frame rail, for the future re-installation.
7) Fully remove the nuts on the ball joints and lower the control arm and bushing assembly from the vehicle.
NOTE: If you are re-using the control arm bushing mounting brackets and installing new bushings in the brackets, follow steps 8-10. If you are installing pre-assembled bushing and bracket assemblies, skip to step 11.
8) Use the control arm bushing removal/install tool to remove the bushing and bracket assembly from the end of the control arm pin.
9) Using a hydraulic press, press the bushing out of the bushing mount bracket.
10) Using a hydraulic press, press the new bushing into the mount bracket. Note if there are any alignment marks to tend with. The new bushing will either install in the same manner as the old original bushing (alignment marks, etc.), or it will come with an installation sheet outlining the proper installation.
Now, click on to Part-2 and continue with the installation of the new control arm and bushing assemblies.
---
All products noted in this video can be purchased in our online store, http://www.bavauto.com/, 24 hours a day, 7 days a week. You are also welcome to e-mail us at [email protected] or call into our headquarters and speak to our knowledgeable advisors at (800) 535-2002 (Mon.-Thurs. 8AM to 9PM EST, Fri. 8AM to 7PM EST, and Sat. 9AM to 4PM EST).


Информация по комментариям в разработке