Click for more info and reviews of this Rhino Rack Roof Rack:
https://www.etrailer.com/Roof-Rack/Rh...
Check out some similar Roof Rack options:
https://www.etrailer.com/fitguideroof...
Search for other popular Subaru Outback Wagon parts and accessories:
https://www.etrailer.com/vehicle/2024...
https://www.etrailer.com
Don’t forget to subscribe!
/ etrailertv
Full transcript: https://www.etrailer.com/tv-install-r...
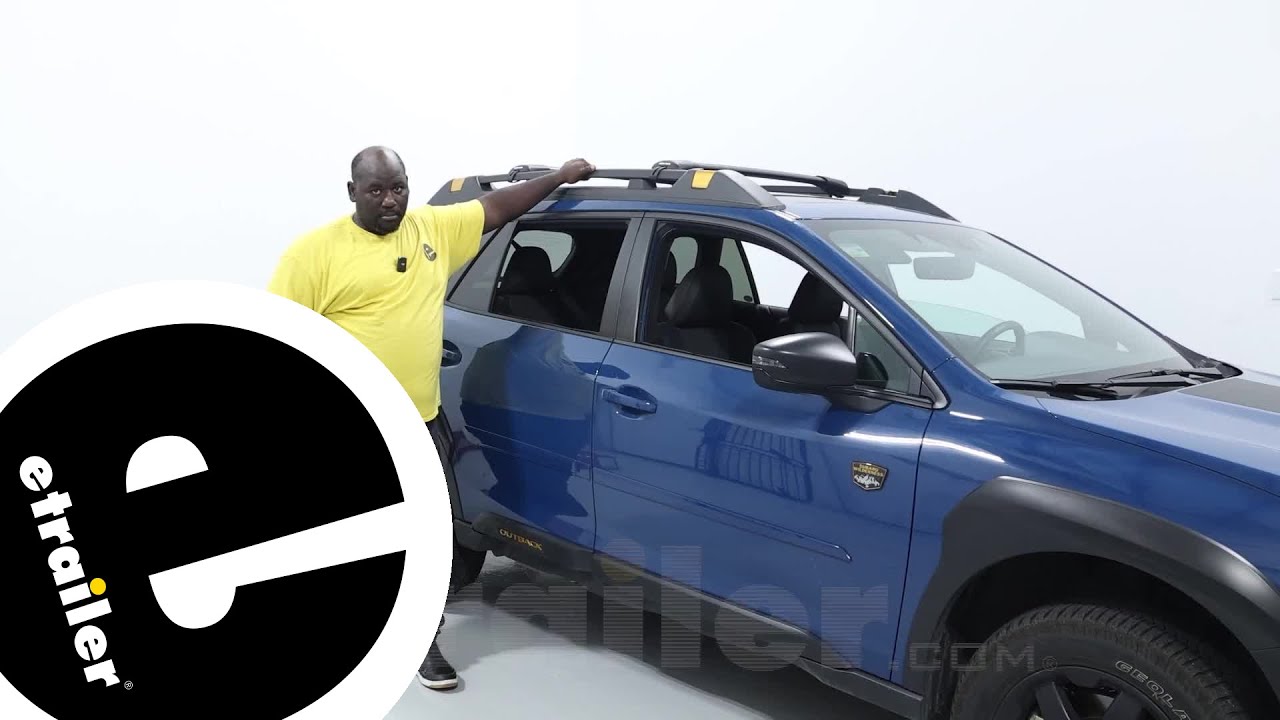
How's it going neighbors This is Ed here with etrailer.com and we're taking a look at the Rhino Rack Vortex Stealth Bar on our 2024 Subaru Outback. So when you have an Outback that doesn't have crossbars from the factory, this is a way to take advantage of the negative space on top of your vehicle, as an Outback owner, you know that cargo space kind of at a premium, and when you're loaded down with passengers and you have a lot of those bigger bulkier items, this is gonna be your solution for how you can get it on the road with you. So let's take a closer look at the Stealth Bar and see what's special about it. You may notice with the Stealth Bar, it has a very low profile. So what that's gonna do for you is help minimize how much you're adding to the top of your vehicle. So if you're adding cargo boxes, rooftop baskets, bicycles, what have you, it's gonna give you just that much more space to get those items stacked on top, set up is super easy.
It just takes a little bit of research looking on Rhino Rack site to figure out what the configuration is for the strap that wraps around your factory rail that runs front to back. But other than that, everything snaps together pretty easy and it has the included tool, so you'll be able to get going right away. All four of your feet are gonna have lockable caps and they're constructed of glass reinforced nylon. What that means for you is the fact that this is gonna hold up against the elements as far as hot, cold, UV, light, sunlight, and wind, the same way that the plastics on your Subaru will. So it's designed to take all the abuse of the adventures you're gonna have out there on the road.
Now taking a closer look at the crossbar itself, you can see that it is an H extrusion pattern in there and what that does for you, that's gonna allow you to have a higher capacity as far as what the crossbars themselves can hold up to. Now again, you definitely wanna make sure you're checking your manual to see what the rooftop capacity is, but the vortex bars are gonna hold up to anything you throw at 'em. Now, as far as setup, I already said that it's super easy and I'll show you how to get it on top of your Subaru. Everything you need to set up your Stealth Bar comes in the packaging with it. So we'll go ahead and get that going.
So I'm gonna take my end cap off the top of my foot and we're gonna remove the Allen key right here. This is where our strap is gonna connect to our Stealth Bar. So we're gonna remove this bolt here and there is a washer that's right there, so you wanna make sure you catch that. Don't let it hit the floor on you. And this is where our strap is going to be installed.
So I took a look at our Rhino Rack online as far as which number we're gonna set this up on. You have 1, 2, 3, 4, and this is gonna be set up on the number one spot. So we're gonna slide this in and I'm just gonna get my hardware started and now we're gonna fasten down our Allen key. So from here, now that we have this strap connected, I'm gonna slide this barrel over. This is where we're gonna make our connection once we get on top of the vehicle. But now while we still have our end cap off, we're gonna put our Vortex strip in our H channel. When you're installing your Vortex strip, I found that it works a little bit better to get one side in and just kind of push the other side over into the track and it just allows it to work itself into place. You kind of go down and back up until you get it flush inside and it just kind of pops right in. Now the good thing about these types of tracks is if you have channel mounted accessories, you can trim these to size and still have your accessories in your H track. Now we're gonna install the rubber foot on the back of our clamp here. It's just a rubber piece that's gonna insert. You have these posts that fit right into these holes, and once you actually get it started in, it may not seat all the way, but once you clamp it down on top, it'll push the rubber into the holes and you'll be good to go. Now I'm just gonna reach across and I'm just gonna kind of rest my crossbar on the other side and fish my strap underneath. Now this portion of the installation, I will advise that you're super cautious. A lot of the neighbors I've spoke with that purchased this guy right here have had some injuries as

Информация по комментариям в разработке